Renewing alternator brushes
The Video Course teaches you everything about modern cars.
Unlike dynamo brushes , alternator brushes normally last for several years. Electrical arcing between brushes and commutator , a major cause of dynamo wear, is far less common.
Alternators carry only the field current of 2 or 3 amps. The brushes are in contact with slip rings , which have a smaller, smoother surface than a dynamo commutator. The slip rings are solid rather than segmented, as in a dynamo. The clicking over the segments is another cause of brush wear in a dynamo.
The brushes are longer than those on a dynamo. Some alternator brushes are marked with a wear limit, but generally they should be renewed when worn about halfway down.
Before starting work, check which make of alternator is fitted to your car. The maker's name should be marked on it — the types used most are illustrated in this section.
Depending on the type of alternator and regulator, worn or damaged brushes or slip rings may be indicated by the ignition warning light not coming on, not going out, or just staying dim. Check to find the cause of the problem (See Testing an alternator and checking output ).
Before doing any electrical work other than circuit testing on the alternator, disconnect the battery .
Generally you need to take the alternator out of the car to replace brushes. Remove it in the same way as a dynamo (See How to fix a dynamo ).
The way in which the brushes are fitted varies according to the make or model. On some alternators the brush holder can be removed from outside. On others the end cover must be removed. Guidance for different types is detailed below.
Slip rings are seldom worn or scored enough to need serious repair or renewal. If they are slightly damaged, smooth them in the same way as a dynamo commutator (See Replacing dynamo brushes ), although there are no insulation strips to cut back. Be careful, however, because the metal on the slip ring is far thinner than on a commutator.
Usually, it is only necessary to clean a slip ring in position. Use a cloth or soft brush damped with methylated spirit.
Clean the brush housing and guides at the same time in the same way.
The brushes must slide freely into their holders. Carefully rub down any high spots on them with a fine file.
Always fit the correct type of replacement brushes and springs (check with the car handbook); make sure all connections and terminals are tight.
Renewing Lucas ACR brushes
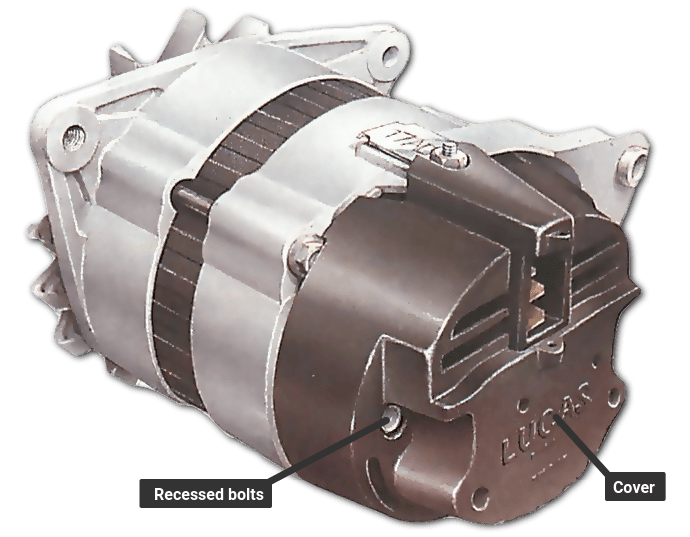
Take off the moulded cover at the rear of the alternator; it is held by two recessed bolts. Use a box or socket spanner size 4BA, or an equivalent size.
Locate the cable connections to the brush terminal strips, and note where each of the four leads goes, so that you can replace them correctly.
Remove the four terminal-retaining screws and disconnect the leads.
Some units also have a regulator field link. Loosen the bolt holding the link so that you can push it aside.
You can renew the brushes without removing the brush box, but you must take it off to expose the slip rings for cleaning.
Take out the two screws holding the brush box and lift it off. The regulator earth lead may be secured by one of the screws; note how it fits.
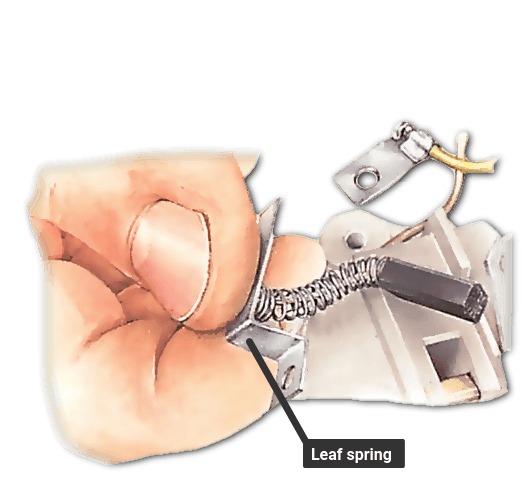
Remove the brushes from the box complete with their terminal strips and springs. There is a small leaf spring fitted to one side of the inner brush; note which side it is for reassembly.
Clean the brush housings and insert the new brushes. Reassemble the unit in reverse order of dismantling, making sure that all connections are correct and secure.
Renewing Lucas AC brushes
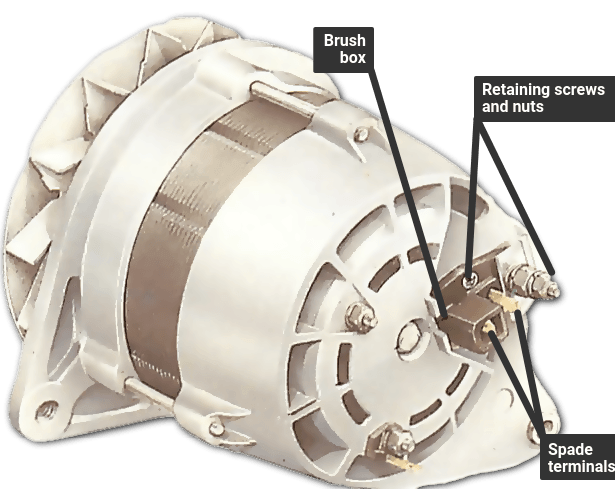
Take out the screws securing the brush box and remove the box complete with the brushes.
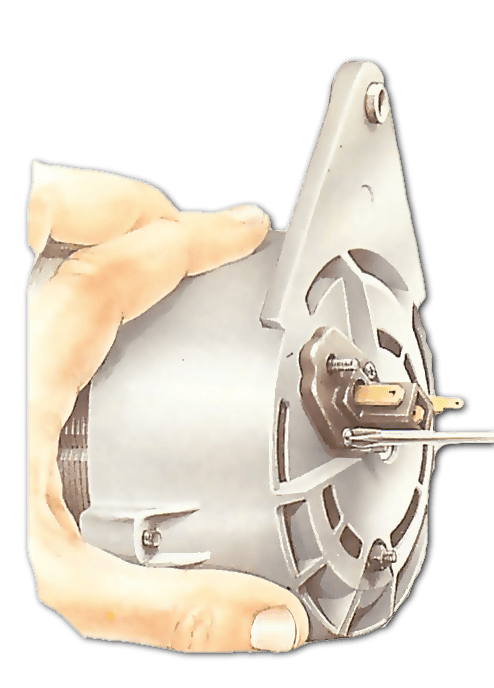
To remove the brushes from the box, use a small screwdriver to press each spade terminal downwards and inwards towards the brushes.
Pull out the brushes and clean the brush housings. Clean the slip rings also.
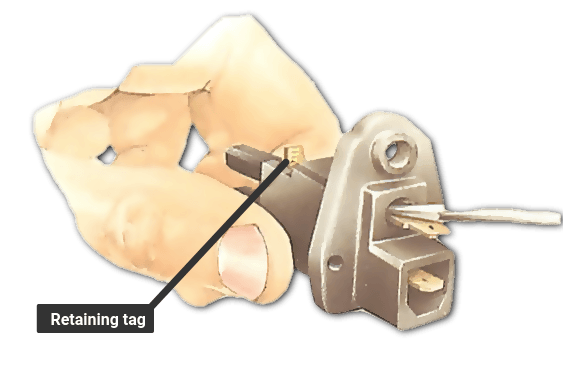
To fit new brushes, insert each spade terminal from the back of the box - the brush end. Use long-nosed pliers to pull the spade through from the other end until the retaining tag locks. Refit the box.
Brush-wear limit: A minimum of 4 in. (5 mm) should be protruding from the housing, or the brushes should be replaced.
Changing the brushes

Renewing typical Motorola brushes
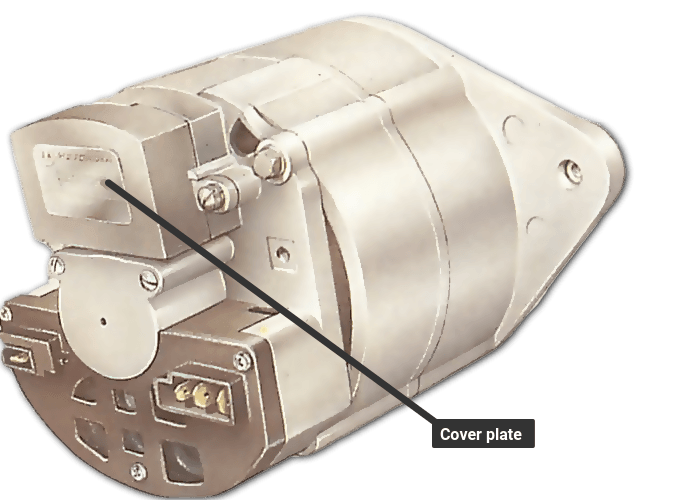
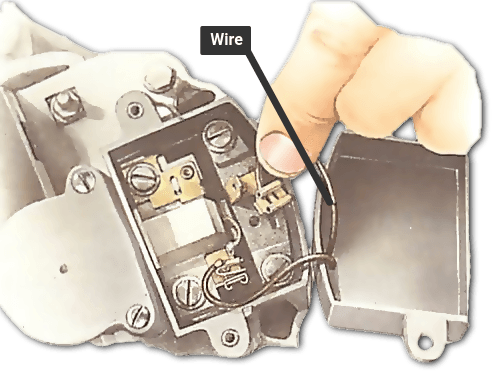
The brush box is under a cover plate at the rear of the alternator, held on by two screws.
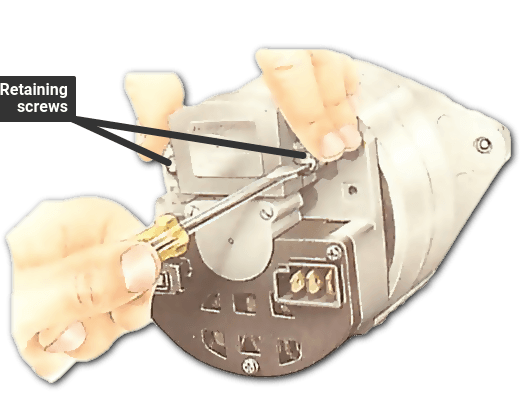
Take out the screws and carefully lift up the cover plate without straining the wires attached inside.
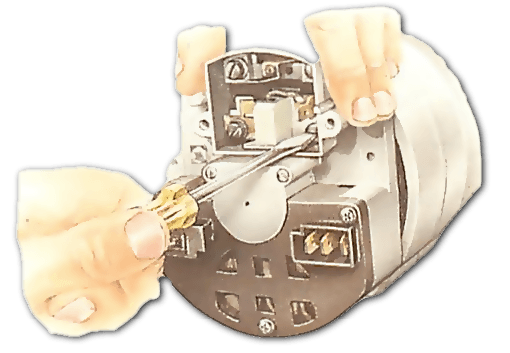
Note how the spade connectors of the leads are fitted before removing them. Remove the two screws securing the brush box and lift the box clear.
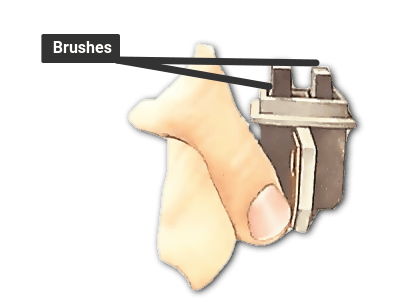
The brushes are fixed by a screw or a bolt. They are easily damaged take care when removing or replacing them; do not use force .
Clean the brush housings and insert new brushes. Clean the slip rings before replacing the box, leads and cover plate.
Removing the brushes

The Ultimate Car Mechanics video course
Learn everything about modern cars from our new video series.
Learn more >-
We build a Mazda MX5 Miata from scratch
We start by tearing down and then rebuilding the whole car.
-
Every part explained
There's ridiculous detail on every part. Clearly and easily explained.
-
All modeled in 3D
We've created the most detailed 3D model ever produced so we can show you everything working.
Super detailed explanations in the video course
15 hours of pro-quality, HD content with subtitles
The
video
course
Bonus: Dismantling the engine

Engine Block

Crankshaft

Tools: Using a tap set

Using an engine stand

The Pistons
