Checking the oil pump
The Video Course teaches you everything about modern cars.
Low oil pressure - indicated on the oil-pressure gauge or dashboard warning light - could provide an indication of wear or damage to the pump .
The oil pump is usually one of three types: the multi-lobe rotor type, the gear type, or the vane type.
Whichever type of pump is fitted, it must be removed from the engine before it can be properly checked.
The pump can be mounted either outside or inside the engine crankcase . An internally mounted pump can be reached only after removing the sump . This may entail taking out the engine, which is a job for a garage.
When you have removed the pump (See Engine oil pump replacement ), take out the screws or bolts holding the end cover. Hold the pump with the cover uppermost and take off the cover.
First look for obvious wear, such as heavy scoring inside the end cover. Then look for traces of metal particles inside the pump body. Lift out the rotor assembly, pump gears or vane assembly and check for scoring and pitting. Note carefully how they come out, so that you can put them back in exactly the same position.
If the pump shows any obvious signs of wear or damage, fit a new one. If it appears to be in good condition, clean it thoroughly with petrol and put it back together.
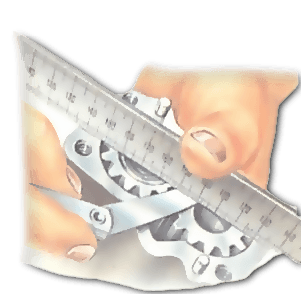
Then, using a feeler gauge and a straight-edge - such as a steel rule measure the clearances between the moving parts. If any of the recommended clearances are exceeded (see right), the pump is worn and you should fit a new one.
If the clearances are within the specified limits, fill the pump with clean engine oil.
Before you replace the end cover, make sure that the sealing ring or gasket is in good condition and positioned correctly.
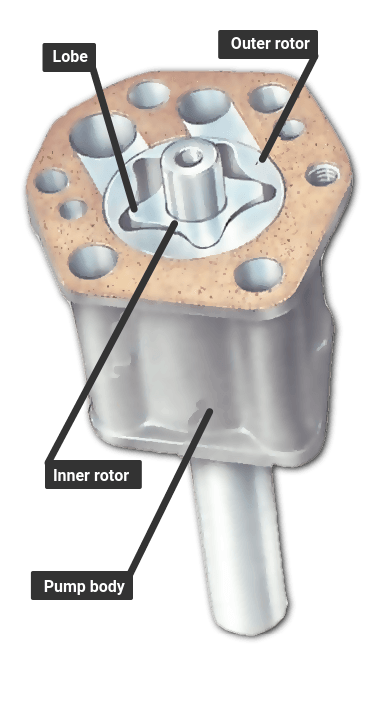
Clearances on a multi-lobe rotor-type pump
Turn the drive gear until the tips of an inner and an outer lobe are opposite to each other. The clearance here usually should not be more than .010 in. (.25 mm).
Put the feeler gauge between the outer rotor and the pump body. The clearance here should generally be no more than .010 in. (.25 mm).
Make sure that the face of the pump is clean, and put a straightedge across the pump body. The gap between the straight-edge and the rotor surface should generally be no more than .005 in. (-13 mm).
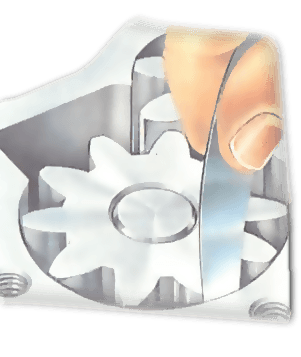
Gear-type pump
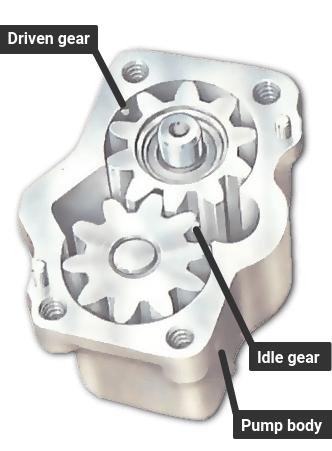
Check the clearance between each gear tooth and the pump body. At the closest point it should typically be no more than .006in. (.15 mm). Make sure that the face of the pump is clean, and put a straightedge across it. The gap between each gear and the straight-edge should typically be no more than 003 in. (.07 mm).
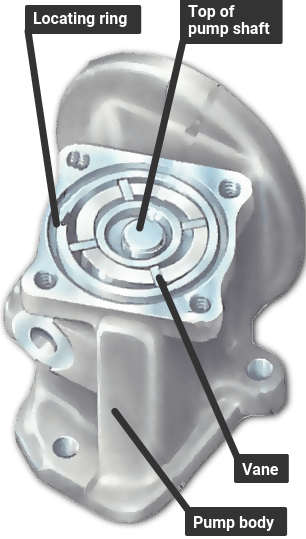
Checking a vane-type oil pump
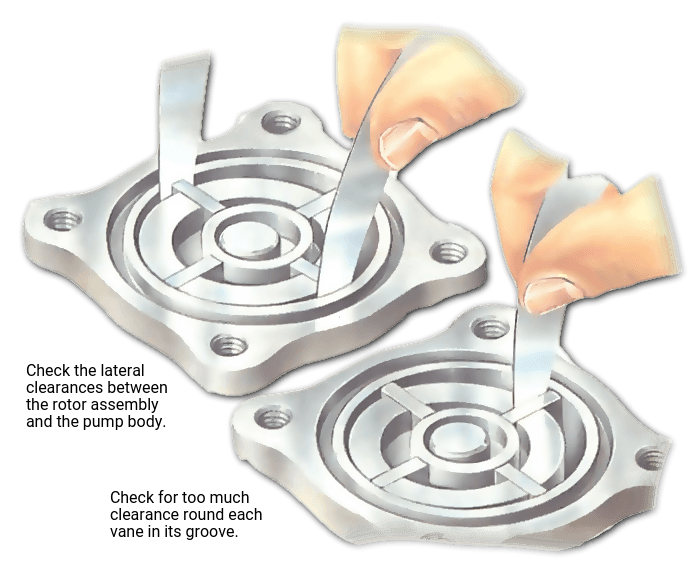
Make sure that the pump is clean, and then put a straight-edge across the face of it. Use a feeler gauge to check the clearance between the straight-edge and the vanes and rotor. The gap should be no more than .005 in. (.13 mm).
Turn the pump shaft until the locating ring has moved to the outermost edge of one of the vanes. Measure the gap at this point, between the vane and the pump body It should be no more than .005 in. (.13 mm).
Without moving the locating ring, measure the gap between the opposite vane and the pump body. It should be no more than •010 in. (.25 mm).
Check the clearance of each vane in its locating groove . The clearance should be no more than .005 in. (.13 mm).

The Ultimate Car Mechanics video course
Learn everything about modern cars from our new video series.
Learn more >-
We build a Mazda MX5 Miata from scratch
We start by tearing down and then rebuilding the whole car.
-
Every part explained
There's ridiculous detail on every part. Clearly and easily explained.
-
All modeled in 3D
We've created the most detailed 3D model ever produced so we can show you everything working.
Super detailed explanations in the video course
15 hours of pro-quality, HD content with subtitles
The
video
course
Bonus: Dismantling the engine

Engine Block

Crankshaft

Tools: Using a tap set

Using an engine stand

The Pistons
