Checking fuel pipes
The Video Course teaches you everything about modern cars.
Any fuel leak, however small, can cause a fire. Do not drive a car with a suspected leak until you have cured it. Never leave a car dripping petrol where a passer-by may throw a cigarette end under it. A small fire extinguisher, fitted where you can get at it quickly, is a valuable accessory.
Whenever you check fuel pipes, disconnect the battery to prevent stray sparks igniting petrol or petrol vapour. Above all, put out all naked lights and cigarettes. Use a torch rather than an inspection lamp, which could start a fire if the bulb is accidentally broken.
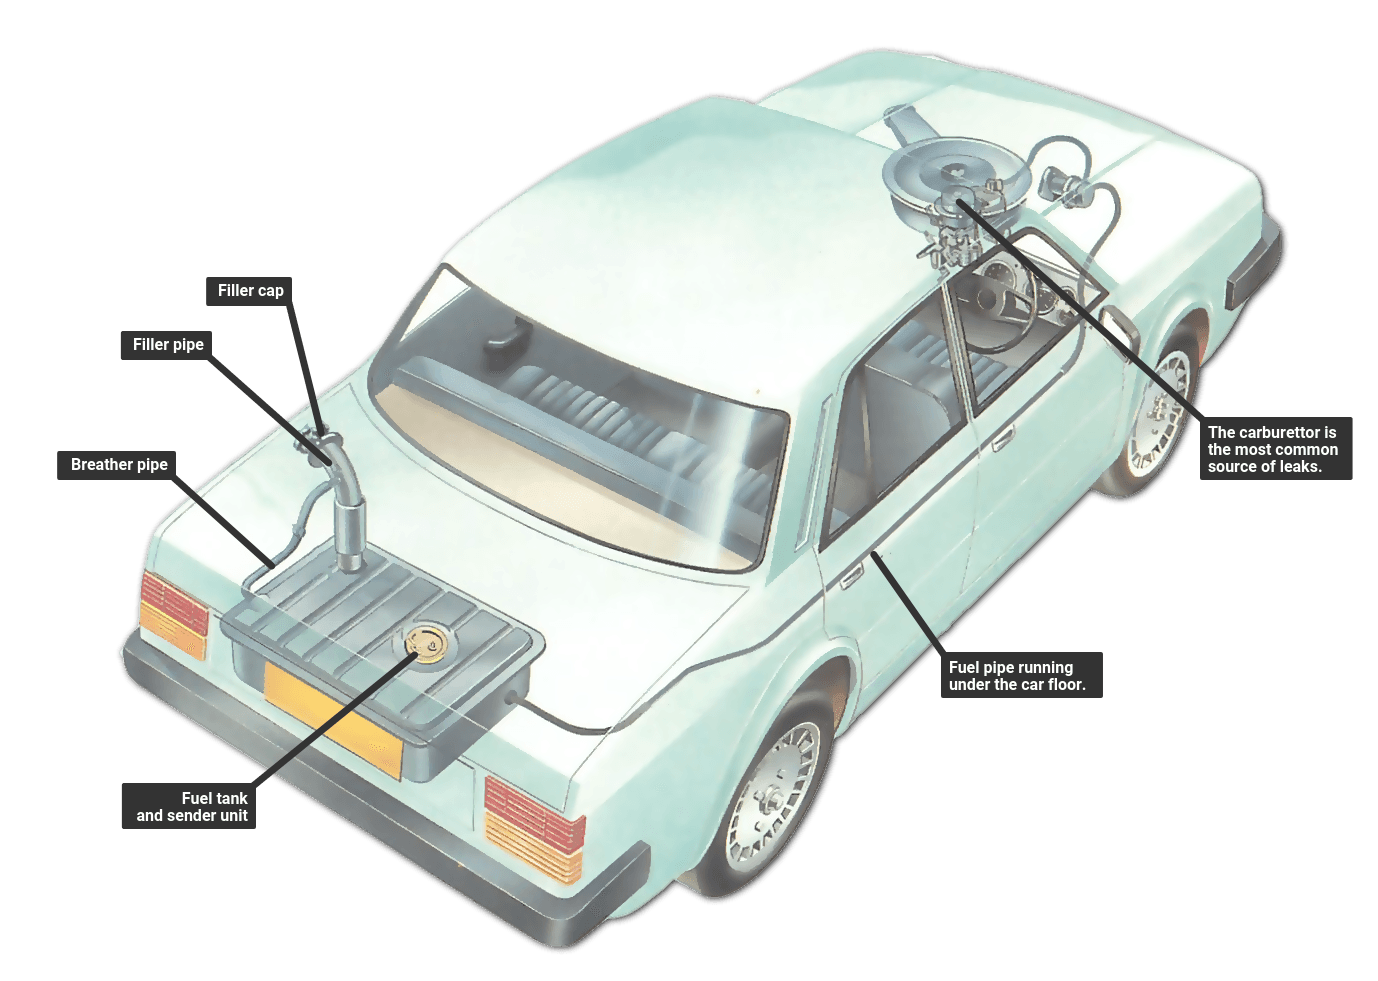
The fuel pipe of a car with the engine in front and the fuel tank at the rear generally runs under the floor, where it can be exposed to corrosion and knocks .
For most of its length it is usually made of metal, but different materials are used on different sections and these are linked with various kinds of connectors. Sometimes the whole pipe is plastic.
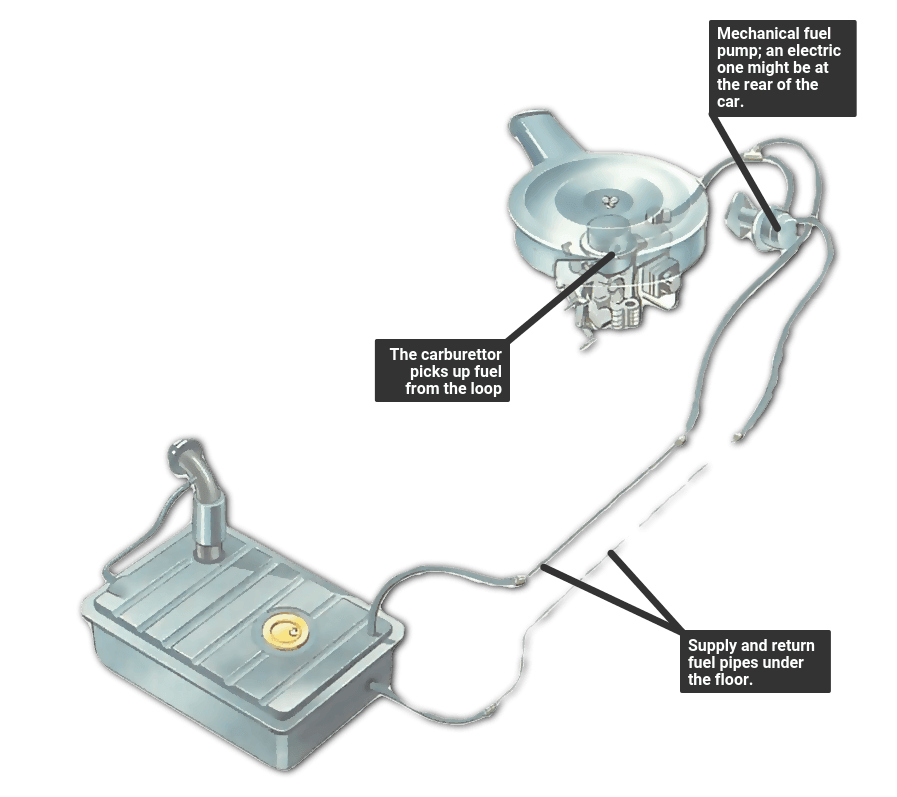
Sometimes there is a twin piping system, with supply and return pipes. The fuel pump circulates petrol in an endless loop, from the tank and back again, from which the carburettor draws off as much as it needs.
A normal, single fuel pipe begins at the outlet on top or at the side of the tank, where it is usually combined with the electric fuel-tank sender unit which operates the fuel gauge.
There is a short pick-up pipe with a filter reaching into the bottom of the tank.
From the outlet the pipe runs to the fuel pump - either a mechanical one mounted on the engine , or an electric one which is often sited at the rear next to the tank, or submerged in it.
The pump sends the fuel to the carburettor , but there are one or more filters on the way - often in unsuspected places that are difficult to reach.
The last part of the fuel pipe, inside the engine compartment, has to be flexible to allow for the engine moving on its rubber mountings.
The flexible section of the piping is usually made of reinforced rubber hose , but sometimes clear, flexible plastic tube is used.
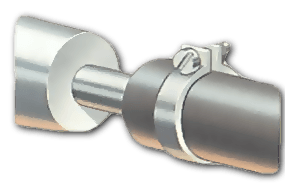
The most usual type of connector for metal fuel pipes on modern cars is a short length of rubber hose fitting over the pipe ends and secured by two hose clips.
Sometimes there are no clips, and the connector is a push-on fit .
On some earlier cars rigid joints are used on metal piping, especially where it is attached to the tank outlet.
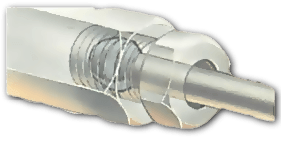
A tube nut fits over the pipe and is screwed tight to force the pipe against an 'olive' - a piece of soft metal shaped like a hollow bead .
The ends of the olive are squashed to make a fuel-tight joint.
Sometimes there is no olive, and the tube nut forces the ends of the tube on to a tapered seating which spreads out the end of the tube into a bell shape.
Leaks can be caused by corrosion in steel pipes, and cracks and abrasion in all types.
The clips holding the pipe to the chassis may damage it, or they may rust and fall off so that the pipe becomes loose. It .may then get dangerously close to the exhaust pipe .
The pipe may also be damaged by stones on unmade roads, or even by jacking the car up with the jack in the wrong place.
Apart from damage to the pipe itself, joints may come loose and leak.
Rubber joints may fray, or the clips loosen. Metal joints tend to leak when they have been pulled or pushed, so that the olive or expanded pipe end is distorted and no longer forms an effective seal with its connector.
Inspect them all carefully at regular service intervals.
If you can smell petrol
The first sign of a leak is usually a strong smell of petrol.
If you smell petrol at any time except when you have just filled the tank, or when you have difficulty starting the car and have flooded the carburettor, suspect a leak and look for it.
If there is petrol under the car after filling the tank, check the flexible hose between the filler neck and the tank neck. A split in the hose will leak petrol as it is being pumped in.
Other evidence may be a damp patch or stain under the car.
Where petrol has run down part of the car from a leak and then dried, it leaves a whitish, chalky mark. Just because the mark is dry, do not suppose that the leak has stopped.
Leaks may occur only at certain times, for example only when the tank is full or the car is tilted in a certain direction.
The carburettor is the most common source of leaks, so start looking there. The fault could be the carburettor flooding , rather than a leak.
Look at the joint between the fuel line and the carburettor, and then check other joints, working all the way back to the tank.
Put the car up on ramps or axle stands to inspect the section under the floor. Bend flexible pipes between your fingers to show up splits or cracks. Push clips and metal joints to see if they are loose.
Feel around joints to see if they are wet, petrol may run along a pipe before it begins to drip, which can be misleading.
Once you have found the leak you can make a temporary repair, but anything that is damaged should be replaced completely as soon as possible.
If a plastic line is damaged the whole line must be replaced, since improvised joints will not remain leakproof for long.
Certain petrol blends sold in Europe may well cause plastic fuel lines to expand or swell. Sagging fuel pipes are the first sign that this is happening. Make sure the pipes are securely clipped on.
Replacing connectors
Rubber connectors are often damaged by being removed in the wrong way. If they are pulled straight off, the tension makes them become narrower and tighter, and they may tear.
They should be twisted off. This also applies to longer lengths of rubber hose.
Pushing on a connector or hose is seldom a problem, but do not use a lubricant to ease it or jointing compound to seal it. This applies to all types of connector used on fuel pipes.
Make sure any clips are correctly positioned. Do not overtighten them, particularly when they are wire clips, for these can cut through a hose.
When a metal connector needs replacing, the pipe is generally damaged as well as the connector. If there is enough pipe, you can cut off the damaged section.
With the type of connector that relies on an expanded or 'belled' end on the pipe, you must bell the end before screwing up the nut tightening the nut completes the belling and forms the seal.
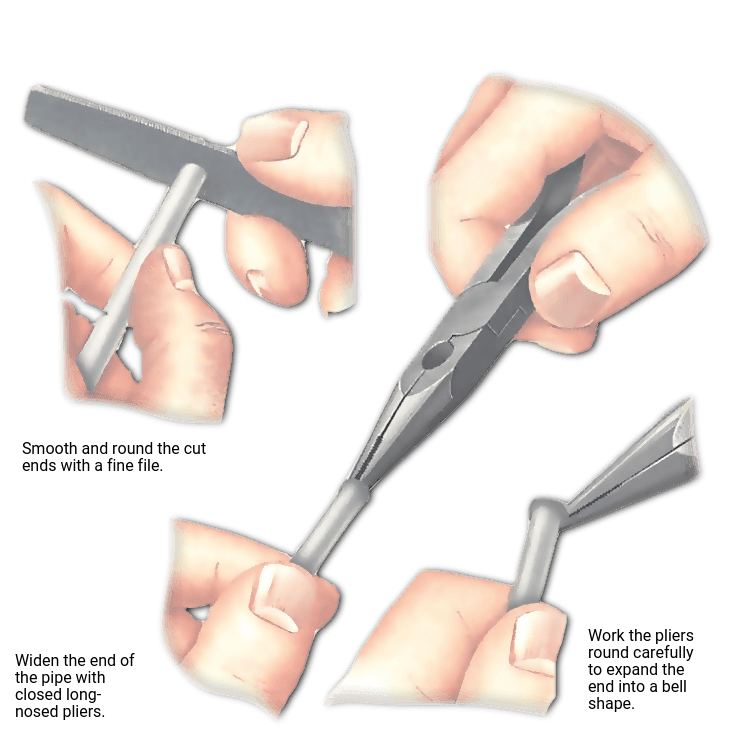
Strictly this should be done with a special belling tool, but in an emergency you can usually manage it by sticking a pair of long-nosed pliers into the end and twisting them round to expand the end into a bell shape.
If you are using a new nut, slide it over the end of the pipe before you start to bell the end, or it will not go on. Have the joint sealed with a proper belling tool as soon as possible.
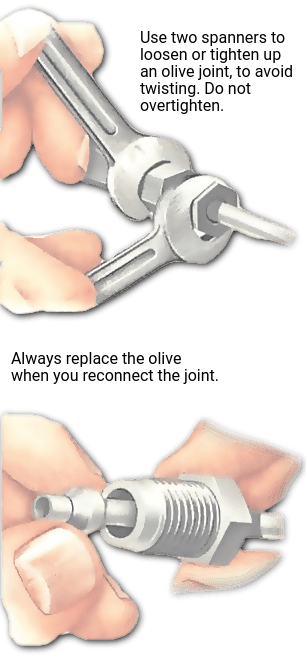
With an olive joint, always replace the olive when you reconnect the joint, whether or not you have replaced any other parts.
Avoid overtightening connectors, which can cause them to leak.
Where plastic pipe is joined with nut-type joints, make sure it does not get twisted when you are loosening or tightening them. This is a particular danger with joints which have a nut at each end. Use two spanners.
The section of fuel line in the engine bay is less exposed to damage than the piping under the car. But heat and oil can damage its rubber connectors.
Special clear-plastic tubing, which is both flexible and oil and fuel resistant, is often used here, particularly where an original rubber hose has been replaced.
Some plastic can become hard and awkward to flex - always use the grade recommended by the spares department of a dealer for your make of car, though it may cost more. Once a plastic fuel pipe has hardened with age, replace it.
Apart from leaking, fuel lines can also become blocked. A total blockage will stop the car, but a partial one may only cause fuel starvation at high speed, which is hard to diagnose as there may be other causes. One clue is that the effect is often spasmodic.
If you suspect a blockage, the quickest way to check is to free both ends of the pipe and blow through it. Use your mouth, not a high-pressure air line, which may cause damage.
An air line may also loosen dirt, which later falls back and blocks the pipe again.
Do not blow into the fuel filler hole it will not reveal a blockage and could be dangerous if the tank is full. You might inhale petrol - or fumes - and get it in your eyes.
If you find a blockage, it may be at a filter. Some filters mounted in the fuel line look just like rubber connectors. There is also one on the fuel pump (See Cleaning fuel-pump filters ).
Kinks and dents in the line itself can cause a blockage.
Old rubber hose - especially the braided type - can collapse internally without this being evident on the outside.
Check by blowing, not by poking anything through the hose which may damage it.
Repeated blockages may be caused by dirt or rust in the fuel tank. If so, the tank must be removed, cleaned and flushed out, or replaced.
When working on the fuel system , do not wipe the ends of pipes with soft rags. Small threads or bits of fluff can come off and block a pipe.
Occasionally a slack joint in the fuel-pipe system allows air into the fuel. This, too, can cause fuel starvation at high speed.
The trouble is difficult to spot. A fuel-pump filter with a glass bowl may show an air leak by a stream of bubbles. Routine checking of all joints for tightness should prevent or cure the problem.
Another cause of fuel starvation can be a blockage of the tank ventilation. This may even stop the engine.
The trouble will show when air hisses in as the filler cap is released. The normal type of tank vent is a plastic pipe leading from the top of the tank to below the car.
If this cannot be reached to unblock it, disconnect the pipe at the fuel tank, and blow through it with a foot pump.
Fitting a metal pipe
A new metal fuel pipe is usually supplied straight and unshaped. It is easy to bend - but also easy to kink.
If the old pipe is still in one piece and undistorted, take it off to use as a pattern for the new one. Make gentle bends and curves by bending the new pipe carefully with your hands. Check frequently that it matches the old pipe and fits the space.
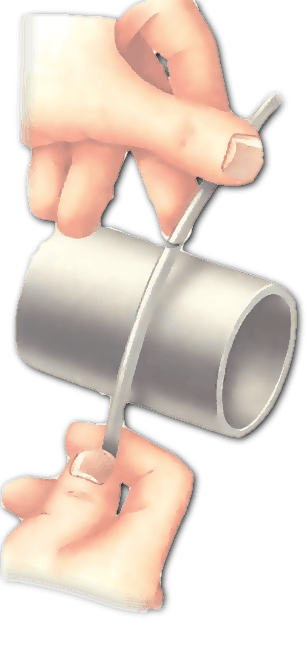
Make tight bends round a tube at least 2 in. (50 mm) in diameter.
If you re-route the new pipe, keep it away from the exhaust, moving parts of the suspension or handbrake mechanism, jacking points and other exposed places.

The Ultimate Car Mechanics video course
Learn everything about modern cars from our new video series.
Learn more >-
We build a Mazda MX5 Miata from scratch
We start by tearing down and then rebuilding the whole car.
-
Every part explained
There's ridiculous detail on every part. Clearly and easily explained.
-
All modeled in 3D
We've created the most detailed 3D model ever produced so we can show you everything working.
Super detailed explanations in the video course
15 hours of pro-quality, HD content with subtitles
The
video
course
Bonus: Dismantling the engine

Engine Block

Crankshaft

Tools: Using a tap set

Using an engine stand

The Pistons
