Servicing a mechanical fuel pump
The Video Course teaches you everything about modern cars.
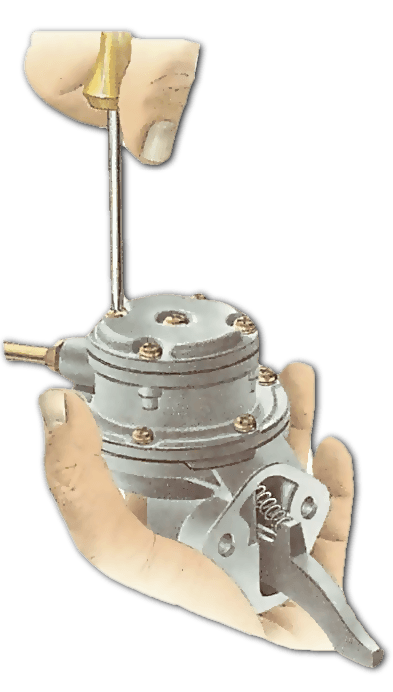
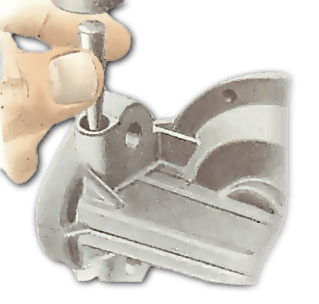
Remove the top of the pump first. It is held on by a central bolt or screw, except on the SU AUF 700, which is held by three screws that also partly hold the halves of the body together.
Do not clamp a pump in a vice to dismantle it — the pressure could break the alloy casting.
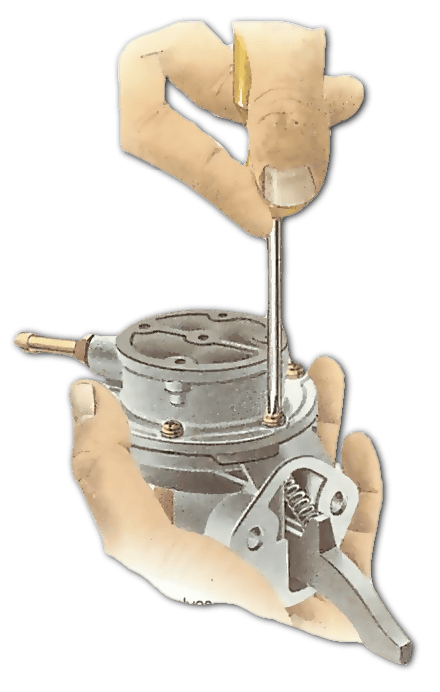

Mark or scratch both halves so that you can refit them in the same position — but do not scratch a line straight across the diaphragm edge.
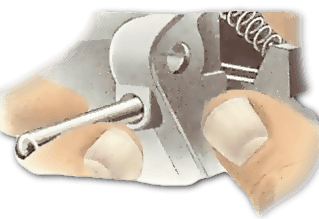
Hold the halves together while you remove all the body screws. Spring pressure inside will push them apart. Release your grip slowly; the diaphragm may stick and need gently freeing. Do not pry with a sharp metal object, which might scratch the mating surfaces and cause a leak.
Checking an oil seal
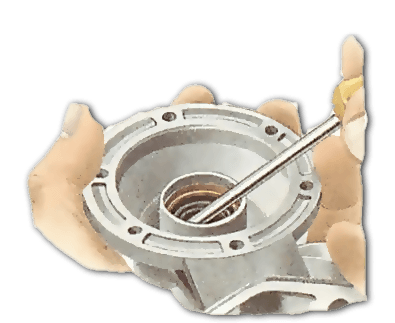
Certain pumps have an oil seal , which fits under the diaphragm and keeps oil off it. Do not remove it unless you have a replacement, as taking it out will probably destroy it.
The seal on the SU is held in place by a steel cup above it. Hook out with a screwdriver and pull out the seal.
If you clean the pump with the seal in place, use only clean petrol.
Freeing the diaphragm
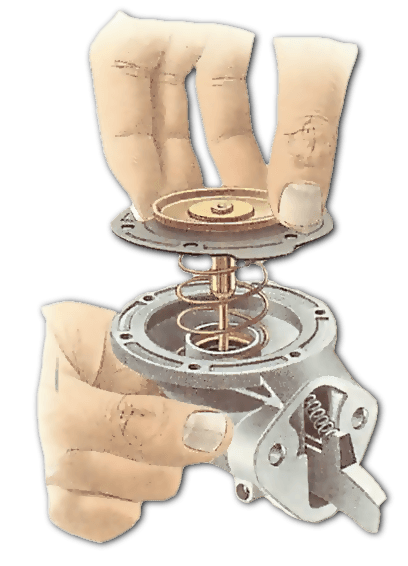
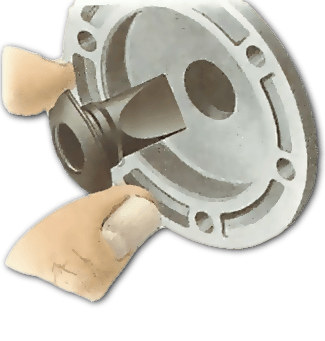
On AC-Delco type pumps the link from the diaphragm centre ends in a T, which fits through a slot in the lever . Hold the lever down, press the diaphragm centre down, and give the diaphragm a quarter turn.
SU pumps have a slot in the diaphragm link, into which the lever slides. Press the diaphragm down while you free the lever by pushing its pivot pin out sideways. If it is difficult to remove, tap it out with a hammer and punch.
As you pull out the lever, a small spring will fall from between the lever and the body. This keeps the lever resting against the cam when the pump is idling - that is, when the carburettor is full and no petrol can be delivered. The diaphragm stays down and the lever moves up and down in the slot.
AC-Delco pumps sometimes have a two-piece lever to allow idling, but there is still a spring. Remove the lever on this kind of pump too, so that you can clean it.
Cleaning the valves
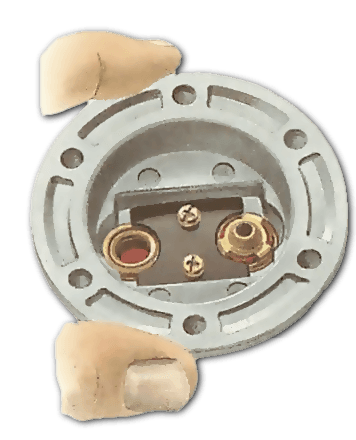
Inlet and outlet valves are combined on the SU AUF 700. The valve unit is a press fit. Push it downwards. Take great care not to damage it, especially the fine edge of the outer ring, which is the inlet part.
Most other pumps have two separate valves, held in by small screws and often interchangeable.
Make sure you know which way up they fit before you remove them.
An inlet valve has its movable disc on the side of the seating facing the diaphragm; an outlet valve has its disc on the opposite side.
These valves often cannot be taken apart, but you can remove dirt with a fine paintbrush.
Cleaning and replacing the pump
Wash all parts thoroughly with clean petrol and a fine paintbrush. If possible replace the diaphragm, valves, oil seal, top gasket and mounting gaskets.
The new parts are supplied together in a pump overhaul kit. It is false economy to renew just one part of the pump, unless the other parts are relatively new.
First refit the oil seal, if renewing it. On an SU, press it into place and lightly tap the cup down squarely on top of it, using a piece of wood or a screwdriver handle so as not to damage it.
Drop the main diaphragm spring into place.
Fit the diaphragm link carefully through the oil seal so as not to damage the fine edge.
Reconnect and refit the lever, remembering to insert the idling spring. Fit the valves back into the body of the pump.
On the SU there is a ridge round the edge of the valve which must fit exactly against a ridge surrounding it on the body. The wide inlet valve must lie evenly on its seating without puckering.
Lift up the lever so that the diaphragm sits flat on the body. Make sure it is accurately in place.
Set the top half of the body on it so that the marks you made earlier are in line.
Keep holding the lever while you screw the body together.
Tighten the screws gradually in sequence, each screw followed by the one opposite it.
This is impossible with the SU pump, where three of the six screws hold the top on.
Fit these three long screws in loosely, but tighten the others - which are short ones - first.
Then fit the top, with its gasket and with the outlet pointing the right way. Screw the top on.

The Ultimate Car Mechanics video course
Learn everything about modern cars from our new video series.
Learn more >-
We build a Mazda MX5 Miata from scratch
We start by tearing down and then rebuilding the whole car.
-
Every part explained
There's ridiculous detail on every part. Clearly and easily explained.
-
All modeled in 3D
We've created the most detailed 3D model ever produced so we can show you everything working.
Super detailed explanations in the video course
15 hours of pro-quality, HD content with subtitles
The
video
course
Bonus: Dismantling the engine

Engine Block

Crankshaft

Tools: Using a tap set

Using an engine stand

The Pistons
