Removing and refitting the distributor
The Video Course teaches you everything about modern cars.
On some cars, because of limited space, the only way of replacing the contact-breaker points or condenser is with the distributor removed.
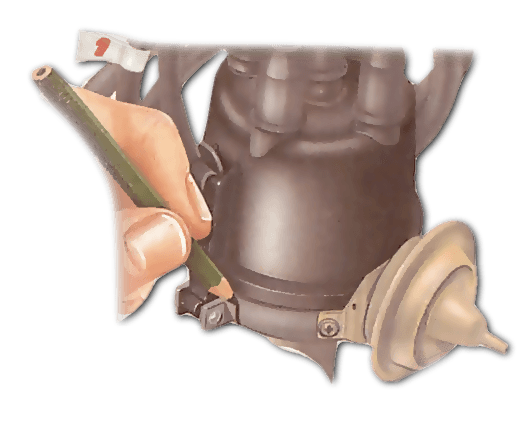
Before removing the distributor, check which of the high-tension leads is connected to the cylinder used for timing (See Adjusting the static timing ). It is nearly always No. 1 cylinder, but on some cars another cylinder is used.
Mark the lead with a tag, and pencil its position on the distributor body.
There are variations in the procedure for removing and refitting the distributor on some cars. Check the details in your car service manual.
Do not crank the engine or move the car in gear while the distributor is out of the engine . If the engine is turned, the timing will have to be reset.
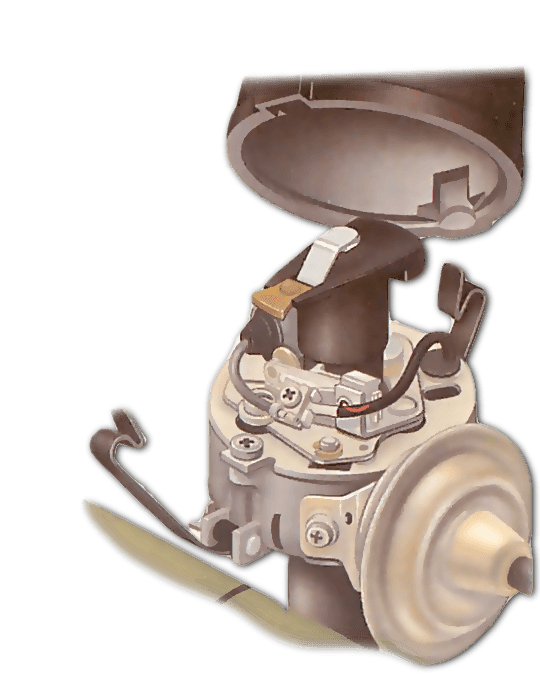
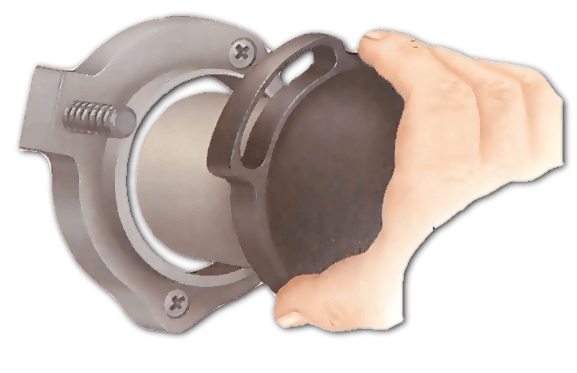
Removing the distributor cap
Make sure that the battery is disconnected. Prise apart the two retaining clips to free the distributor cap or remove the screws if the cap is held on by screws. Remove the rotor arm to take out the dust shield fitted to some cars, then replace it.
Check that the position of the timing-cylinder sparkplug lead is clearly marked on the distributor body.
Remove the distributor cap with its HT leads.
Preparing to remove the distributor body
Turn the engine with a spanner on the crankshaft-pulley nut. Alternatively engage top gear, release the handbrake , and push or pull the car.
Turn the engine until the contact-breaker points are just starting to open, and the rotor arm points to the position of the timing cylinder HT lead.
To save time when refitting, scribe a mark on the distributor body and a corresponding mark on the drive housing or engine block . Remember that this will be useless if the engine is turned and the rotor arm position altered after the distributor is removed.
Disconnect the vacuum tube and low-tension lead.
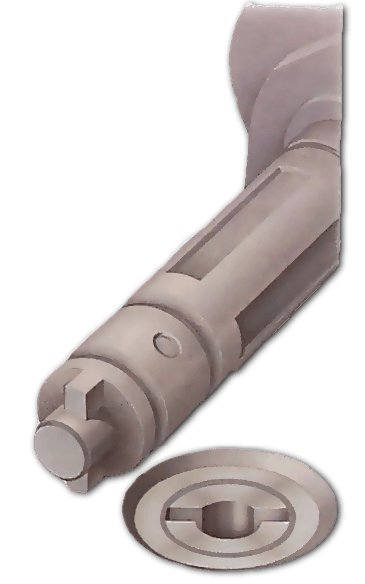
Removing a pinch-bolt assembly
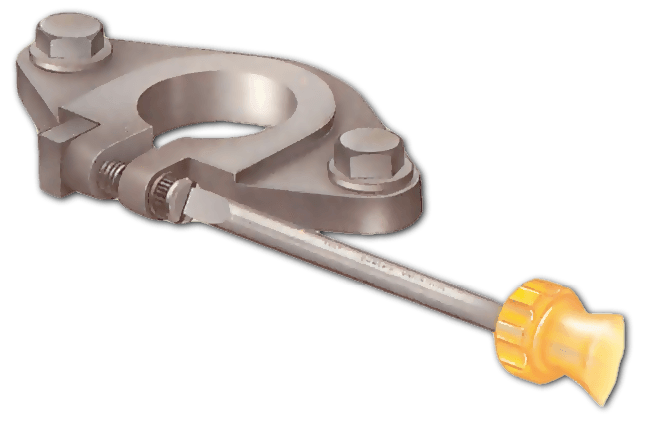
The commonest fixing is a clamp-plate and pinch-bolt assembly; the pinch bolt is the same one that is loosened when turning the distributor to set the ignition timing .
Loosen the bolt or bolts holding the clamp plate to the engine. Undo the pinch bolt and carefully withdraw the distributor.
If the distributor is tight, insert a screwdriver blade between the open ends of the clamp plate and prise them slightly apart.
As you withdraw the distributor, the rotor arm sometimes shifts slightly through the movement of the driving gear. If this occurs, mark the final position of the arm to simplify replacement.
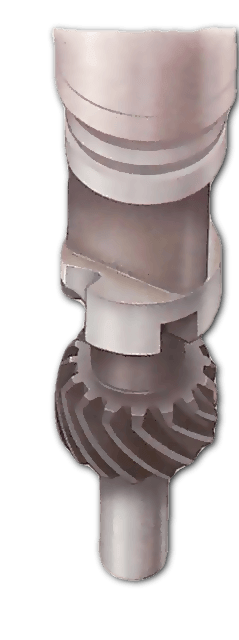
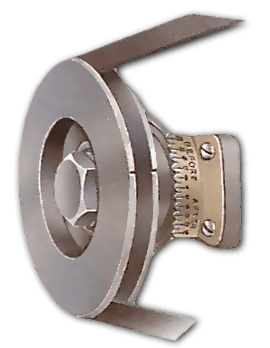
Removing a flange-and-stud assembly
On some overhead-camshaft engines, the distributor has a slotted flange at the base that fits over two or more studs on the engine. The distributor is secured by nuts and washers.
The slots in the flange allow the distributor to be turned when the nuts are slacked while timing the engine. Mark the position of the distributor, by scribing lines on the flange and on the stud plate so that it can be replaced in exactly the same position.
Remove the nuts and pull the unit away from its mounting. Twist it gently if it sticks, but do not try to lever it from the engine block with a screwdriver.
Replacing the distributor
Slide the distributor driving gear back into the engine block, roughly aligning the scribed marks.
If the drive fitting on the shaft is an offset dog - a tongue that fits into a slot - turn the contact-breaker cam until the dog engages, then push the distributor home.
If the drive fitting is a skew gear, it may be difficult to align the scribe marks without turning the distributor slightly.
You may need to point the rotor arm roughly 30 degrees before or after the cylinder-lead mark on the distributor body, depending on the direction of rotation of the rotor arm. As the gear meshes, the rotor arm should turn to line up exactly.
With the scribe marks properly aligned, tighten the fixing and reconnect the vacuum tube and low-tension lead.
If the engine has been turned while the distributor was removed, the ignition timing will have to be reset. If the engine has not been turned, check the accuracy of the timing and reset if necessary (See Adjusting the static timing ).
Refitting the cap
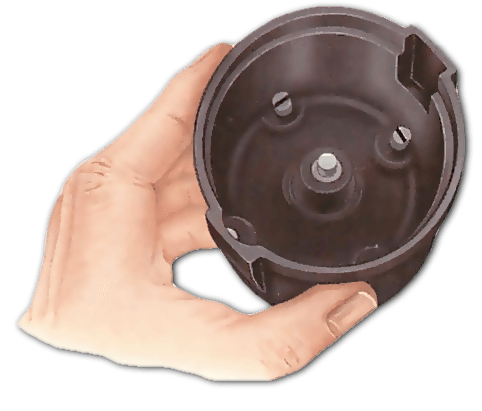
Inspect the cap for cracks or racking marks, fine lines that look Ike forked lightning, before fitting it to place. If it is marked or cracked, renew it, changing over the HT leads in identical order (See ). Wipe inside the cap with a clean, dry rag. Reconnect the battery .
Variations on some cars
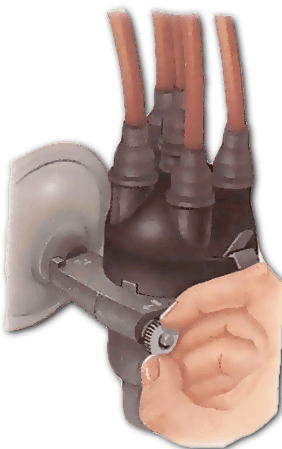
The distributor may be fitted with a vernier timing adjuster - a graduated scale which allows fine adjustment of the timing. Turning the knurled knob clockwise retards the ignition, turning anti-clockwise advances it.
When replacing the distributor after the engine has been turned, set the adjuster to midway between advance and retard.
Slide the distributor into place, and position it so that when the driving gear is engaged the rotor arm is pointing to the timing-cylinder electrode .
On cars with electronic ignition, removing and refitting the distributor is the same but the timing must be set with a stroboscope.
Other types of distributor
When you remove some types of distributor, the driving gear may stay in the engine. Hook it out with your finger or a suitable piece of wood.
When refitting, oil the driving gear with clean engine oil and replace it in the block before positioning the distributor.
There may be a gasket between the distributor mounting and the cylinder head . Remove and discard it, and fit a new one when replacing the distributor.
On another type of distributor, the first step is to remove a TDC sensor from the clutch housing - on a VW for example - so that the timing marks can be seen. Use a plug spanner sawn off to about 2 in. (50mm).
Turn the engine by hand until the 0 mark on the flywheel is opposite a reference mark on the clutch housing .
In that position, the timing mark on the camshaft sprocket should be level with the cylinder-head cover, and the rotor arm should be in line with the No.1 electrode in the distributor cap.
If the engine is turned while the distributor is out of the car, turn the engine until the flywheel and clutch-housing marks are aligned.
If the camshaft-sprocket mark is not then level with the cylinder-head cover, turn the crankshaft through another complete revolution.
Make sure that the lug on the end of the oil-pump drive shaft is in line with the crankshaft axis.
Resetting the distributor after the engine had been turned
To reset the firing position, the distributor must be refitted so that when the contact-breaker points are just opening, the timing mark on the crankshaft pulley is in line with its pointer and the piston of the timing cylinder is approaching top dead centre on its compression stroke .
Remove the spark plugs to make the engine easy to turn.
To check when the piston is approaching top dead centre on the compression stroke , ask a helper to place a thumb over the timing cylinder plug hole.
Turn the engine with a spanner on the crankshaft pulley nut. As the piston rises, your helper will feel the pressure build up until, as the piston reaches the required position, the pressure is sufficient to force the helpers thumb off the sparkplug hole.
Alternatively, take off the rocker cover and watch to see when both valves of the cylinder are fully closed.
Turn the engine a little until the timing mark and pointer are in line with the appropriate number of degrees before TDC.
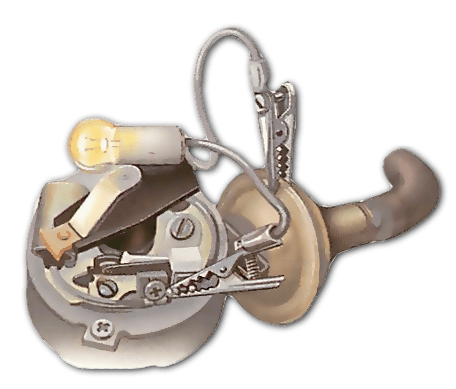
Slide the distributor into position so that when the driving gear is engaged, the rotor arm is pointing to the position of the timing-cylinder lead. Reconnect the battery, and connect a test lamp across the contact-breaker points to check that they are just opening.
Secure the distributor on its mounting and check the accuracy of the ignition timing. Re-check the contact-breaker points gap and refit the distributor cap.
Refit the distributor so that the timing marks align as the piston of the timing cylinder approaches TDC on its compression stroke.
Use a test lamp to check that the contact-breaker points are just opening

The Ultimate Car Mechanics video course
Learn everything about modern cars from our new video series.
Learn more >-
We build a Mazda MX5 Miata from scratch
We start by tearing down and then rebuilding the whole car.
-
Every part explained
There's ridiculous detail on every part. Clearly and easily explained.
-
All modeled in 3D
We've created the most detailed 3D model ever produced so we can show you everything working.
Super detailed explanations in the video course
15 hours of pro-quality, HD content with subtitles
The
video
course
Bonus: Dismantling the engine

Engine Block

Crankshaft

Tools: Using a tap set

Using an engine stand

The Pistons
