Checking a clutch cable
The Video Course teaches you everything about modern cars.
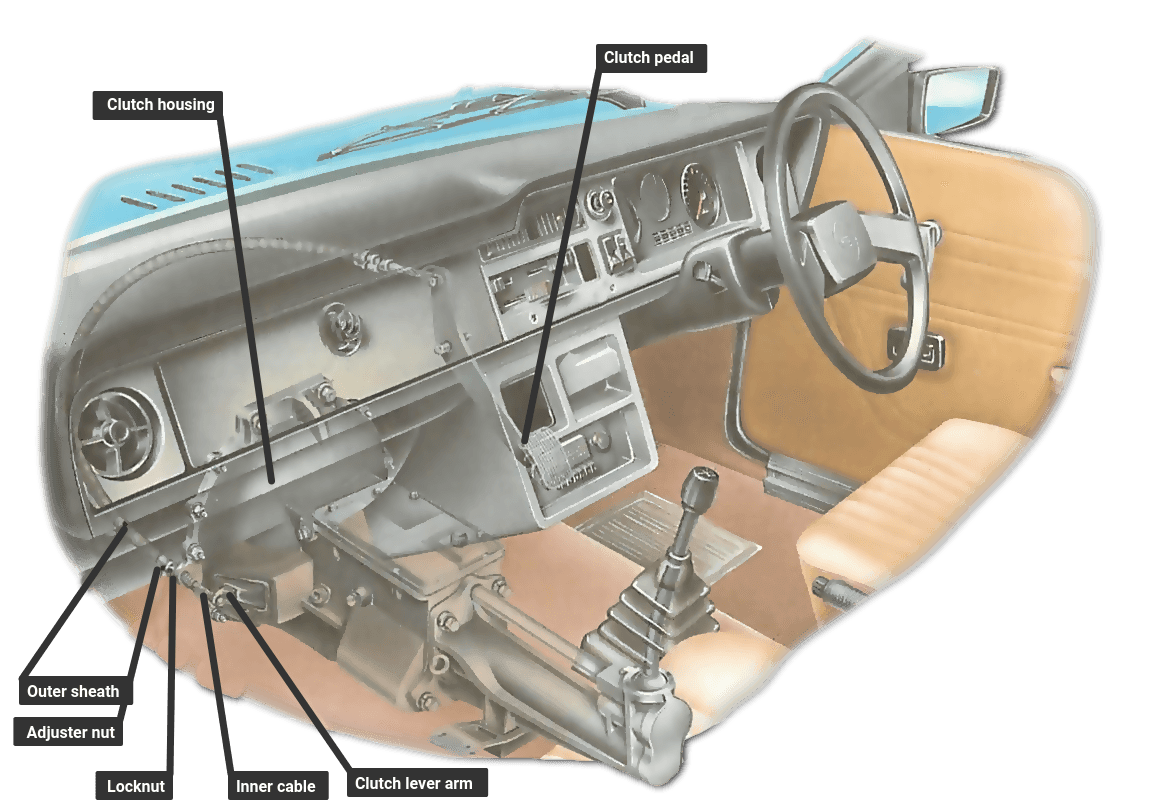
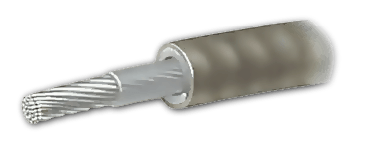
The clutch cable has a steel-wire inner core sliding inside an outer sheath. It should last at least two years, but check it at every main service; if it breaks it may do so without warning.
The heavy clutch-pedal pressure needed to work it may conceal any initial stiffness or stickiness in the cable itself. The exposed cable ends are the parts most likely to fray and break, especially at the gearbox end.
To check or replace the cable, support the car on ramps or axle stands and chock the wheels on the ground .
Checking the cable
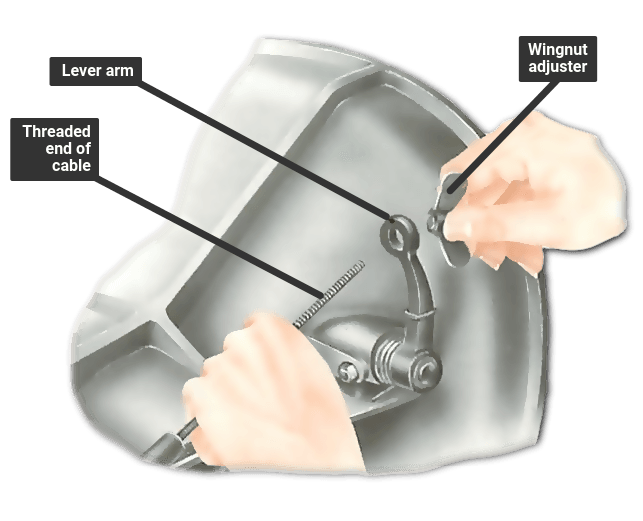
Disconnect the cable at the gearbox end. It is fixed to the clutch-release lever by nuts which also provide adjustment.
Move the clutch pedal by hand. You should be able to feel whether the cable slides smoothly. If it does not, the cable may be bent at too sharp an angle by being wrongly routed.
Usually there are guides to keep its path smoothly curved. Make sure that the outer sheath is not kinked or crushed: if it is, replace the cable.
Pay particular attention to the cable on a rear-engined car, where its long route makes it extra prone to damage.
Inspect the exposed ends of the inner core, pulling each end in order to reveal as much as possible. If even one strand is broken, the others will soon follow: replace the cable at once.
If the cable passes all checks, reconnect the gearbox end and adjust the nuts until there is the correct amount of free play (See Adjusting the clutch ).
Finally tighten the locknut.
Replacing the cable
Disconnect the gearbox end first and remove the nuts; then free the inner cable from the pedal.
It may have a loop which fits over a hook at the top of the pedal; pull the cable slack and lift it off.
The cable may end in a fork pivoted on the pedal by a clevis pin. The pin has a head at one end and a washer and a split pin at the other, straighten and pull out the split pin with pliers, then push out the clevis pin. Use a new split pin when refitting.
If there is a ball on the end of the cable which fits through a keyhole-shaped slot in the pedal, pull the cable slack and push it up towards the large end of the keyhole to free the ball.
Unscrew any bolts which hold the outer sheath to the bulkhead. Note the order in which washers, spacers and seals are fitted so that you can replace them correctly. Pull the whole cable out through the engine compartment.
Some rear-engined cars, such as the VW Beetle, have clutch, brake and accelerator pedals on a common shaft. To free the clutch cable for replacement you may have to disturb the other two pedals and linkages .
To reach the clutch end of the cable remove the left rear wheel, supporting the car on an axle stand. Adjustment is generally by turning a wingnut or a domed nut and locknut at the clutch end.
Hold the cable with grips to prevent it turning with the nut while adjusting. Turning clockwise reduces free play at the pedal, which should be between 10 and 25 mm. Make sure the adjuster nut is seated properly in the elliptical hole of the clutch lever arm.
Check all the rubber grommets and seals along the route of the cable, and replace any that are worn or damaged. Some may be supplied with the new cable.
Take the old cable and other parts to be replaced to the parts store. Lay the old and new cables side by side and check that they are the same length and that the fittings are the same.
If the old type has been superseded by an approved but slightly different one, make sure you have any adaptors you need.
Find out whether the new cable has to be greased before fitting. Most modern cables have greaseless non-stick linings.
If you do have to grease the cable, use your finger to poke as much high-melting-point grease as you can into the outer sheath at both ends, and slide the cable back and forth to spread the grease.

The Ultimate Car Mechanics video course
Learn everything about modern cars from our new video series.
Learn more >-
We build a Mazda MX5 Miata from scratch
We start by tearing down and then rebuilding the whole car.
-
Every part explained
There's ridiculous detail on every part. Clearly and easily explained.
-
All modeled in 3D
We've created the most detailed 3D model ever produced so we can show you everything working.
Super detailed explanations in the video course
15 hours of pro-quality, HD content with subtitles
The
video
course
Bonus: Dismantling the engine

Engine Block

Crankshaft

Tools: Using a tap set

Using an engine stand

The Pistons
