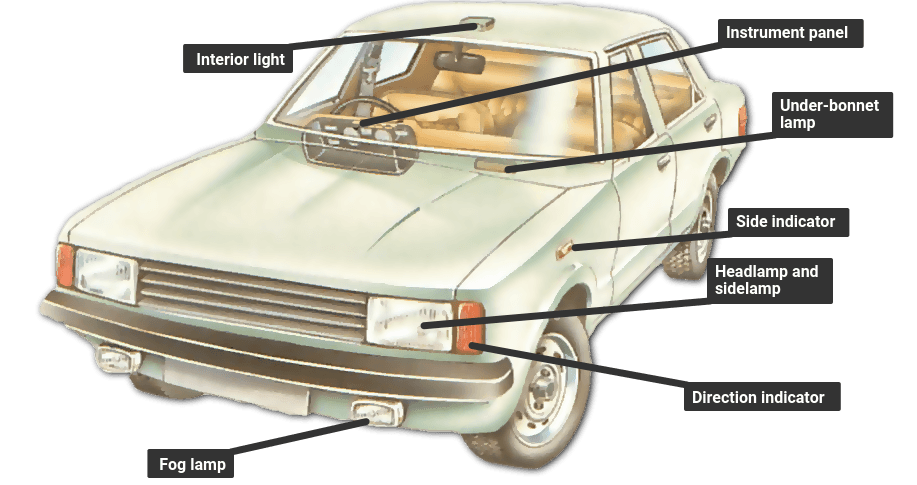
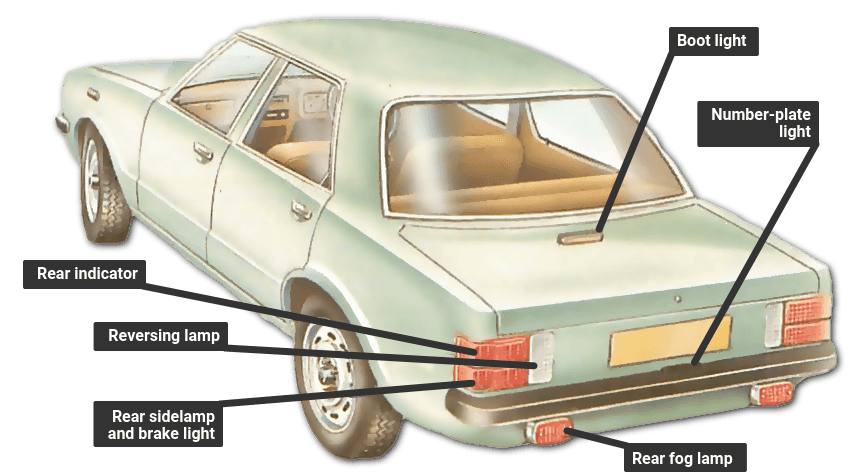
in Accessories
It is an offence in law not to have all obligatory lights working. Check them frequently, especially before a night journey. Walk round the car while someone works the switches .
Obligatory lights are side and tail lights, headlamps (main and dipped beams), direction indicators, stop lights and a rear number-plate light. When fitted, reversing lights, fog lights (front and rear), long-range driving lights and hazard warning lights should also be working.
Wipe all the lenses with a clean cloth, checking them for damage.
If a lens is cracked, seal it temporarily with clear adhesive tape, taking care not to obscure more of the glass than absolutely necessary.
Damaged lenses must be replaced as soon as possible, both for safety and to prevent moisture entering the lamp fixture. Water will tarnish the reflector, and corroded connections will soon put the lamp out of action.
On many modern cars the headlamp bulb can be reached from inside the bonnet; on others it is necessary to remove the lamp bezel or grille on the front of the car.
Failure of a single headlamp is usually confined to either the main beam or the dipped beam.
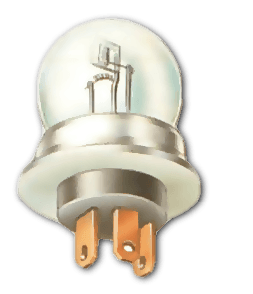
In a lamp unit fitted with a bulb, this is easy to check: remove the bulb, hold it up to the light and see if any filaments are broken.
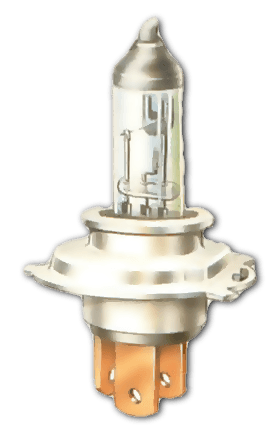
If the bulb is of the halogen type, it should not be touched with the fingers. Use a clean, dust-free cloth to keep fingermarks off it and avoid premature failure. Clean it with methylated spirit on a cloth if necessary.
Filament damage cannot be seen in a sealed-beam unit, and a different method is needed to check if it is faulty (see panel on right). Checks on wiring and connections must include the spring-loaded contacts, where that type of bayonet bulb holder has been used.
A sticking plunger could result in the failure of the lights in that unit, while failure of an insulating washer could mean a short circuit and a dimming of all the lights, or cause a fuse to blow.
A dim yellow light on one side is usually a faulty earth connection between the headlamp and the body of the car.
The connection is often simply a wire lead attached to the body; corrosion or dirt may cause a high resistance in the connection which results in a dim light.
Unbolt the connection, and use emery cloth to clean the terminal and washers. Use a wire brush on the bolt. Clean the surface of the metal where the hole is drilled. Reassemble and tighten firmly.
The same fault can occur on both headlamps when they are interconnected. However, when both lamps are dim, another possible cause is rust under the locating flange of one or both of the bulbs. Clean away dirt and corrosion wherever you find it.
Total failure of all the headlamps - both main and dipped beams on both sides means a failure in the feed to the main lighting switch or between that and the dipswitch.
Where there is a fuse fitted in the headlamp circuit , check it to see if it has blown (See Working on the wiring system ).
Circuits can be overloaded by adding extra driving lamps, or installing bulbs that are too powerful in the main lamps. Another possible cause of fuses or lamps blowing is a faulty voltage regulator (See How to test a car battery ) in the charging circuit.
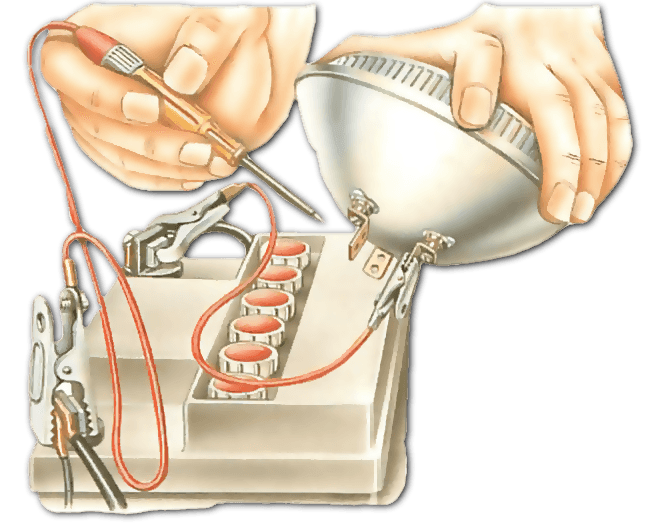
Use a plain test lead with crocodile clips to link the earth terminal on the battery to the earth tag on the sealed beam.
Connect the crocodile-clip end of a circuit tester to the live battery terminal, and touch the probe to the other terminal or terminals on the sealed-beam unit in turn.
Use the car headlamp switch in the right positions. A sealed-beam unit with three terminals contains filaments for both main and dipped beam; if it has only two terminals, one is the earth and the other works on main beam only.
If any live terminals do not work, the lamp has failed. If they all work, check the connector block and wiring back to the snap connectors on the cars main wiring loom.
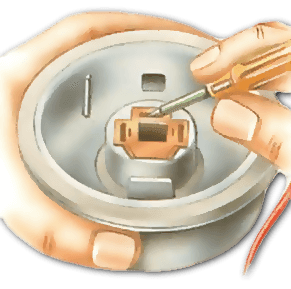
The connector block at the back of the headlamp may be covered with a large rubber protector. Prise it off complete with the two-pin or three-pin multiple plug.
Switch the headlamps on. Connect the earth lead of a circuit tester to a suitable earth, such as the car body, and with the probe check each of the connector terminals in turn.
One of them is the earth. If there is only one other terminal, it is for the main beam. If there are three terminals altogether, the connector is for both main and dipped beam. Use the car's headlamp switch to check all the terminals.
If any of the positive terminals do not work, check the wiring and the snap connectors back along the wiring loom to the bulkhead. Clean all the terminals before refitting.
If the starter does not turn the engine although the car battery is in good condition, the ...
If your car's instrument panel includes an ammeter , it will tell you how well the charging syst...
Only a garage with special equipment can align headlamps accurately. However, you may need to d...
If there is trouble without an obvious cause in any electrical component, test the circuit to f...