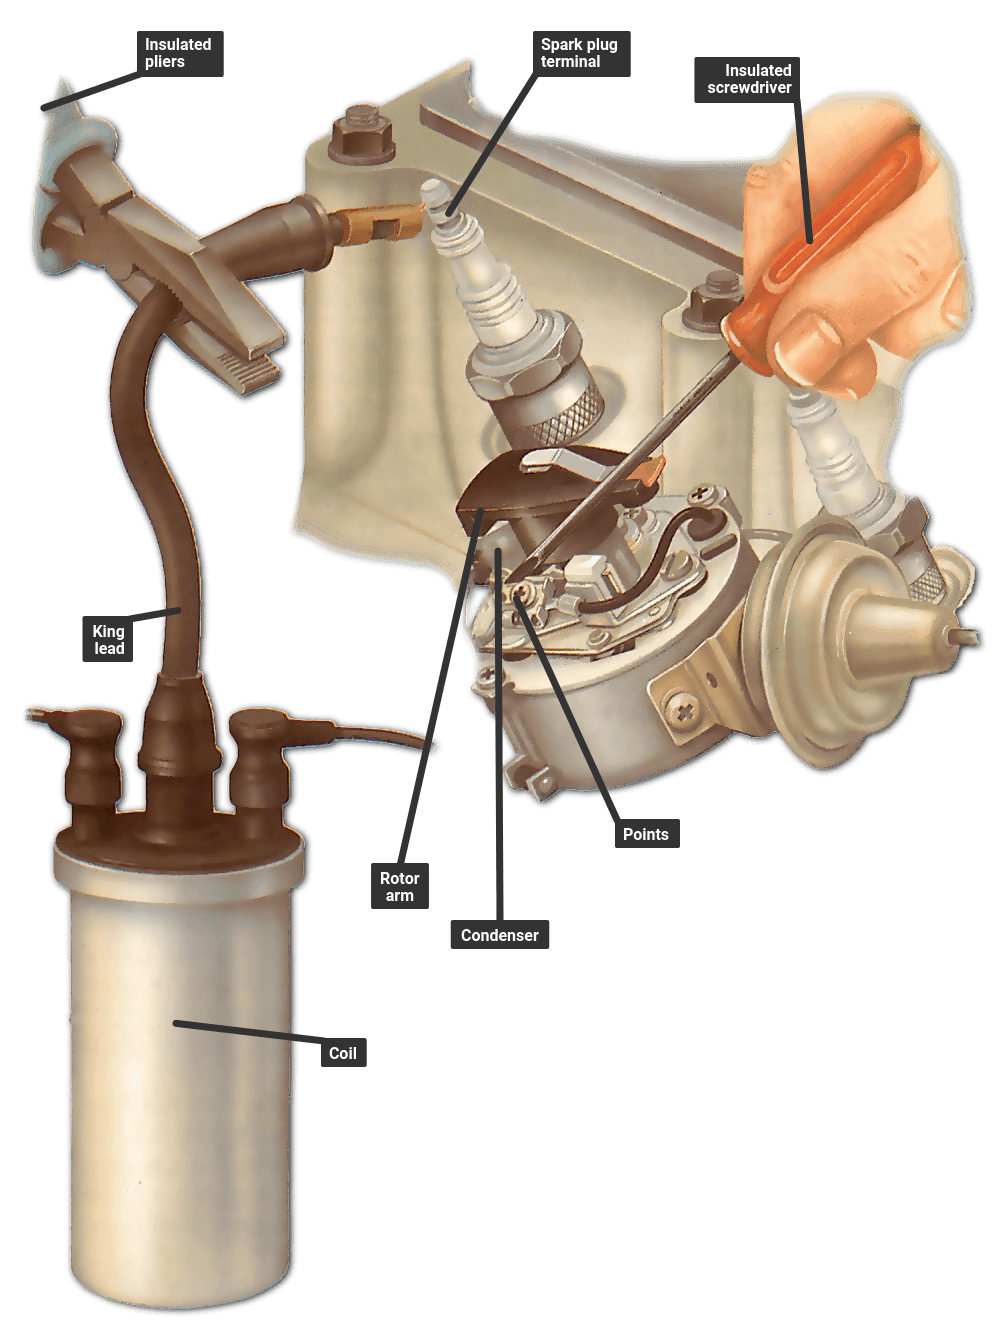
If your car is misfiring or running badly, or has suddenly stopped completely, the most likely source of the problem is the ignition system.
First check the obvious problem areas. Make sure that all the wiring is firmly connected and that the spark plugs are in good condition and their leads are firmly on. Check the condition of the contact breaker points , that they open and close properly, and that their gap is correct.
If that fails to throw light on the problem, it may be that the coil is failing or has burnt out. You can check whether the coil is at fault very quickly using a test lamp.
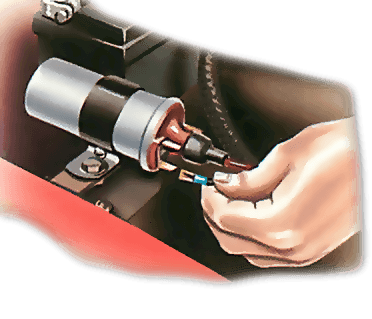
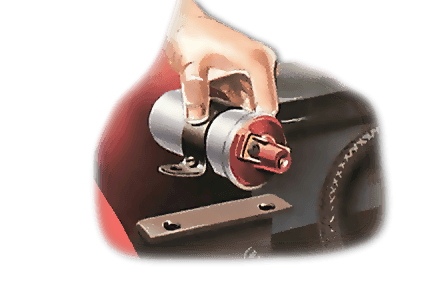
First find the coil's low-tension positive terminal , the one leading into the coil from the ignition switch (it is often marked SW or +). Attach the crocodile clip of your test lamp to a clean earth point on the nearby bodywork and probe the coil terminal with the other end of the test lamp.
The test lamp should light up to show that current is reaching the coil. If it doesn't light, the fault lies further back in the circuit .
Check the wiring running back to the ignition switch , then check the ignition switch itself, and finally the wiring leading to the switch from the battery . (If the problem lies in the switch or its wiring to the battery you would have noticed that some other component in the ignition-controlled circuit has failed.)
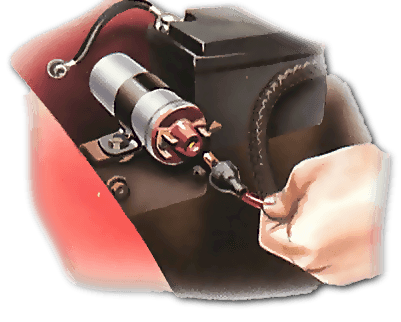
Now find the low-tension negative terminal on the coil — it is usually marked CB or —. Keeping the crocodile clip still fixed to the bodywork, probe this terminal with the test lamp. If the lamp lights, the low-tension part of the coil (the primary windings ) is working. If the lamp does not light, the coil has blown and needs replacing.
If the LT part of the coil is working, the problem may lie in the high-tension part. To test this, see the illustration overleaf.
If you are still not sure whether the coil is working, you can carry out a more advanced test on it using an ohmmeter .
A further check you can make on the coil is to measure its resistance with an ohm meter . You can hire these for the purpose, or you may find that your multi-meter (if you have one) incorporates this meter.
Make sure the ignition is off then disconnect both low-tension leads from their terminals on the coil. The ohmmeter has two leads coming from it. Connect one to each low-tension terminal on the coil — it makes no difference which way round they are connected.
When connected the ohmmeter should give a reading of a few ohms. To find out what the specific reading should be for your car, look in the workshop manual or ask a dealer.
If the reading is too high or too low it means the windings are broken, have lost some of their insulation or are burnt. In all cases, you need a new coil.
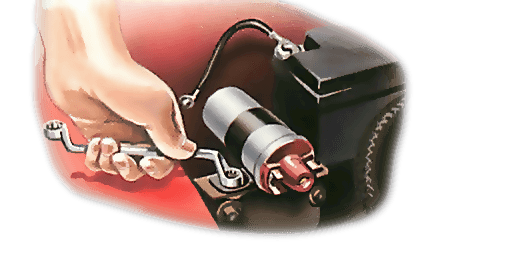
Removing and replacing the coil is a straightforward job. With the battery disconnected, take off the low-tension wires. Make a note of which wires go to which terminal. Sometimes there are extra wires fitted to the terminals for ballast resistors or radio suppressors. Note how these are connected and remove them too.
Remove the high-tension lead from the coil, pulling it out carefully to avoid stretching it.
The coil is usually bolted to the inner wing, or to part of the engine and its ancillaries. Undo the bolts or screws holding the coil's bracket and remove the coil from the car.
The new coil may come without a bracket. If so, undo the small screw or bolt clamping the bracket to the coil and slide the coil out. Fit the new coil into the clamp and tighten the bolt so that the coil is held firmly.
Refit the coil to the car, then reconnect all the wires to the correct terminals. Make sure you position the rubber weather seal around the end of the high-tension lead over the nose of the coil.
The purpose of the ignition system is to generate a very high volt age from the car's 12 volt ...
Inspect the ignition system whenever you make a general under-bonnet check. It takes only a cou...
Bosch distributors are found on many different cars and are generally very reliable. But after ...
For an engine to work at its best, the fuel /air mixture in each cylinder must fire just as ...