Fitting an electric fan to a car

in Modifications

Fan kits

The Pacet electric cooling fan is available in two sizes; which you need depends on the size of your engine. The smaller fan (A) comes ready assembled with the motor in its support bracket. The larger fan (B), has first to be assembled, using support brackets (C) and motor (D). Both kits are supplied with a thermal sensor and switch with mounting bracket (E). To secure the fan to the radiator you use the special ties, washers, sponge pads and nuts (F). Extra wiring and terminal connectors with an in-line fuse (G) are supplied to wire the fan up.

All cars have a fan to help cool the coolant as it passes through the radiator . On most cars, the fan is driven directly by the engine , usually via the generator drive belt. But this arrangement means that the fan always runs at the same speed as the engine. This has several disadvantages.

Mechanical problems

First, the fan runs as soon as the engine is switched on and is cold. This is when the engine needs to warm up as soon as possible for maximum efficiency, and having the fan running delays this process.

Second, when the car is travelling fast and the engine is running at high speed, the fan is also turning over at its fastest. But in these conditions, the airflow through the radiator is enough to keep the engine cool, so the fan is being driven for no reason - all it is doing is wasting power.

Third, in a traffic jam, when the engine is idling and the car is stationary, there is no proper airflow through the radiator and so the engine can easily overheat. Yet, because the engine is idling, the fan is also running at its slowest and often cannot keep the engine cool enough.

Electric fans

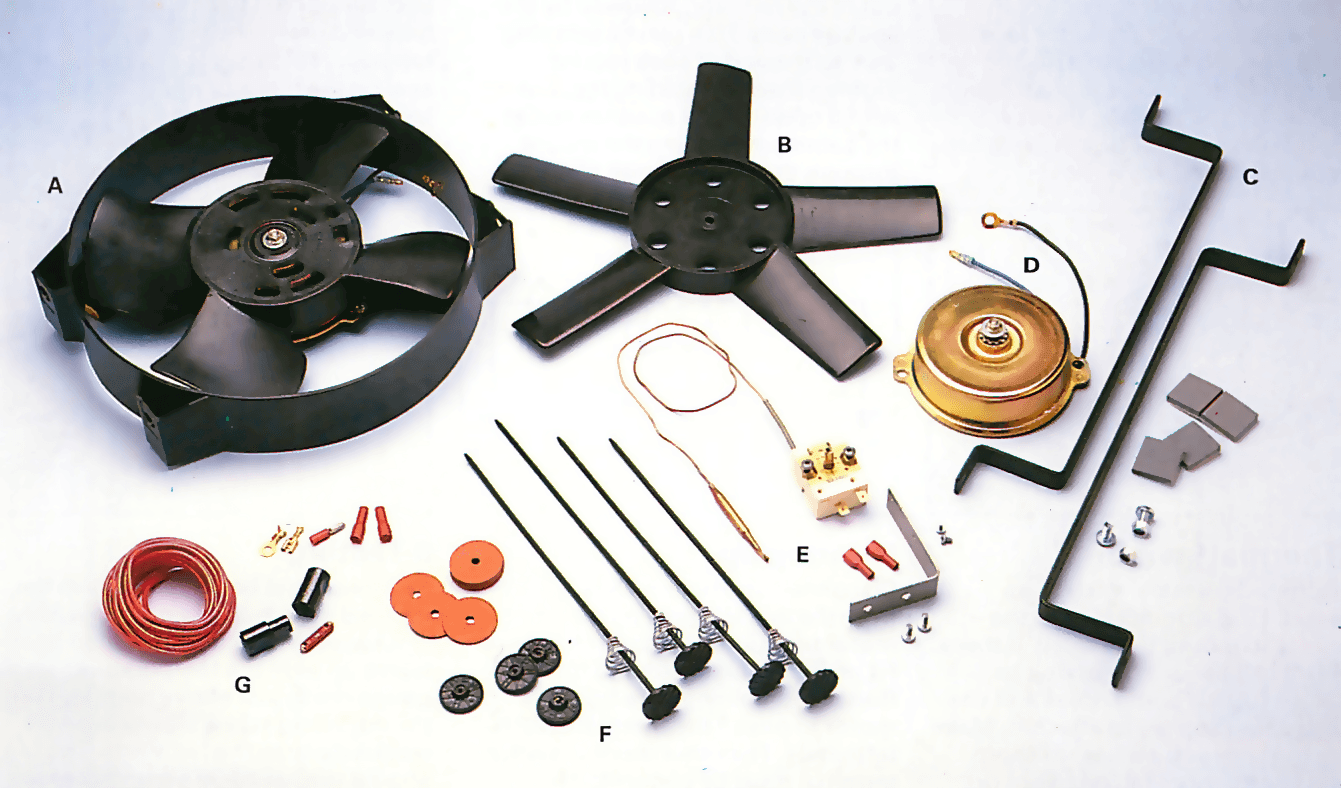
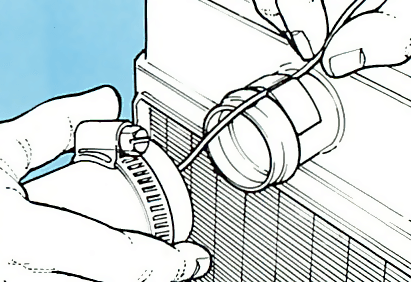
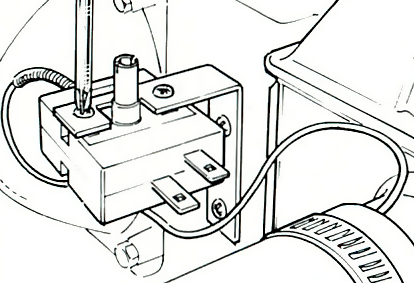
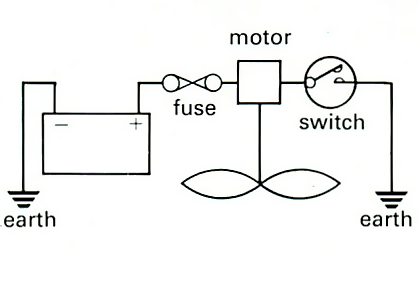
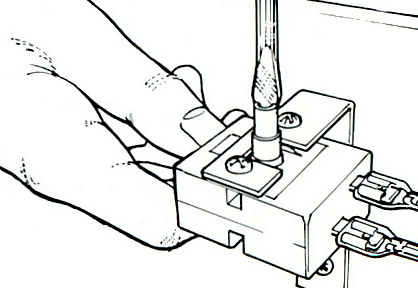
The solution is to fit an electric fan driven by a motor . The fan is switched on and off by means of a thermostatic sensor switch fitted to the cooling system .

When the temperature of the coolant rises to a certain point, the sensor switches on the fan. The fan then operates until the temperature falls below the critical point, when the sensor switches off the fan. The electric fan keeps the engine much nearer its optimum running temperature, saving fuel and gaining engine power.

Details of fitting an electric cooling fan differ for front-wheel-drive and rear-wheel-drive engines. This sheet looks at rear-wheel drive fans. The other type will be covered in a later Projects sheet.

Fitting an electric fan

1. Remove belt-driven fan

First remove the generator drive belt and unbolt the existing fan from the water pump or crankshaft pulley. Refit the bolts to hold the pulley, but check they don't protrude too far to the rear of the pulley. If necessary, fit extra washers under the bolt heads to compensate for the loss of the fan.

2. Positioning

Check the fitting instructions to find out whether you fit the fan on the front or rear side of the radiator. The fan isn't always mounted in the centre of the radiator— it may be offset to clear an obstruction such as the water pump. You may have to remove the radiator to fit the fan.

3. Assemble fan

Some kits come with the fan and motor already assembled to the mounting brackets, while others require putting together. If yours comes in pieces, refer to the instructions and assemble the fan and the brackets to the motor. When fitting the fan, make sure the correct side faces the front of the car.

4. Fit fan mounts

Place the assembled fan against the radiator. Hold the fan in place and fit a fibre washer between one of the fan brackets and the radiator face. Fit a cone-shaped spring to a plastic mount, then pass the mount through the bracket and washer, then on through the radiator fins. Repeat for the other brackets.

5. Secure the fan

Fit fibre washers to the ends of all four plastic mounts where they stick out of the radiator, followed by the sponge pads. Fit a plastic securing 'nut' to the end of each mount. Tighten them by holding the 'nut' with a open-ended spanner and at the same time pulling the mount through the radiator with pliers.

6. Fit thermal sensor

Drain the cooling system and remove the top hose at the radiator end. Straighten the end of the sensor tube and insert the sensor into the top hose. Place the special rubber seal on the radiator hose stub, then lay the straightened sensor tube on the seal. Fit the top hose over the seal and tube, and tighten the clip.

7. Thermal switch

Attach the thermal switch to its bracket. Find a point close to the radiator to mount the switch. If there isn't an existing screw or bolt to attach it to, drill some holes and use self-tapping screws to attach it. Make sure the sensor tube has no sharp bends and cannot fall on to hot or moving parts.

8. Wiring up

Disconnect the battery. Run a wire from the live terminal on the fan motor to an ignition-controlled feed. Fit an in-line fuseholder to this wire. Run the remaining wire from the motor to one of the thermal switch terminals. The other thermal switch terminal must be connected to a nearby earth point.

9. Testing

Reconnect the battery, then turn the thermal switch adjusting screw fully clockwise. Start the engine and let it warm up until the temperature gauge reads just above normal. Turn the adjusting screw slowly anticlockwise until the fan starts. The fan should run for 20-30 seconds before cutting out.

Read more

Fitting an electric fan to a side radiator

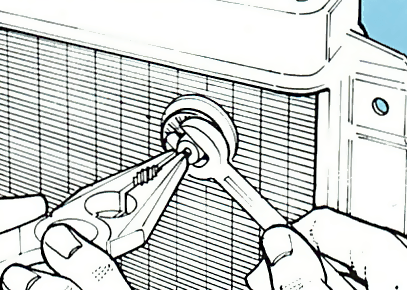
Fitting an electric, thermostatically controlled fan in place of the mechanical, engine -drive...

We're making the ultimate video course.

Start watching →

You can preview the video course here