Testing and replacing a flasher unit
The Video Course teaches you everything about modern cars.
There are two basic types of flasher unit. One is operated by a piece of wire or a bimetallic strip which expands and contracts as it is heated by the current ; the other is a relay operated by a transistorised circuit .
The first type is easy to locate if it is working at all because of the clicking sound it makes. To check whether it is faulty, use a circuit tester or test lamp in the way described below.
The transistorised type does not make a clicking sound, and cannot be checked with a circuit tester. It can be damaged by a short circuit .
The only way to determine if a transistorised type is faulty is by eliminating all the other components in the circuit.
Changing the flasher unit

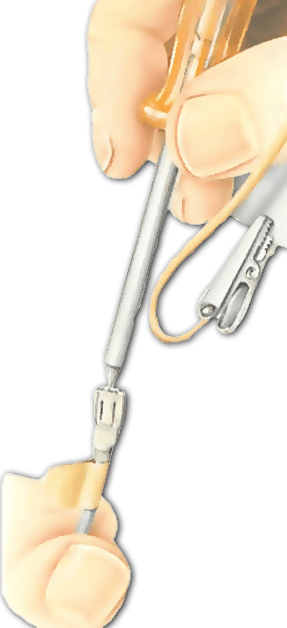
The flasher unit may be fixed by a small bracket held by one or two self-tapping screws, or a push fit in a spring clip, or plugged into the fuse box. Or it may just hang by its wiring behind the instrument panel.
Except for the plug-in type, there is a risk of confusing the wires. Label them before removal.
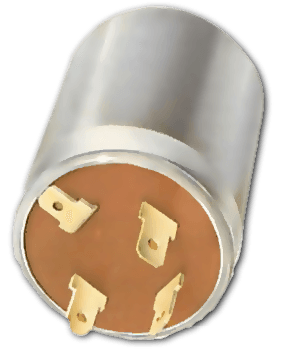
A two- terminal unit has no terminal for the light on the instrument panel, which is connected to the switch instead.
Replace the unit with one of the same type. The type number is usually stamped on the metal cover.
Tracing faults
If the indicators stop working completely, first check the fuse (See Checking and replacing fuses ). An indication of a blown fuse is that other components in the same circuit stop working.
Your car handbook or service manual should tell you which components are in the circuit.
Fit a new fuse. If it blows again, look for a short circuit.
If the fuse is sound, look at the stalk and hazard-warning switches and the flasher unit. Remove the stalk-switch cover to test the unit.
The flasher unit may be near by, or behind or under the bonnet or plugged into the fuse box (See ). Check that all the connections are sound and the wires unbroken.
Testing the flasher unit
To test the conventional type of flasher unit, use a circuit tester between the terminal marked B on the unit and the earth. Turn on the ignition .
If the supply side of the unit is working, the bulb should light. If it does not, look for a break in the wiring between the unit and the fuse box.
If the tester lights, test between the terminal marked L and the earth. The lamp should light; it may flash.
If it works, the fault is in the switch or the wiring; if not, the flasher unit is faulty.
Fast or slow flashing
Flashers are required by law to flash between 60 and 120 times each minute - that is, between once and twice a second.
If the speed of flashing becomes unusually fast or slow, you have a conventional type of unit - in the transistorised type the speed is constant.
If you have a three-terminal unit, flashing that is faster than normal indicates one blown bulb, or a corroded or disconnected bulb holder.
Flashing that is slower than normal indicates that there is a partial short circuit.
With a two-terminal unit, slow flashing indicates a blown bulb; fast flashing means a partial short circuit.
Hazard warning lamps
Hazard warning lamps are fitted to all modern cars, for use only when the car is stationary and a hazard to other drivers.
Operation of the hazard warning switch bypasses the normal switch, using the flasher unit to send signals to all the indicator lamps simultaneously.
Heavy-duty flashers
If a car is to be used for towing a caravan or other type of trailer, an electrical connecting socket must be fitted for the trailer's lights, along with the tow bar.
The existing flasher unit is not powerful enough to serve the extra lamps, and so a heavy-duty unit (or an extra remote unit) must be fitted.
The heavy-duty unit operates the car's normal flashers when driving without the trailer, with no effect on flashing speed and with no extra load on the lamps.
The unit has an extra terminal prong for the extra flasher warning lamp (also required by law) for the trailer connection.
The terminal prong may have to be bent to a 90 degree angle and the warning-lamp terminal fitted on to it before plugging in the heavy-duty flasher unit.
The additional warning lamp can be fitted permanently into the instrument panel, or mounted on a bracket where the driver can see it.
If the car flasher unit is located in an inconvenient place, such as inside the instrument panel, tow-bar centres can supply an additional remote flasher unit instead of a heavy-duty unit.
A remote unit can be placed anywhere convenient, such as in the boot. It must be wired into the existing flasher system. Follow the maker's instructions when fitting it.
The switch on the steering column
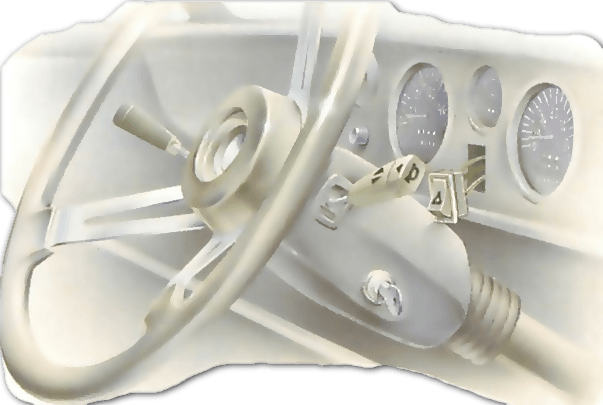
On most modern cars with multi-function switches on the steering column , the connectors are complicated - patience is needed to check them.
The switch may have been bent, broken or dirty connections which prevent it form working on one or both sides.
Connect the tester between one output terminal of the switch and the earth. With the ignition on, turn the switch to that side. The lamp should light.
If it does not, the switch is faulty. If it does, look for a wiring break break between the switch and the lamps on that side.

The Ultimate Car Mechanics video course
Learn everything about modern cars from our new video series.
Learn more >-
We build a Mazda MX5 Miata from scratch
We start by tearing down and then rebuilding the whole car.
-
Every part explained
There's ridiculous detail on every part. Clearly and easily explained.
-
All modeled in 3D
We've created the most detailed 3D model ever produced so we can show you everything working.
Super detailed explanations in the video course
15 hours of pro-quality, HD content with subtitles
The
video
course
Bonus: Dismantling the engine

Engine Block

Crankshaft

Tools: Using a tap set

Using an engine stand

The Pistons
