in Fuel systems
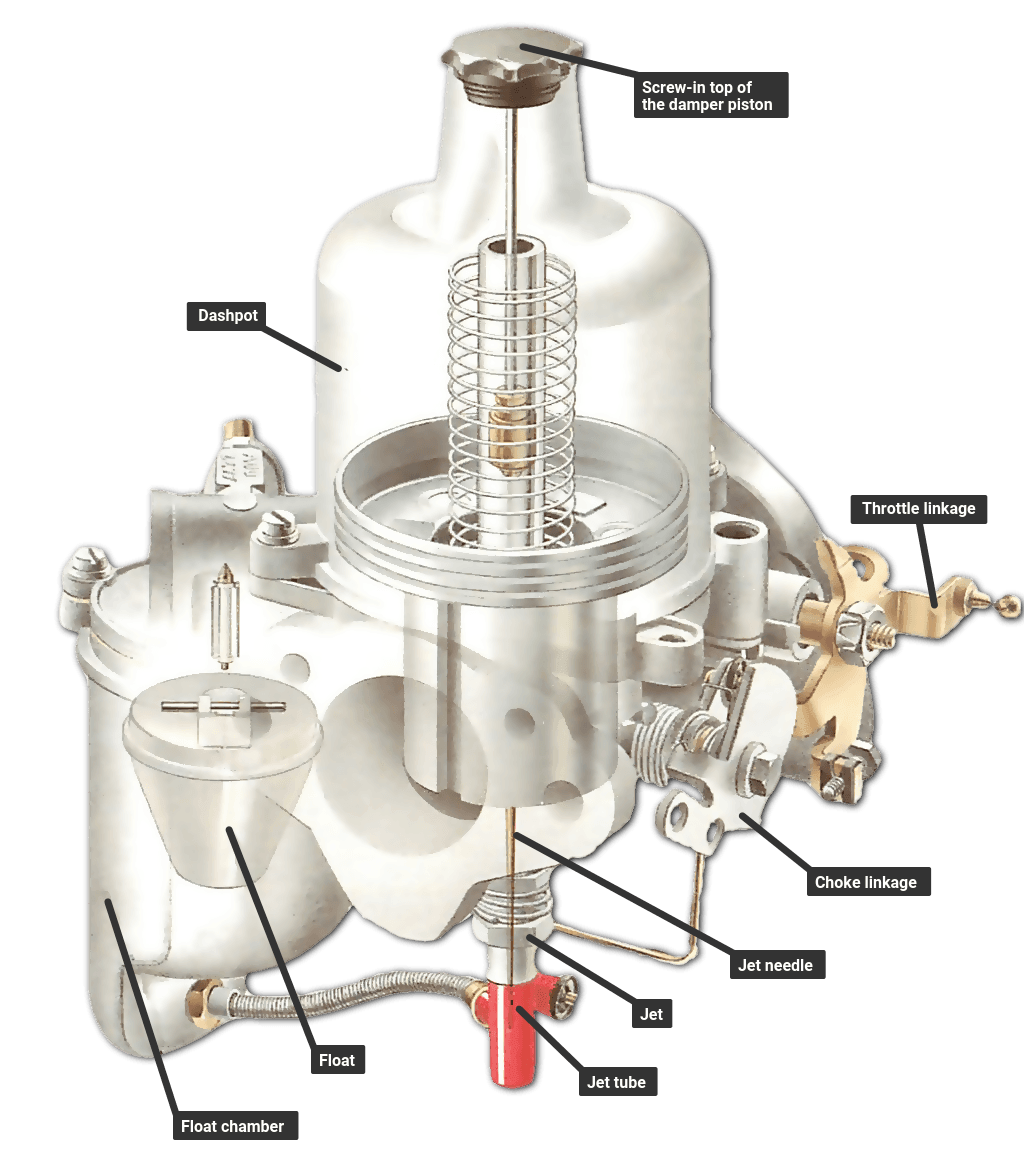
The SU carburettor is simple to strip. It has only one jet (except in a few special types) and very few moving parts. It is very reliable, but it can become dirty and choked — and some parts wear out.
The most common type of SU is the HS. The HIF, overleaf, differs in some ways. They should be removed from the engine for cleaning.
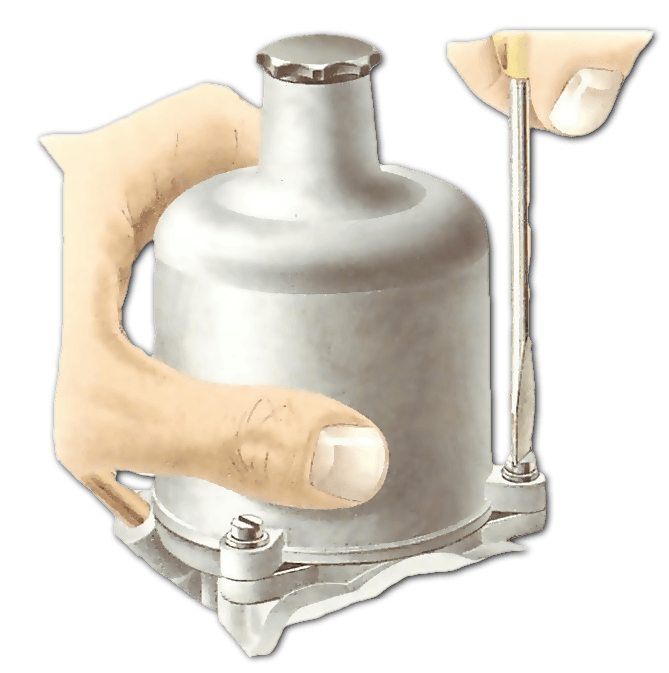
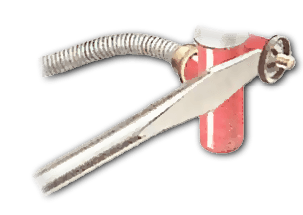
Unscrew the damper and pull it out of the ' dashpot ' (properly called the piston chamber). It may pull straight out, or you may have to unfasten a circlip to free it.
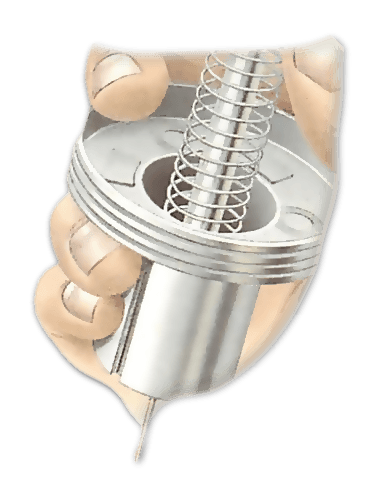
Mark how the dashpot fits on to the main body so that you can replace it as it was. If it is turned, the piston may stick.
Remove the screws holding the dashpot. Lift it off.
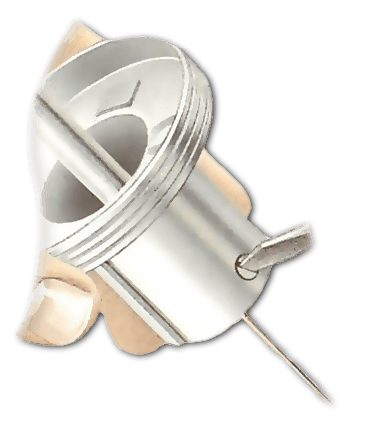
Pull out the piston carefully, straight upwards. It is easy to bend the jet needle.
There are dozens of jet-needle sizes: the type number is stamped on the shank of the needle.
Remove the needle by loosening the grub screw in the side of the piston.
Early carburettors have a rigid needle with a shoulder or groove which must fit level with the bottom face of the piston.
Later models have a flexibly mounted needle. This hangs at an angle and must be fitted the right way round.
Look before you remove it. There may be an etch mark pointing either towards or away from the butterfly plate .
Alternatively, there may be a notch which lines up with a groove in the needle guide.
Renew the jet needle if it is bent or looks worn. Wear is hard to assess visually on a centred needle. The needle wears imperceptibly over a period by fuel flowing past it at the mouth of the jet.
Wear spots will show as shiny patches on the needle if it is not centred - particularly at the thick end on a flexibly mounted needle, which actually bears against the lip of the jet on one side.
If in doubt, renew the needle at major service intervals or after two or three years, according to mileage. Or examine it closely against a new one.
If the carburettor hs a plastic emission-control seal prise it off and throw it away.
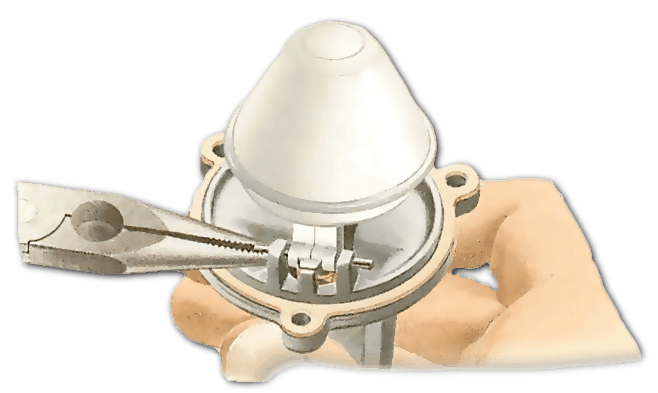
Disconnect the jet from the choke linkage . On older models you do this by removing one self-tapping screw - do not lose the spacer washer under it.
Alternatively, there may be a circular, toothed spring clip. Lever this off this with a screwdriver.
The largest models have a different linkage. There is a fork with two clevis pins held in place by split pins.
Sometimes the linkage includes a bimetallic disc for adjusting the mixture to suit the temperature. Pull out the split pins and clevis pins.
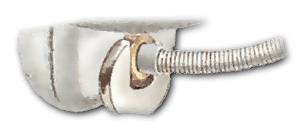
Unfasten the nut which holds the jet tube on to the float chamber. Pull the tube free. A small rubber sealing ring will probably stay inside the joint. Prise it out with a small screwdriver.
Pull the jet out of the carburettor. Look at its hole. If it has worn oval, renew the jet.
Prise off the spring clip on the choke linkage.
Undo the nut holding the jet tube to the float chamber.
Wash all parts in petrol and blow through the jet to clear it - use a foot pump if you have one.
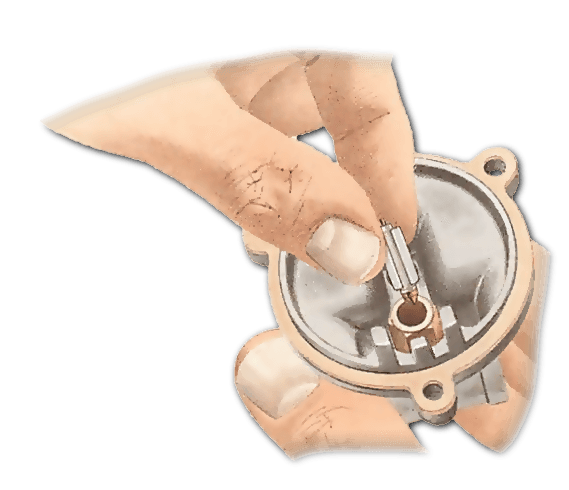
To reassemble the jet, slide the metal ferrule into the end of the jet tube. Fit the metal washer over the end, then the rubber seal.
Leave at least 5 mm of tube sticking out of the end of the seal. Insert the tube into the float chamber. Tighten the nut.
When you reassemble the dashpot, note that the piston has a groove in one side and fits in only one way. If the carburettor has a rigid needle it must be centralised in the jet.
Disconnect the fuel pipe from the top of the float chamber.
Remove the three screws holding the top on the float chamber.
Lift the top off with care: the float hangs from it and its pivot arm is easily bent, which will upset the critical fuel level in the chamber and cause either fuel starvation or flooding of the carburettor (See Adjusting an SU carburettor ).
Check the bottom of the bowl for sediment and remove any by dislodging it with a small screwdriver. Wash out the bowl with clean petrol and wipe dry with a lint-free cloth. Replace the top with a new gasket and tighten the screws evenly. Refit the fuel pipe to the chamber top.
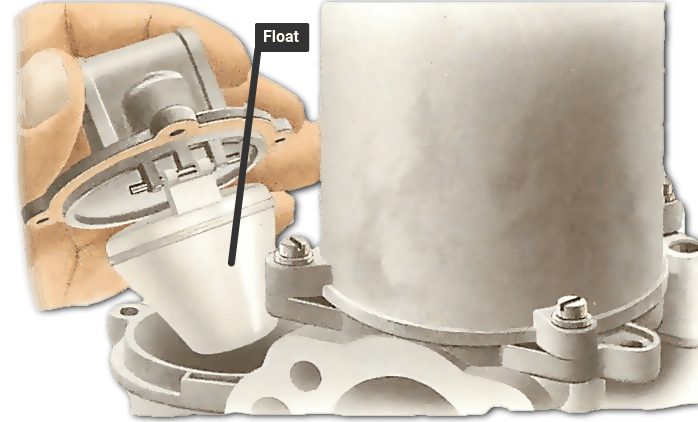
Pull out the float pivot pin with pliers. Mind you do not drop the float as it comes free, or lose the needle valve as it drops out of its housing.
Use a spanner to unscrew the housing from the chamber top: there may be dirt inside it.
Look at the needle valve . If a groove has been worn at the pointed tip, it cannot seat properly and may allow the chamber to flood - to overfill with fuel. Renew it.
After cleaning and reassembly, check the float height, which governs the level of fuel in the chamber.
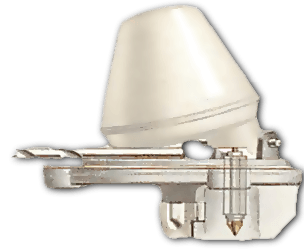
Hold the chamber top upside-down and level. The gap between the float and the top should be between 8 in. and in. (3mm and 5mm).
If the gap is wrong, you can sometimes adjust it by bending the float arm - but only when the arm is metal. You cannot adjust an all-plastic float.
Bend a metal arm carefully at its outer end. Do not bend it at the float end, in case you loosen its fastening to the float, which may cause a leak.
If the float has a crack or split, do not seal it with glue. The weight of the float is critical. You must replace it with a new float.
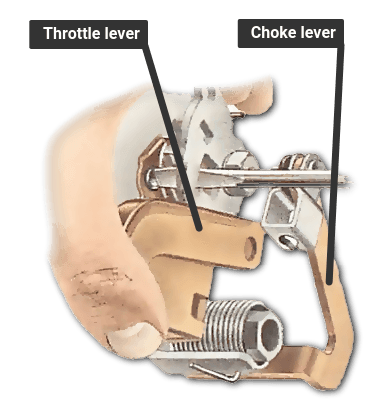
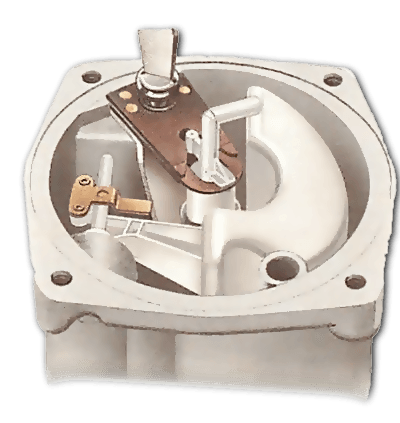
Remove the linkage to clean the carburettor. The retaining plate is held on by two screws.
Usually there is a square hole in the fast-idle cam . Turn the cam to reach one of the screws through the hole. Otherwise, remove the cam.
With the retaining plate free, pull the choke assembly out, taking care not to damage the seals.
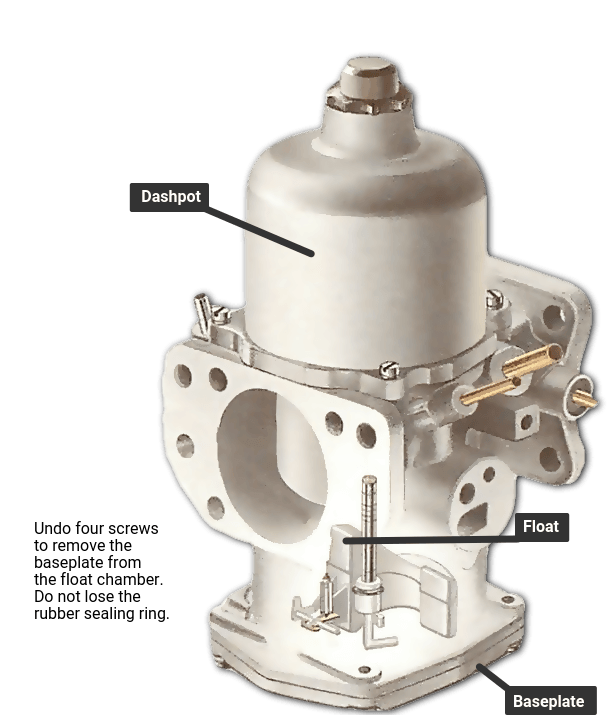
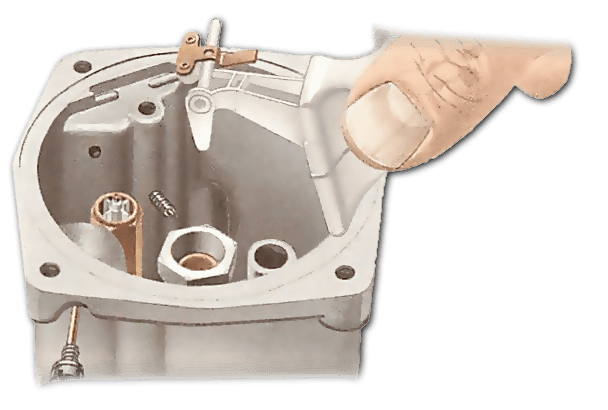
Undo four screws to remove the baseplate from the float chamber. Do not lose the rubber sealing ring.
Fixed-jet carburettors are easily blocked by small dirt particles and chemical residues from f...
The Varajet carburettor used on many Vauxhalls and Opels is a hybrid between fixed-jet and vari...
The Ford Variable Venturi carburettor is fitted to many small Fords.
The Stromberg carburettor does not have a regular service schedule, but should be cleaned about...