Fitting a towing socket
The Video Course teaches you everything about modern cars.
A caravan or trailer must, by law, be fitted with certain warning lights. These are wired up to a standard plug socket called a 12N socket which provides a 12 volt supply to power the indicators, stop lights, tail-lights, number-plate illumination and fog lights.
While the 12N socket is adequate for operating the obligatory lights, you may want to run power from the car for other, non-essential accessories such as reversing lights. A caravan without its own battery may also need extra power for interior lights, a refrigerator or a water pump . For this you need an extra towing socket.
Supplement
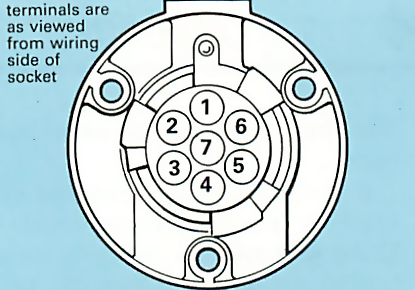
The extra socket that is fitted to the car to provide the power needed for these additional items is known as a supplementary or 12S socket. It is fitted near to the original socket and, like the original one, has a seven pin connection inside. You can identify the supplementary sockets by their grey or white caps.
The standard sockets have black caps.
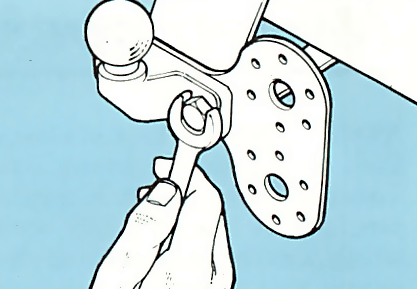
If you are fitting a tow bar, and you intend towing a caravan, it is worth while fitting both types of socket.
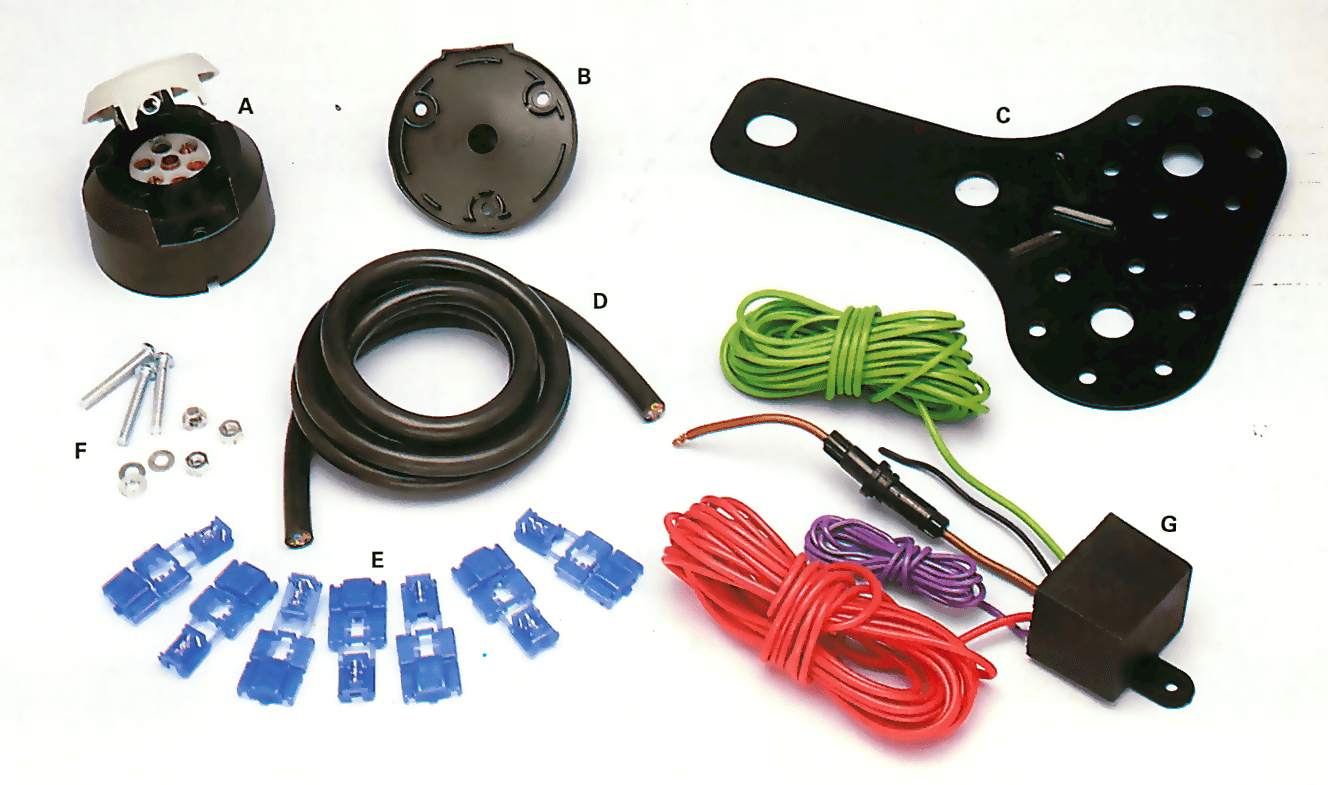
You can buy both ordinary 12N sockets and supplementary 12S ones in the form of a complete kit from an accessory shop or towing specialist. The kit should include all the items you need to fit the socket to the car such as mounting brackets, wiring, weatherseals, indicator relay , dash-mounted warning light and securing screws.
Relay
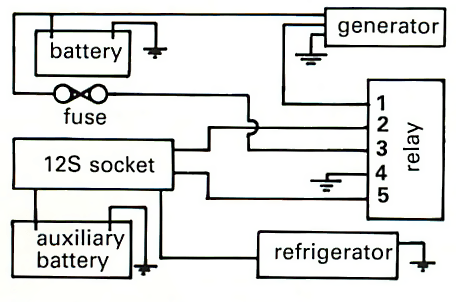
If your caravan has a built-in battery you need some way of keeping it charged up. You can, of course, plug in a mains battery charger if there is a convenient supply, but another option is to fit a special combination relay that is connected into the car's charging circuit . This allows the car's generator to charge the auxiliary battery.


The Ultimate Car Mechanics video course
Learn everything about modern cars from our new video series.
Learn more >-
We build a Mazda MX5 Miata from scratch
We start by tearing down and then rebuilding the whole car.
-
Every part explained
There's ridiculous detail on every part. Clearly and easily explained.
-
All modeled in 3D
We've created the most detailed 3D model ever produced so we can show you everything working.
Super detailed explanations in the video course
15 hours of pro-quality, HD content with subtitles
The
video
course
Bonus: Dismantling the engine

Engine Block

Crankshaft

Tools: Using a tap set

Using an engine stand

The Pistons
