Coil springs replacement
The Video Course teaches you everything about modern cars.
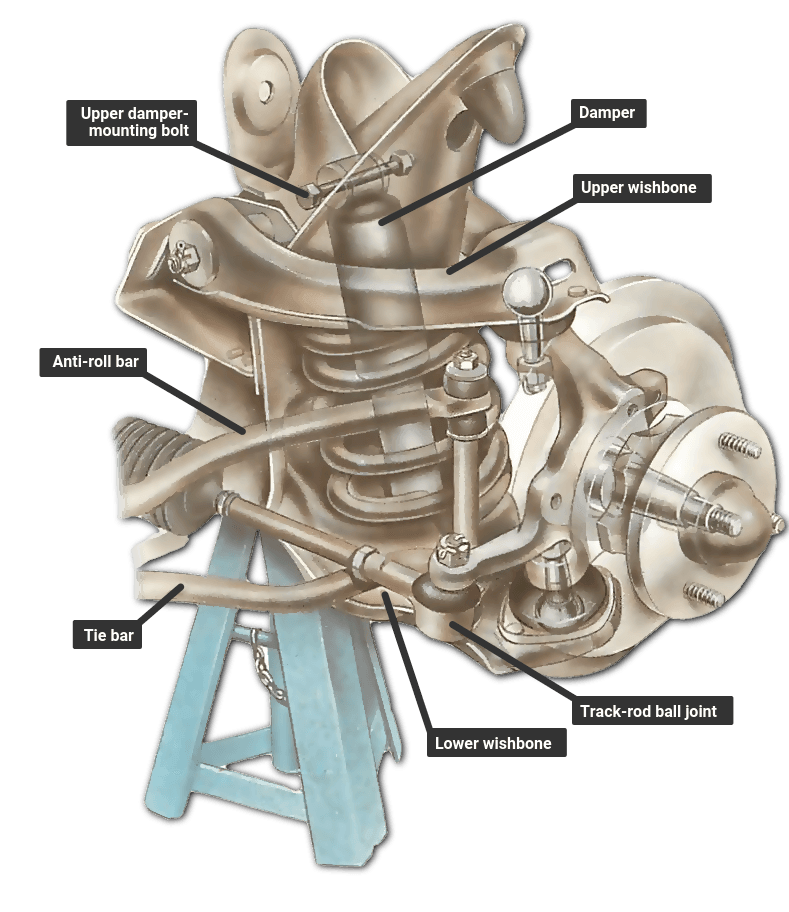
If you have to replace a coil spring on the front suspension , the replacement spring must be of the correct rating.
It is also best to replace both front springs — the other one may not match exactly the rating of the new spring to be fitted.
Check the rating with your local dealer. Springs are normally identified by coloured paint markings.
Removing a spring
Raise the car with a jack, and support it on axle stands beneath the frame . Apply the handbrake securely and chock the rear wheels. Remove the raised wheel.
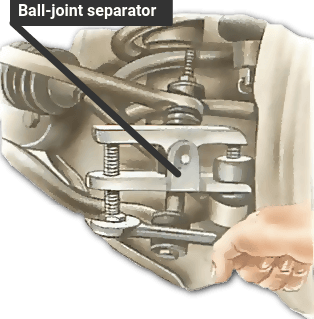
Remove the locking pin (if fitted) and unscrew the track-rod ball-joint nut at the steering arm . Disconnect the joint from the steering arm, using a ball-joint separator .
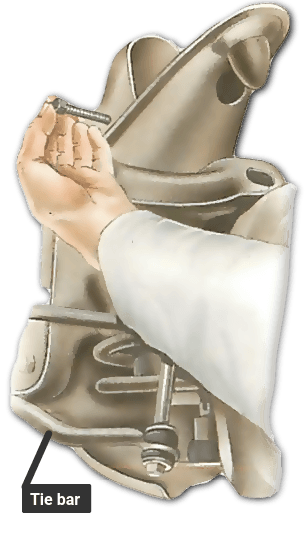
Disconnect the anti-roll bar and tie bar, if fitted (See How to replace anti-roll-bar bushes ).
On some cars you have to loosen the steering- rack U-clamp bolts and move the rack, to prevent damage to the lower-wishbone fulcrum bolts and the rack gaiters.
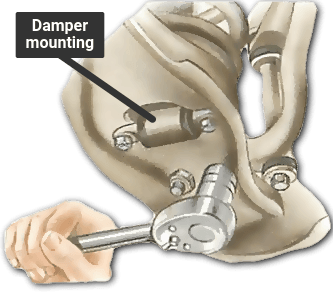
On many cars the damper is fitted inside the coil spring, and must be removed. To remove, place a jack beneath the wheel hub and raise it far enough to relieve the loading on the damper.
Release the upper and lower damper mountings and remove the damper through the hole in the lower wishbone. Lower and remove the jack.
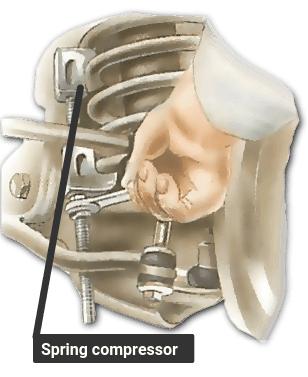
Fit the spring compressor clamps opposite to each other on the coils. Tighten them to compress the spring.
Remove the locking pin (if fitted) and the nut from the ball joint at the end of the lower wishbone, where it is connected to the steering swivel member. Separate the joint.
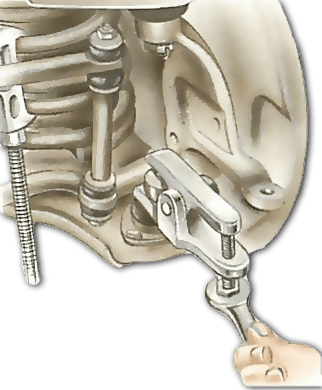

Tie up the upper wishbone and the steering swivel member (also called the stub axle). Carefully drive out the fulcrum bolt or bolts from the inner end of the wishbone, using a drift of slightly smaller diameter.
Take a note of the way these bolts are fitted, and also of any rubber insulators or cups fitted at the top of the spring, to aid reassembly.
Unscrew the spring compressor clamps a little at a time on each side to release the tension.
When all the tension in the spring has been released, remove the spring from the lower wishbone.
Fitting the new spring to the wishbone
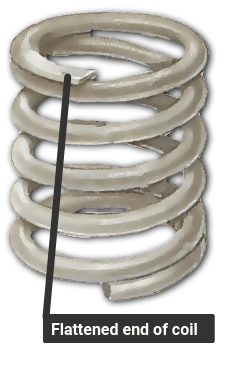
The top coil of the new spring may be different in shape from the bottom coil. Be sure you insert it right side up.
Compress the new spring with the spring compressor clamps, and place it on the lower wishbone. Make sure the bottom of the spring is seated properly. Reconnect the lower-wishbone ball joint to the stub axle, screwing the nut until finger tight.
Make sure the top of the spring is seated properly and that any rubber cups or insulators have been properly inserted. Reconnect the inner ends of the wishbone with the fulcrum bolt(s).
The wishbone will be easier to refit if the bushes are smeared with petroleum jelly. (Do not tighten the fulcrum bolts fully until the car has been lowered to the ground at a later stage when its weight is on all four wheels.)
Remove the spring compressor clamps carefully. Reconnect the track rod and ball joint and the anti-roll bar or tie rod , if fitted.
If necessary, retighten the steering-rack U-clamp bolts and replace the damper inside the spring.
Make sure that all nuts and bolts are fitted correctly and tightened to the correct torque as recommended by the car maker. Consult a service manual for the car, or your local dealer if necessary.
Use new split pins to lock the ball-joint retaining nuts in place.

The Ultimate Car Mechanics video course
Learn everything about modern cars from our new video series.
Learn more >-
We build a Mazda MX5 Miata from scratch
We start by tearing down and then rebuilding the whole car.
-
Every part explained
There's ridiculous detail on every part. Clearly and easily explained.
-
All modeled in 3D
We've created the most detailed 3D model ever produced so we can show you everything working.
Super detailed explanations in the video course
15 hours of pro-quality, HD content with subtitles
The
video
course
Bonus: Dismantling the engine

Engine Block

Crankshaft

Tools: Using a tap set

Using an engine stand

The Pistons
