
How to fit an oil radiator

Oil cooler kit
The Serckspeed kit contains hoses (A), radiator (cooler) (B), radiator mounting brackets (C) with nuts and bolts (D), adapter (sandwich block) (E), in-line thermostat (F) and plastic ties for securina hoses (G).

The oil in your engine needs to be kept at an optimum temperature so it can still carry heat away from the engine and lubricate the moving parts properly. If the temperature of the oil is allowed to rise, the oil will become too thin to lubricate properly and too hot to disperse heat, and there will be a risk of damage to the engine.

Car engines are designed so that the oil does not overheat under normal running conditions. But if an engine has been modified to give greater performance, or is used frequently for towing heavy objects such as a caravan, there may be a possibility of the oil getting too hot. In this case it is a wise precaution to provide extra cooling for the oil.

Cool it

The answer is to buy an oil-cooler kit to fit to the car. These are fairly expensive, but not as expensive as repairing an engine that is damaged because of overheating.

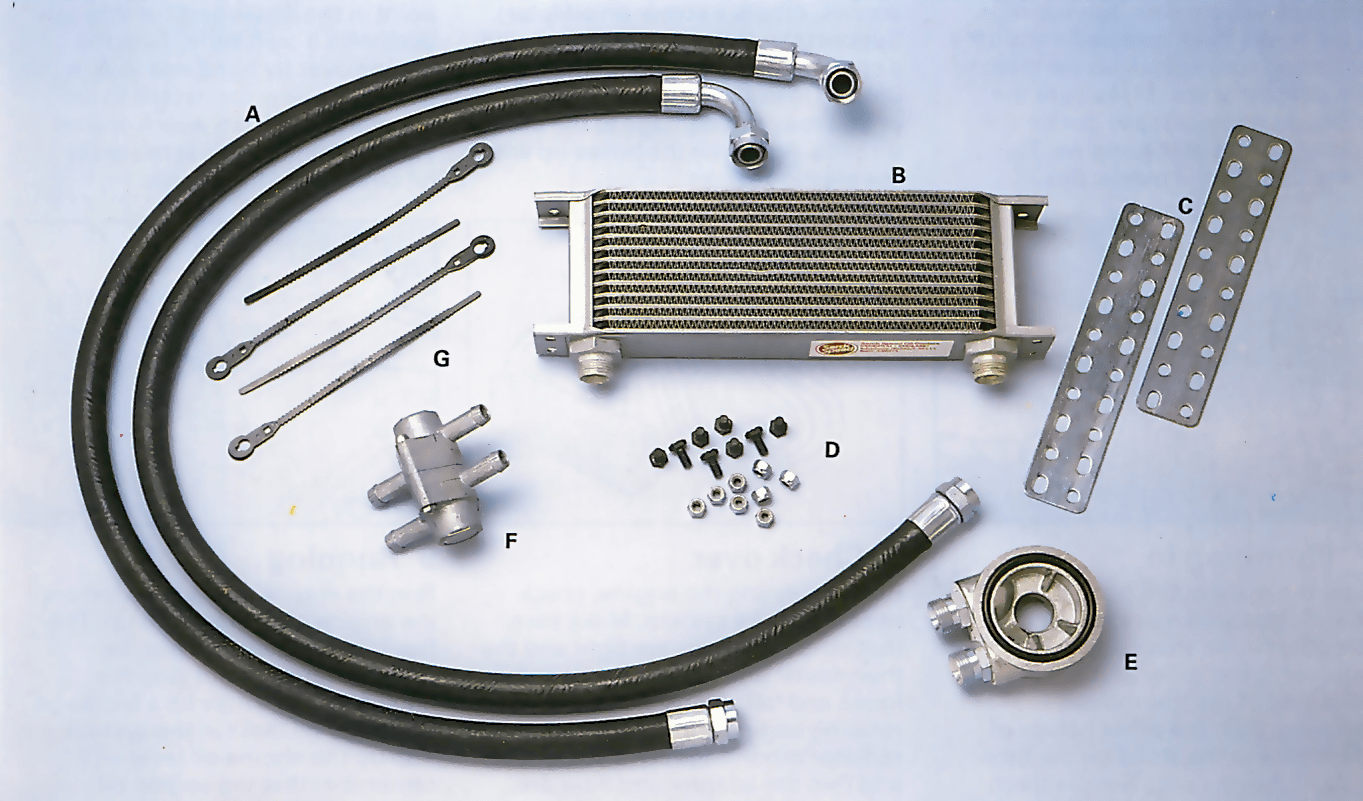
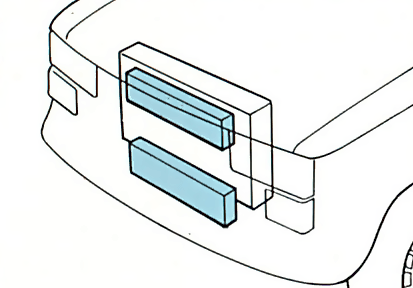
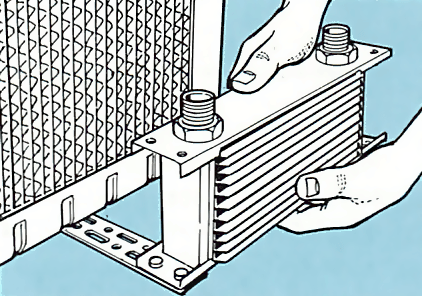
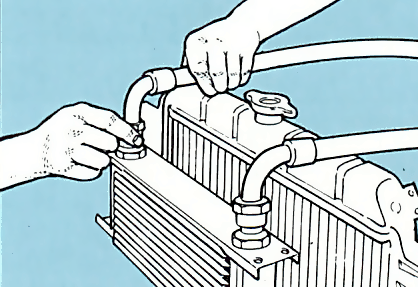
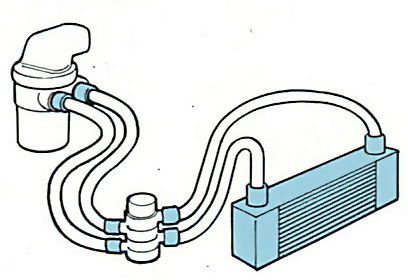
The main part of the kit is a radiator , sometimes known as the cooler. This looks similar to a small water radiator and, like most normal radiators, it is mounted in the main airflow for maximum cooling effect.

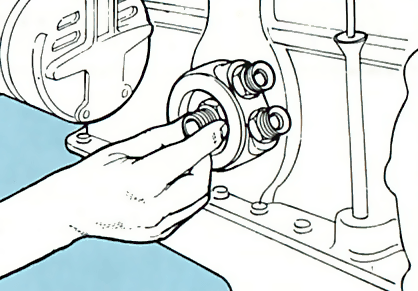
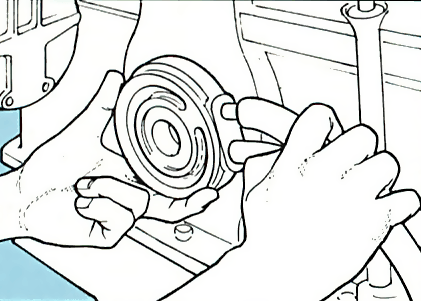
To join the radiator to the rest of the engine, you use a special adapter or sandwich block. This fits to the engine where the oil filter normally mounts, and the filter is then mounted on to the outer end of the adapter.

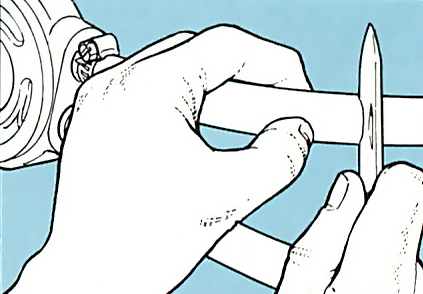
The adapter is joined to the radiator by two flexible rubber hoses one a feed, the other a return. All the necessary mounting brackets and securing clips are supplied with the oil-cooler kit.

Thermostats

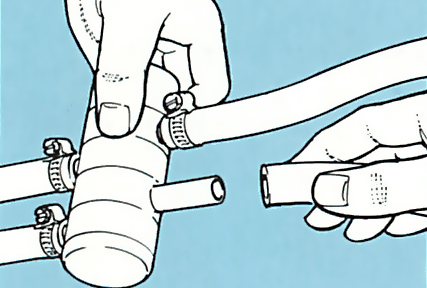
As with water-cooling systems, there is a danger of the oil being over-cooled if it is allowed to flow through the radiator all the time. A thermostat is often fitted to overcome this problem. It is normally plumbed into the hoses, though on some systems it is built into the bottom of the oil radiator.

1. Mounting position
In most cases the oil cooler can be mounted between the main radiator and the grille for maximum airflow. But on some cars you may have to mount it low down behind the front valance. Some coolers have to be mounted upright; others can be on their side or even upside down.
2. Bracket fixing
Use the brackets in the kit to secure the cooler to the body. Bolt a bracket loosely to each corner of the cooler, then attach the brackets to the car. You may be able to attach them to the main radiator mountings or you may have to drill holes in the body. Bolt the brackets in place and tighten all bolts.
3. Remove filter
Remove the old oil filter (have a container ready to catch the spilt oil). Lightly oil the sealing ring on the adapter and offer it up to the filter head. Screw the extension bolt through the adapter and do it up hand tight. Fit a new filter and tighten it up.
4. Fit hoses to adapter
If the hoses are the push-on type, ease them over the stubs on the adapter. Secure with Jubilee clips. If the hoses have screwed ends (or a screw-on connector), screw them to the'adapter stubs. Make sure the pipes do not touch any hot or rotating parts of the engine. Tie them up with the plastic ties.
5. Fit hoses to cooler
Screw the hoses hand-tight to the cooler (some pipes have built-in screws, others a screw-on adapter). Support the stubs on the cooler with a spanner while you do up the hose union. Do not overtighten the nuts or you may risk damage to the union threads. Again, tie the hoses up with the plastic ties.
6. Thermostat position
The thermostat fits in-line along the flexible hoses. Find a suitable point in the hoses and cut through both with a craft knife. Turn the engine over by hand and look at the two hoses now connected to the adapter. Note from which one oil starts dribbling: this is the main oil outlet from the engine.
7. Plumbing in
Join the main outlet hose to the thermostat stub marked 'inlet'. Join the other hose attached to the adapter to the other stub on the inlet side of the thermostat housing. Join the other halves of the hoses to the stubs on the other side of the housing. Secure them with Jubilee clips.
8. Check over
Before running the engine, check over the entire system. Make sure that all connections are tight and the thermostat and hoses cannot come loose and fall against hot or rotating engine surfaces. Check the radiator mountings are also tight and that the adapter and filter are securely in position.
9. Running
Run the engine at idling speed until the engine starts to warm up. The flexible hoses should also be getting warm — if not stop the engine as there may be a blockage. Check for oil leaks in the system. Top up the engine oil level remember that the engine oil capacity will be increased.
Engine Block 18 minutes
Stop wasting time on YouTube and get serious!

The Ultimate Car Mechanics video course

Learn everything about modern cars from our new video series.

Learn more >
  • We build a Mazda MX5 Miata from scratch

    We start by tearing down and then rebuilding the whole car.

  • Every part explained

    There's ridiculous detail on every part. Clearly and easily explained.

  • All modeled in 3D

    We've created the most detailed 3D model ever produced so we can show you everything working.

Start watching

Super detailed explanations in the video course

15 hours of pro-quality, HD content with subtitles

icon-search