Diagnosing faults in automatic transmission
The Video Course teaches you everything about modern cars.
Although they are considerably more complicated than manual gearboxes, with control and operating functions in addition to the gears , modern automatic transmissions are less likely to give problems than their manual counterparts.
Reliability
The main reason for this greater relibility is the fact that the gears are engaged smoothly by the operation of internal clutches and brake bands under automatic control, so minimizing the possibility of maltreatment, shock loading and gear crashing, and the mechanical damage that can result from these.
When problems do occur they are often caused by the external control linkages , or a low fluid level, and can often be dealt with without having to strip the transmission . Internal transmission faults generally call for specialist equipment and knowledge and are best left to a service engineer - after you have checked to make sure that the problem really is internal.
The close linkage between engine and transmission can make faultfinding difficult, so before you blame the transmission for bad performance you need to check that the engine is in good tune. Bumpy starts and gear shifts, for example, can be caused by a high engine idle speed .
Simple checks
By far the most common cause of trouble with an automatic gearbox is incorrect fluid level (see sideline, opposite). If that seems to be all right, you need to do a test to discover whether the problem is in the gearbox, the torque convertor or the engine.
A general lack of performance with poor acceleration and bad hill starting can be due to a fault in the torque convertor. With some models it is possible to check the convertor by carrying out a stall test , though this procedure is not suitable in all cases. Find out from your manual (or your dealer) if you can do the test, and also what is the specified stall speed for your transmission.
With the engine running and both the engine and transmission properly warmed up apply the footbrake firmly, select the lowest gear and fully depress the accelerator pedal so that the engine revs up - keep it going until the revs stop rising.
Using an accurate rev counter, make a note of that engine speed (called the stall speed). Release the accelerator and return the selector to neutral. Do not hold the transmission in the stalled condition for more than ten seconds or you may cause serious damage.
Compare the measured stall speed to the specified value. A reading just below the specified value means that the engine is probably out of tune, but a significantly lower reading (say 500rpm down) shows that there is a convertor fault. A high stall speed points to a problem with the fluid supply to the convertor, or to an internal fault in the rest of the transmission. To find out exactly where the problem lies, you will need to do the tests shown in the faultfinder chart below.
Fluid transmission level and condition
First check the fluid level. A need for frequent topping up shows that there is a leak somewhere in the transmission which should be traced and put right as soon as possible.
Try standing the car over some newspaper laid out on the ground . Start the engine and operate the transmission lever a couple of times. Any drips will show up on the paper and their position will give you a good idea where the fluid is coming from. If the level is all right, you should check the fluid condition. The condition of the transmission fluid can often provide a useful guide to transmission condition. Put a smear of fresh fluid on some white kitchen paper to give a comparison and then use the dipstick to obtain a sample of the fluid from the transmission, again smearing it on paper.
Hot fluid is thinner and will have a less pronounced colour but the two samples should appear much the same. Dark brown discoloration shows that the fluid has been overheated, while the presence of black specks points to heavy wear of the internal clutches and brake bands and an internal investigation will probably be needed — especially if your other tests show the transmission is not working properly.
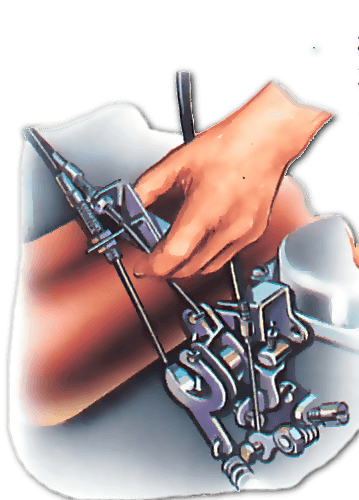
Adjust the parking cable
On some cars, the parking brake is operated by a separate cable from the rest of the gear selector linkage. It must be correctly set or the brake may not work.
Find out from your workshop manual where the adjuster is—it may be at the gearbox or somewhere under the bonnet.
Select 'park', then adjust the cable so that the parking brake pulls on. Then select neutral and check that the parking brake releases. You can do this by gently trying to push the car in each position.
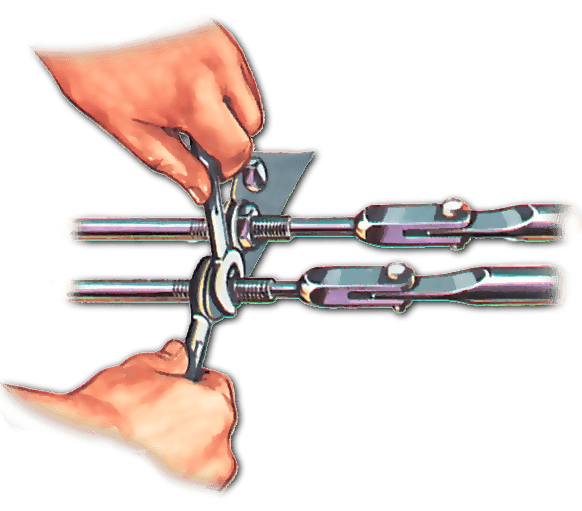
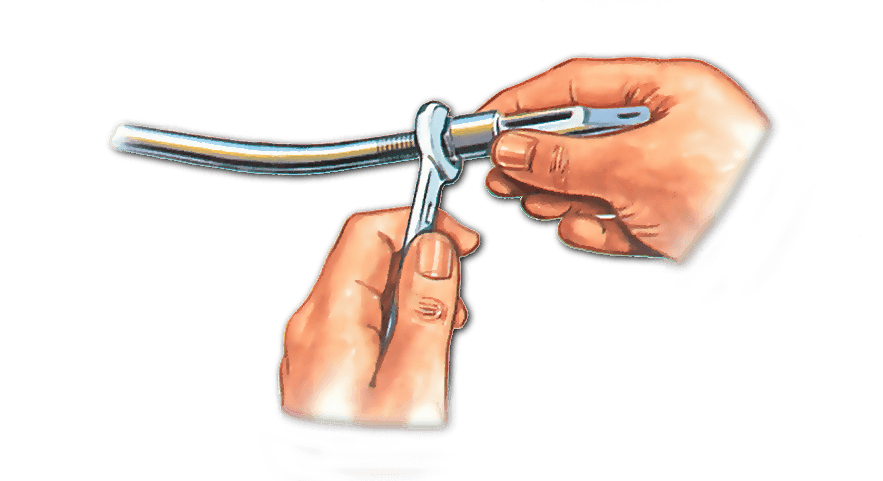
Reset downshift cable
The downshift cable, or in some cases linkage, provides the transmission with information about the accelerator pedal position which is used to adjust the speeds at which gearchanges occur.
Check for free movement of the cable by manually operating the throttle linkage. The cable should move up freely and return without kinking. If the movement is not free check along the outer cable to make sure it is not kinked or squashed.
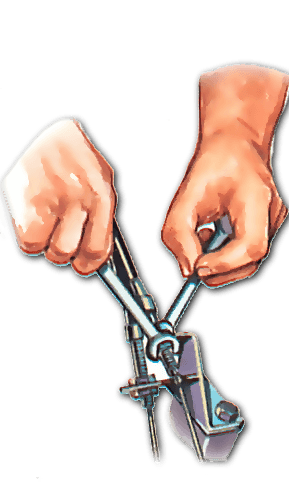
Pull on the cable itself to check there is a resistance to movement— if it pulls up freely with no resistance it is broken or has become disconnected in the gearbox. There should be a small amount of free movement in the throttle linkage before the cable, or linkage, comes into action.
You can make minor changes in the cable setting by releasing the locknut and using the adjusting screw. Make only small changes and check the effect by road testing.
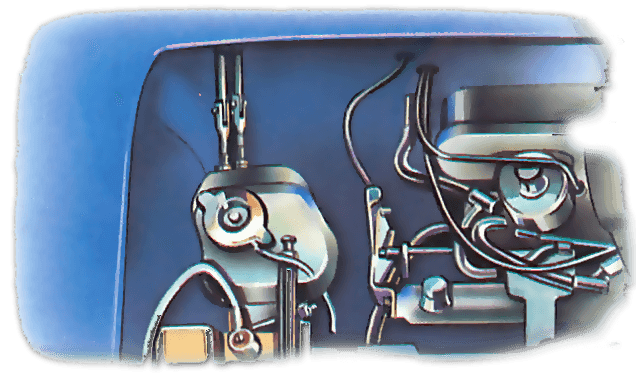
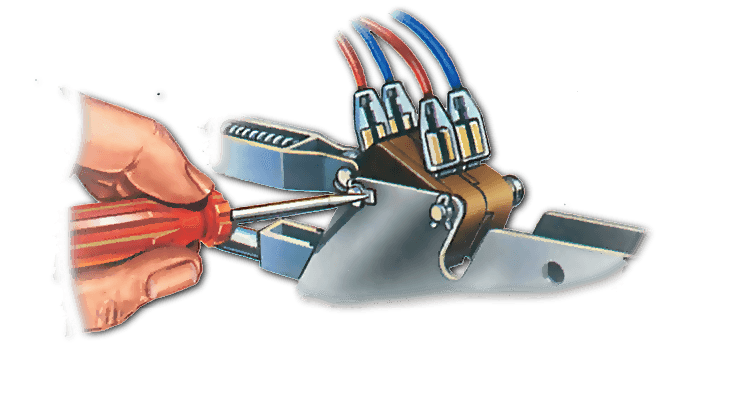
Test automatic inhibitor switch
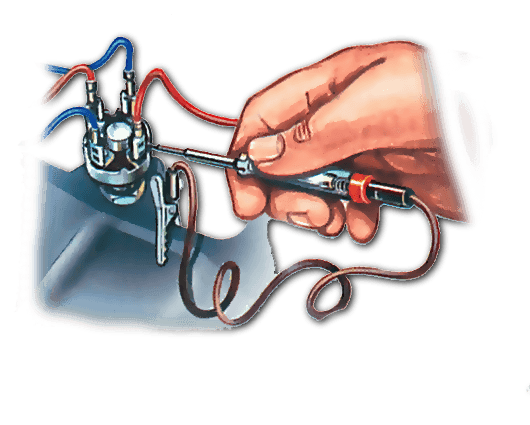
Most automatic transmissions are fitted with an inhibitor switch which lets you start the engine only when the transmission is in the 'neutral' or 'park' positions — often the switch includes an additional set of contacts for the reversing lights. Failure of the switch, or the associated wiring, will mean that you will not be able to operate the starter .
However, before you check the switch, try to start the engine in all the control lever positions because the problem could lie with the control linkage. If the starter will operate in any position other than 'park' and 'neutral', the linkage needs adjusting. Common positions for the inhibitor switch are on the transmission housing (close to the selector lever); at the end of the cable-operated control linkages (in front-wheel-drive cars); and by the side of the control handle inside the car. Using a test lamp check that there is a power supply to the inhibitor switch when the starter is being operated — you will need someone to help with this.
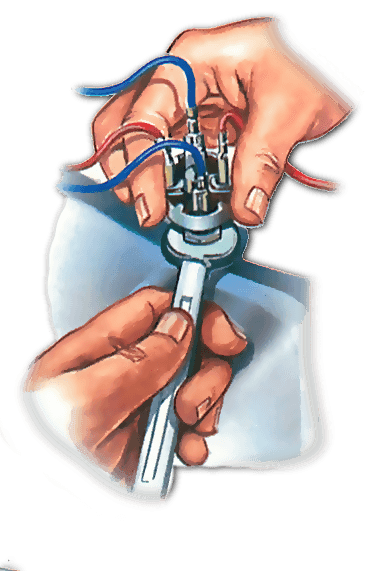
Then see if power appears on the output side of the switch when the selector lever is in the 'park' or 'neutral' position. If it does not, the switch needs adjusting or replacing. With some transmissions the switch can be adjusted by releasing a locknut and screwing the switch assembly into, or out of, its mounting.
Where the switch is by the control handle, adjustment is generally made by releasing the contact assembly mounting screws and sliding the assembly into a new position. After making any adjustments check that the starter will only operate in 'park' and 'neutral'. If you cannot get the switch to work by adjusting it, you will have to fit a new one.
Adjust control linkage
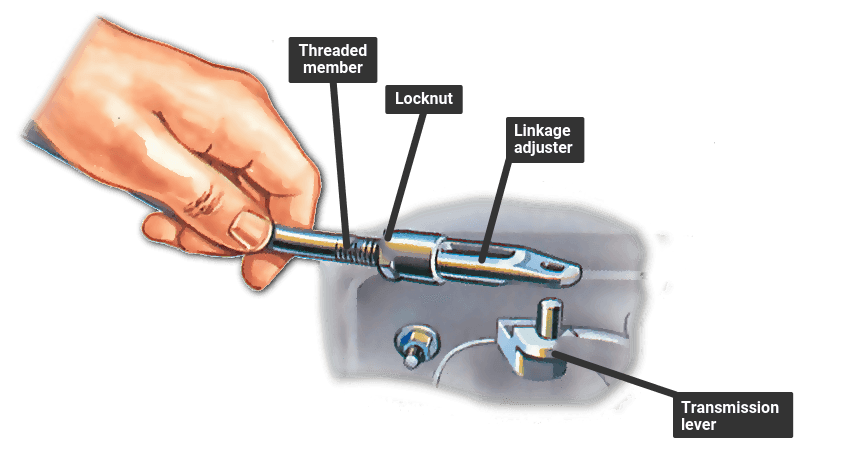
Incorrect alignment of the linkage between the control lever and the transmission can cause a variety of problems such as an inability to start the engine or to engage drive.
The precise method of adjustment varies with the type of transmission and the linkage design but the normal procedure is to disconnect the linkage where it connects to the selector lever on the transmission. The lever on the transmission and the selector inside the car are set to the same control position, generally 'drive' or 'park', and the linkage alignment checked.

The Ultimate Car Mechanics video course
Learn everything about modern cars from our new video series.
Learn more >-
We build a Mazda MX5 Miata from scratch
We start by tearing down and then rebuilding the whole car.
-
Every part explained
There's ridiculous detail on every part. Clearly and easily explained.
-
All modeled in 3D
We've created the most detailed 3D model ever produced so we can show you everything working.
Super detailed explanations in the video course
15 hours of pro-quality, HD content with subtitles
The
video
course
Bonus: Dismantling the engine

Engine Block

Crankshaft

Tools: Using a tap set

Using an engine stand

The Pistons
