Fixing a heated rear window
The Video Course teaches you everything about modern cars.
There are a number of possible causes for a rear window heater not working, including a blown fuse , a broken or chafed wire, a faulty switch , a damaged heater element or a bad earth connection.
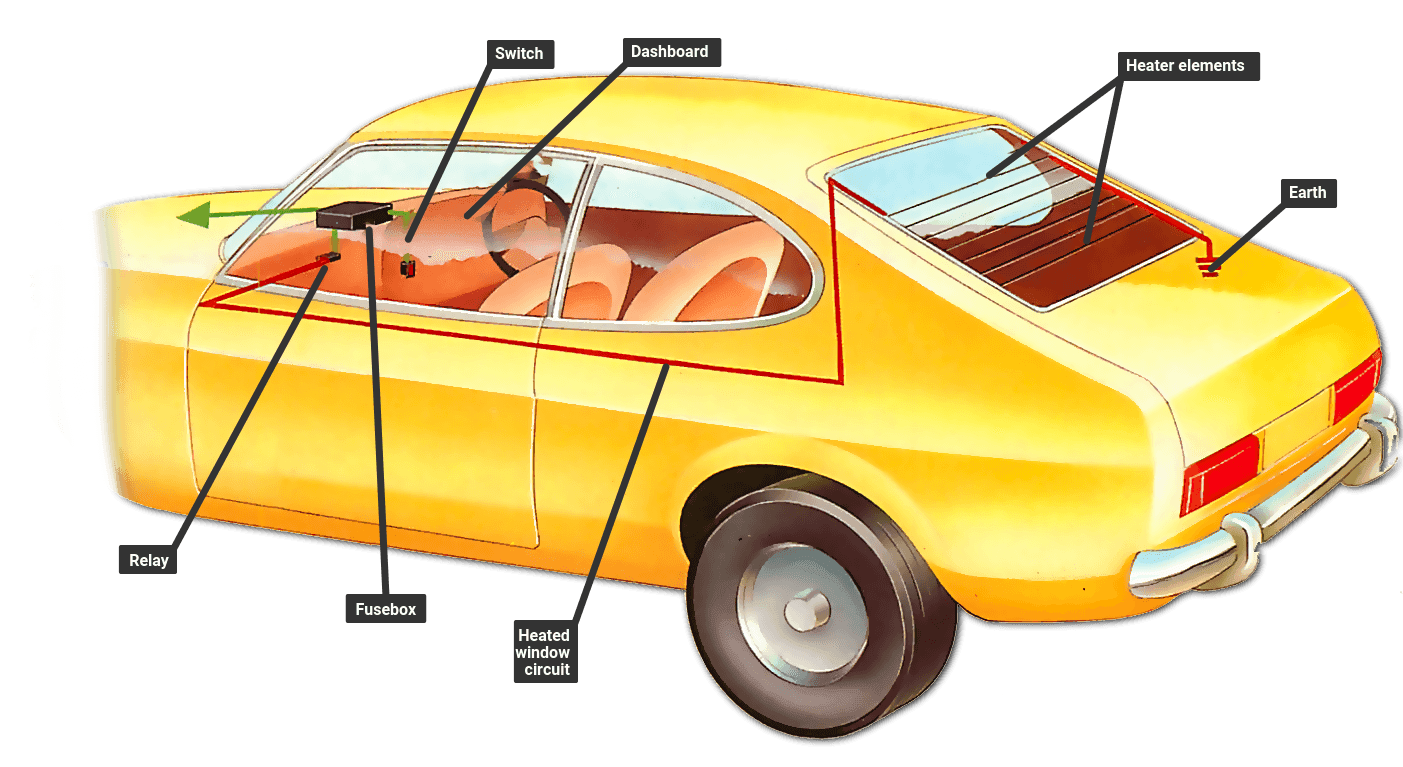
One of the most common and simple problems is a blown fuse. Find the fuse protecting the heated rear window circuit . On heaters fitted by the car manufacturer, the fuse is probably in the fusebox and protects other circuits too. After-market heaters have an in-line fuse fitted between the pick-up point for the live feed and the window heater switch.
Fuse check
Examine the fuse to see if it has blown. If it has, replace it and test the heater again: If the new fuse blows as soon as the heater switch is operated, there is a short circuit either in the switch or in wiring and you will have to check the switch and along the length of the wire to find it.
If the fuse looks intact, it is still worth replacing it to see if that solves the problem. But if the heater still fails to work, you will have to test the circuit with a test lamp.
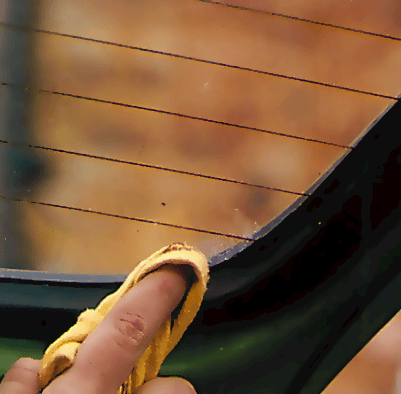
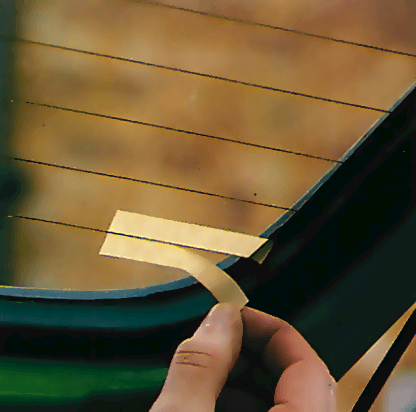
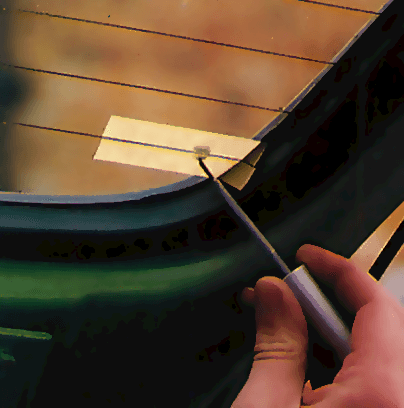
Repairing heater element with conductive paint

Test lamp check
Clip the lamp to a good earth point and probe the input side of the fuse. If the lamp fails to light, check the wiring between the battery and fuse for breaks or loose connections.
If the lamp lights, next check for current at the switch input terminal . If the lamp fails to light, check the condition of the wiring between the switch and the fuse.
If the lamp lights, touch the probe against the output terminal and turn the switch on. If the lamp now fails to light suspect a faulty switch. Look for signs of burning around the switch and check that it is not sloppy in operation. If the switch is faulty, fit a new one.
If the switch is working, next check between the switch and the heater element. Disconnect the wire where it joins the heater element and probe the wire with the test lamp. If no feed is evident trace the route of the wire back along the car and probe it at various intervals until you find the break or loose connection in the wire.
Element earth
If current is reaching the heater element, check the element earth wire. Make sure that the earth connection is clean and tight, and that the wire is not broken. If you see any corrosion around the earthing point, disconnect the wire, clean it off with wet-or-dry paper and smear vaseline over the area to prevent further corrosion.
Heater element
If you still cannot trace the fault, the problem must lie in the heater element itself. Look carefully at each element strip for any breaks. If you do find a break in one of the strips, you may be able to repair it depending on the type of heater.
Older heaters have their elements fitted inside the windscreen glass and in this case the heater can be replaced only by fitting a whole new window. Instead it is cheaper and more convenient to fit an after-market heater.
Modern heaters have the elements printed, or stuck, on to the screen with adhesive. They can be repaired using a special conducting paint, which is available from accessory shops.

The Ultimate Car Mechanics video course
Learn everything about modern cars from our new video series.
Learn more >-
We build a Mazda MX5 Miata from scratch
We start by tearing down and then rebuilding the whole car.
-
Every part explained
There's ridiculous detail on every part. Clearly and easily explained.
-
All modeled in 3D
We've created the most detailed 3D model ever produced so we can show you everything working.
Super detailed explanations in the video course
15 hours of pro-quality, HD content with subtitles
The
video
course
Bonus: Dismantling the engine

Engine Block

Crankshaft

Tools: Using a tap set

Using an engine stand

The Pistons
