How to align headlights at home
The Video Course teaches you everything about modern cars.
Only a garage with special equipment can align headlamps accurately. However, you may need to do it temporarily yourself if you have had to remove the lamp unit or fit a new one.
You may also need to do so if you have to make a night journey with the car so heavily loaded at the back that the beams are angled upwards.
Do not try to adjust four-headlamp systems. They are too complicated for the simple method outlined here.
To do the job, load your car to the level at which you propose driving it, then drive to level ground with a plain wall (or garage doors) at one end.
Marking the wall
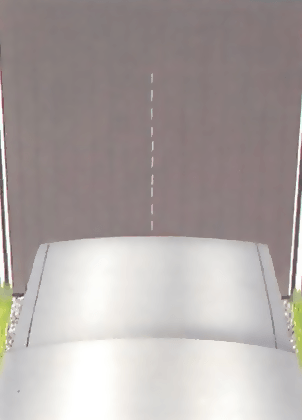
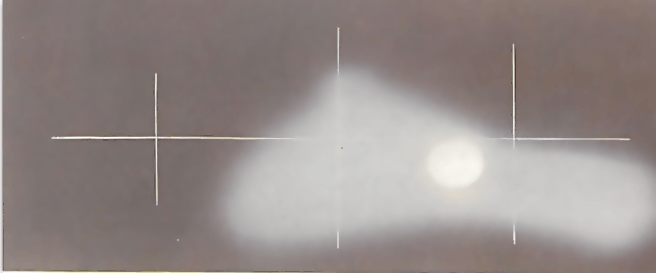
Drive the car close to the wall, facing it at right-angles. Bounce the car to settle the suspension , then chalk a vertical line on the wall opposite the centre of the car.
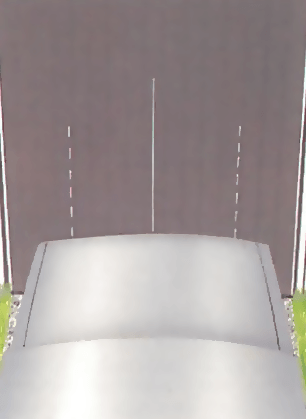
Measure the distance between the headlamp centres, halve this figure and draw two more vertical lines at the same distance on each side of the centre line.
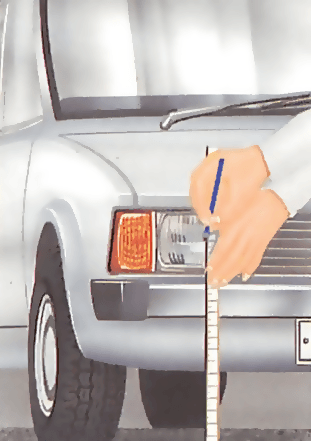
Measure the height of the lamp centres and draw a horizontal line at this height across the three vertical lines.
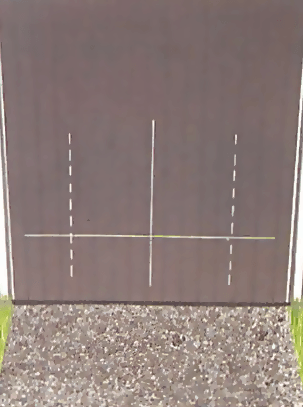
The outer crosses should now be exactly in front of the lamp centres. Emphasise them with chalk so they stand out clearly.
Back the car straight from the wall for 25 ft (8 m). Make sure it is pointing exactly at the centre cross. Bounce it again.
Adjusting the headlamps
The adjuster screws may be at the front of the lamp units, in which case remove the bezel (decorative rim) to reach them.
On single, round headlamps of the earlier pattern there is one self-tapping screw underneath the bezel. Take it out, pull the bezel forward and lift it off two lugs at the top.
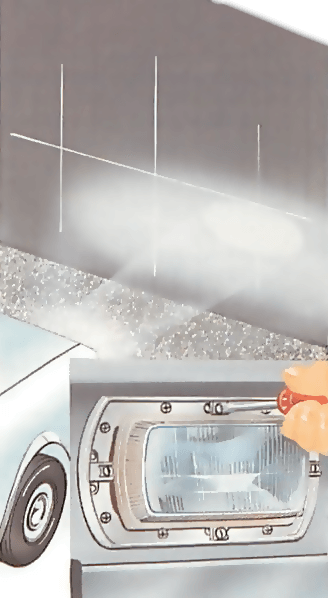
On a few cars you need to remove the radiator grille - it may be held by self-tapping screws or clips. But many later cars have adjuster screws, turn-buttons or levers that can be reached from inside the bonnet. Consult your handbook if in doubt.
There may be one top adjuster, which moves the beam up and down, and one or two side adjusters, which move it sideways.
Switch the headlights on, set them to main beam and cover one - for example, with a coat.
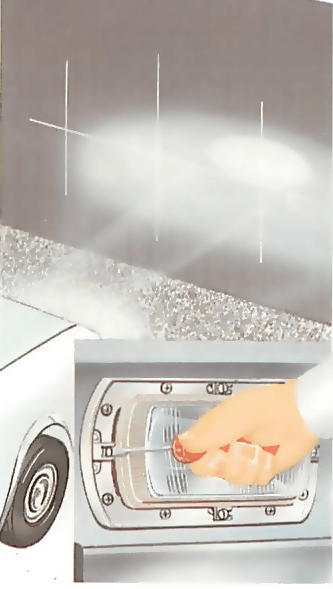
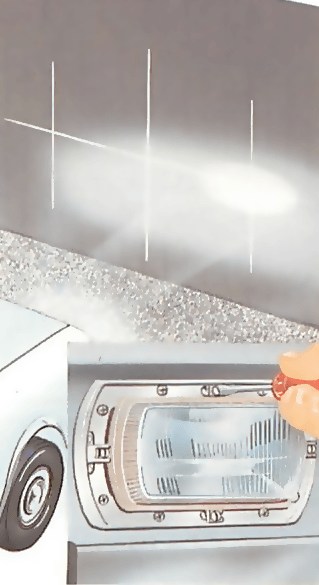
Turn the side adjuster(s) on the other to centre the brightest patch of light on the vertical line on that side. Use the top adjuster to bring the patch on to the horizontal line.
When the patch is centred on the cross, turn the top adjuster to move it 2 in. (50mm) down the wall. Repeat with the other lamp.
Other methods of adjustment
Cars with rectangular headlamps and those imported from mainland Europe have an asymmetric dipped beam - straight ahead it is sharply cut off above a horizontal line, but it fans out to the left (for British roads).
On main beam, such lamps do not give an easily found bright spot. Adjust them on dipped beam.
There is a broad 'V' at the top of the dipped beam, where the horizontal cut-off angles up at the side. Align the point of the 'V' 2 in. (50 mm) below the cross centre.
Some cars - mainly French ones with Cibie lights - have headlamps that can be set to dip left for Britain and right for abroad. They have a two-headed arrow marking.
Change the dip from one side to the other by taking out the bulb and fitting it into a set of alternative slots in its holder (See ).
Some cars - again mostly French - have two-position levers. When switched to the down position, they lower the beams by a set amount to compensate roughly for heavy loads. Certain estate cars have as many as five positions. In some modern cars, the driver can adjust the beam aim from inside the car.

The Ultimate Car Mechanics video course
Learn everything about modern cars from our new video series.
Learn more >-
We build a Mazda MX5 Miata from scratch
We start by tearing down and then rebuilding the whole car.
-
Every part explained
There's ridiculous detail on every part. Clearly and easily explained.
-
All modeled in 3D
We've created the most detailed 3D model ever produced so we can show you everything working.
Super detailed explanations in the video course
15 hours of pro-quality, HD content with subtitles
The
video
course
Bonus: Dismantling the engine

Engine Block

Crankshaft

Tools: Using a tap set

Using an engine stand

The Pistons
