Patching rust holes
The Video Course teaches you everything about modern cars.
If a hole in the bodywork is not in a load-bearing area, such as a section of the chassis , it may be repaired with glass fibre, body filler or the more recently introduced filler-fibre mixture.
There are proprietary kits available which contain all the materials necessary for making repairs. Many of the materials can also be bought separately from accessory shops, garages or specialist firms.
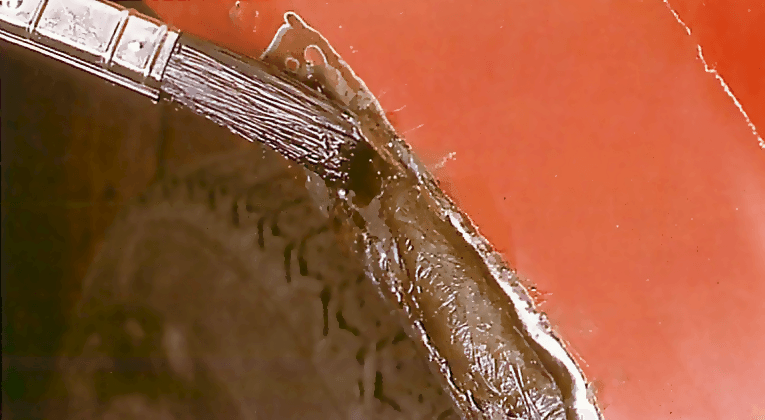
Use an electric drill fitted with a wire brush , sanding disc or flap wheel to take off the paint for about 2 in. (50 mm) all round the hole. Wear protective goggles to guard your eyes against flying grit and paint dust.
Cut out any weak and rusted metal with tin snips. If any traces of rust remain, treat the metal with a rust preventative (See Eliminating rust before painting ).
Bridging the gap
Tap the edges of the hole inwards with the ball of a small ball-pein hammer below the level of the panel.
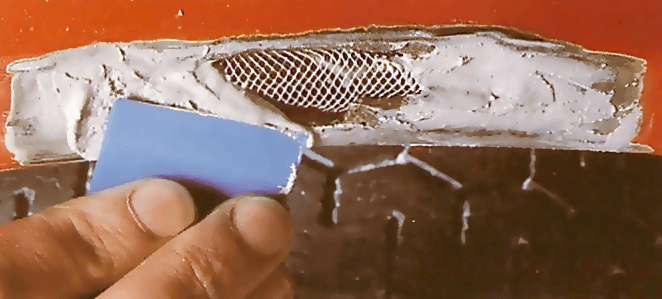
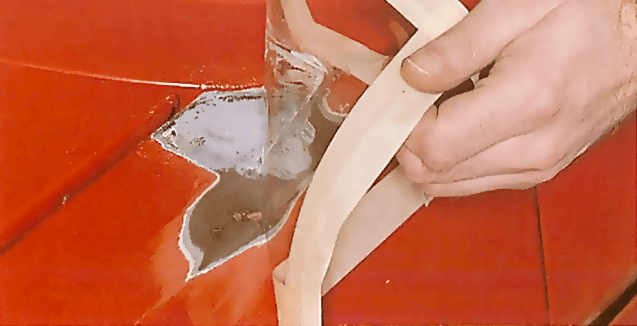
Body filler can be supported by a sheet of expanded zinc metal fixed behind the hole. A suitable piece is usually supplied in the repair kit.
Use tin snips to cut the expanded metal so that it is about 1 in. (25 mm) larger than the hole all round.
Mix a small amount of body filler paste with the hardener from the filler kit. You can make it set quicker than normal by adding a little more hardener than the kit instructions suggest. But do not deviate too far from the maker's instructions.
Put the metal sheet behind the hole and fix it in position with small amounts of filler.
If you cannot hold the sheet from behind the hole, use wire hooks to pull it against the back edge until the filler that is fixing it has set or, depending on the type of hole, roll the mesh into a tube shape and fix it firmly into position. Add filler to build up the contour .
Laying up the glass fibre
Glass fibre can cause skin irritation to some people - wear rubber gloves when you handle it.
Use scissors to cut out two pieces of the glass-fibre mat so that they overlap the edges of the hole by I in. (6 mm) all round.
Mix the liquid resin, following the instructions given with the kit.
Put a layer of glass-fibre mat in the hole from behind. Use an old paintbrush to dab the resin mixture on to the mat - both sides if possible - until the mat goes translucent.
If any resin drips on to the paintwork, wipe it off at once with a rag soaked in methylated spirit.
Put the second piece of mat over the rear of the first and add more resin with the brush. Let the resin set hard. Fill in the remaining slight hollow with filler (See Smoothing out a dent ).
Using a filler-fibre mixture
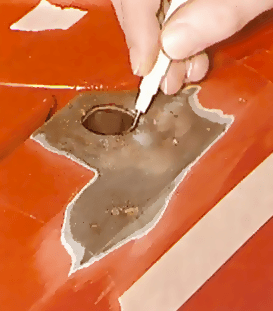
Some repair kits do not use a mesh backing. They reduce the stages involved by using a plastic cover sheet to hold the combined filler and glass-fibre mixture to the same contour as the body.
Prepare the hole in the way already described under Bridging the gap (left).
Put the plastic sheet over the outside of the hole and fix one edge with a strip of paper masking tape.
Trace the outline of the hole on the plastic sheet, then fold the sheet back.
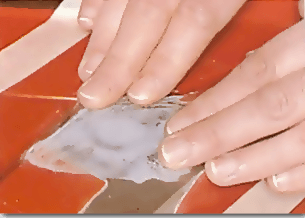
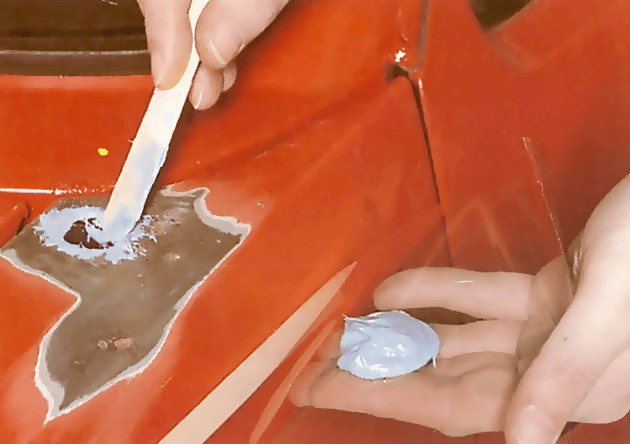
Add hardener to the filler mixture as directed by the instructions with the kit. Put the mixture on to the plastic sheet, inside the marked area. Dab more mixture on the edges of the hole.

Hinge the plastic sheet back over the hole, press it against the hole, and tape down the other three edges. The plastic sheet should follow the body contours.
When the filler mixture has set hard, peel off the plastic sheet. Small marks left on the surface of the repair can be filled with small amounts of the mixture or can be filled with paintstopper before the repaired area is sprayed.

The Ultimate Car Mechanics video course
Learn everything about modern cars from our new video series.
Learn more >-
We build a Mazda MX5 Miata from scratch
We start by tearing down and then rebuilding the whole car.
-
Every part explained
There's ridiculous detail on every part. Clearly and easily explained.
-
All modeled in 3D
We've created the most detailed 3D model ever produced so we can show you everything working.
Super detailed explanations in the video course
15 hours of pro-quality, HD content with subtitles
The
video
course
Bonus: Dismantling the engine

Engine Block

Crankshaft

Tools: Using a tap set

Using an engine stand

The Pistons
