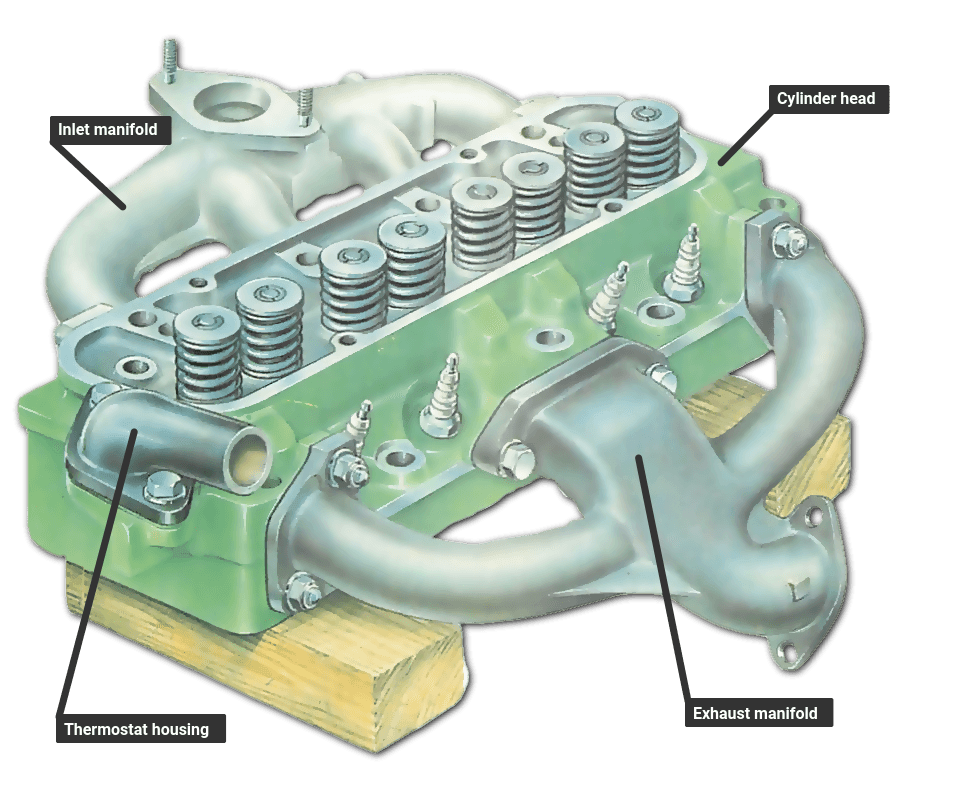
Removing and grinding valves
The Video Course teaches you everything about modern cars.
Good engine performance depends on valve condition. Worn guides or stems and burned or badly seated valves allow gas to escape under compression , resulting in poor starting and loss of power.
Valve springs , too, can affect engine performance. Over a period of time they weaken, causing the valves to `bounce' on their seats as they close.
Removing the valves
Support the cylinder-head assembly firmly on a suitable bench or work surface. See that there is sufficient space to store parts as they are removed, and cardboard boxes and clean newspaper available to keep them clean and safe.
Undo the nuts or bolts securing the inlet manifold to the side of the cylinder head; remove it, complete with carburettor if possible.
On some engines, the carburettor is unbolted and removed before you can gain access to the manifold nuts or bolts (See Exhaust manifold gasket replacement ).
Put the manifold/carburettor assembly in a clean, safe place preferably on a sheet of newspaper.
Similarly, remove the exhaust manifold from the side of the head and place it with the inlet manifold.
On some engines, the inlet and exhaust manifolds are fitted and removed as one unit.
Undo the nuts or bolts securing the thermostat housing to the cylinder head. Ease off the cover and lift out the thermostat.
If necessary, unscrew and remove the temperature-gauge transmitter from the side of the cylinder head.
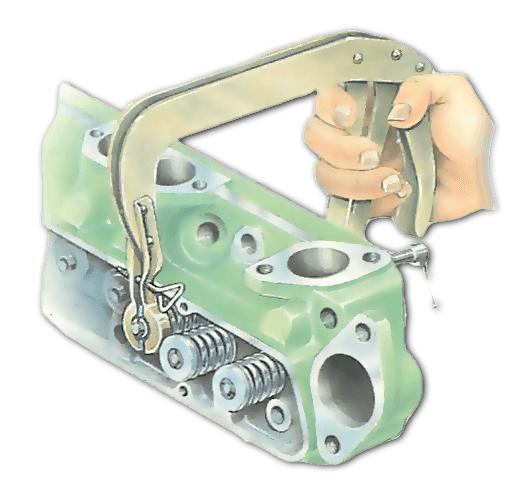
Turn the cylinder head on its side and support it on blocks to remove the valves. Place a valve-spring compressor over the valve nearest the front of the head.
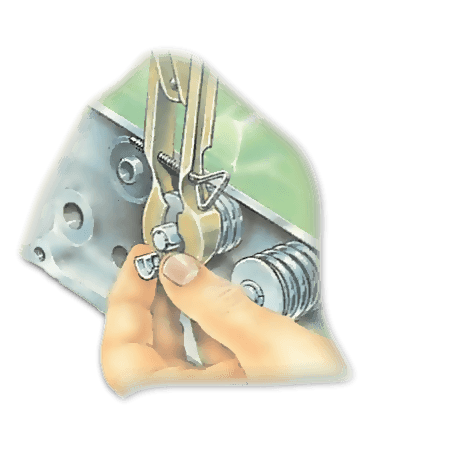
Compress the valve spring until the two split, tapered collets round the top of the valve stem can be removed. Take care not to drop them, they are easily lost.
Release the compressor slowly until it is free, then remove the valve-spring assembly and withdraw the valve from the head. Place all the valve parts together for examination later. Discard the oil seals (if fitted).
Repeat the valve-removal procedure on the remaining valves in the correct order, and place the components in their order of removal on a numbered sheet of clean paper, or push them into a piece of cardboard.
Alternatively, use the old cylinder-head gasket to•store the valves in their correct sequence.
Each valve must be refitted in its original position on reassembly, as individual valves, valve guides and valve seats wear in different ways.
Removing carbon
Remove all carbon deposits from the cylinder-head combustion chambers and valve ports , using a suitable scraper, such as a blunt screwdriver, and a wire brush .
Take great care to avoid scoring the surface of the valve seats or the machined face of the head, particularly on an aluminium-alloy head.
Clean the machined cylinder-head face to remove any remains of the old headto store— use the smooth side of a hacksaw blade, or a paint scraper.
Again, take care not to scratch or damage the face.
Scrape until the face is smooth and flat. Modem head gaskets have a resin-coated finish which sticks the gasket to the surface and is often difficult to remove. Make sure you remove all of it.
Clean the carbon from each valve in tum. Grip the valve stem in the chuck of a stand-mounted electric drill — or vice-mounted if necessary. Turn at slow speed, if possible, and scrape off the deposits carefully with a screwdriver.
The valve head can be smoothed using very fine emery cloth. Remember to keep the valves in their order of removal.
Inspect the face and edge of each valve, looking for grooves , pits and for other signs of damage. If the valves are burnt, bent or damaged, renew them.
Check the valve seats in the head, looking for grooves, pitting and particularly for cracking.
Slight pitting can usually be removed by grinding. More serious pitting is removed by having the valve seat recut at an engineering shop.
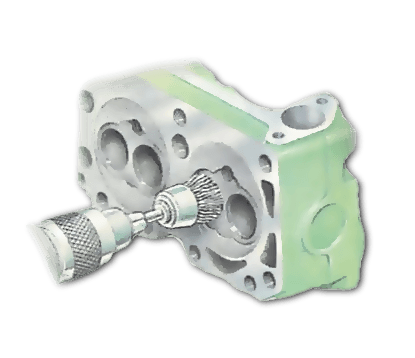
Clean all carbon and dirt from inside the inlet and exhaust ports, using a cup-type wire brush mounted in an electric-drill chuck. Protect your eyes with goggles.
Stubborn carbon particles can be removed by gently scraping with a blunt screwdriver, followed by the wire brush.
Checking valve guides
Check valve guides for wear by first refitting a valve into its respective guide, then raising the valve slightly off its seat.
Try moving the valve head from side to side. If the movement at the valve head is more than 0.007 in. (0.2 mm), the valve guide or the valve stem may be excessively worn - check the manufacturer's specifications, given in a service manual, or consult your local dealer.
If there is too much movement, repeat the test using a new valve. If this has less movement, the old valve stem is worn and the valve must be replaced. If there is still too much movement, the wear is in the guide and the cylinder head should be taken to an engineering shop for the replacement of all the guides.
If the guides are an integral part of the cylinder head, they can be reamed - opened out - to a larger size to take new valves with oversize valve stems. This work should also be entrusted to an engineering shop.
Grinding and refitting the valves
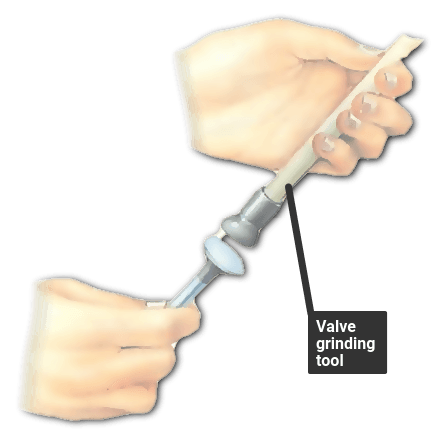
Generally valves should be ground , or 'lapped', into their respective seats to ensure a gas-tight seal . Grind-in each valve (including new valves) by hand, using a valve-grinding tool and valve-grinding paste.
On some modern cars the valve faces have a thin coating which must not be removed. When fitting coated valves, use an old valve to grind the valve seat.
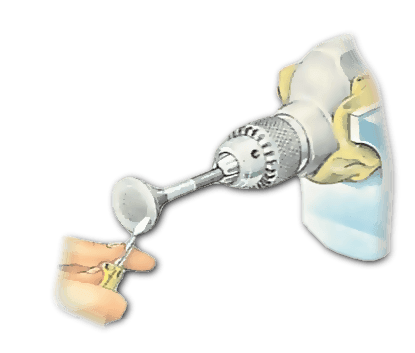
Smear clean engine oil on the valve stem, and attach the valve head to the sucker on the end of the grinding tool.
Smear a thin film of grinding paste round the chamfered edge of the valve head and insert the valve fully into its guide.
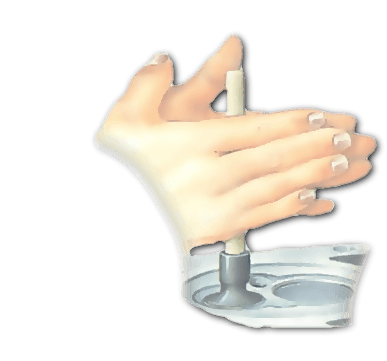
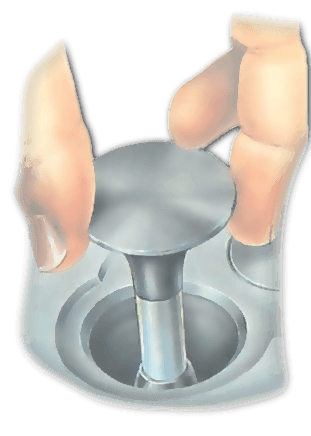
Rotate the grinding tool back and forth between the palms of the hands, pressing the tool and valve into its seat at the same time.
After a minute of continuous grinding, raise the valve off its seat, revolve it about 45 degrees, then continue the grinding process for another minute.
Repeat the grinding procedure, altering the position of the valve periodically until both the valve-head flange and the valve seat have an even, matt-grey appearance, which indicates that the valve and seat are making good contact all the way round.
If slight pitting remains on the seat, use a coarser grinding paste, followed by fine paste.
When all the valves have been ground-in, remove them and place each in its order of removal.
Wash the cylinder head, combustion chambers and valve ports thoroughly with paraffin, to remove all traces of grinding paste.
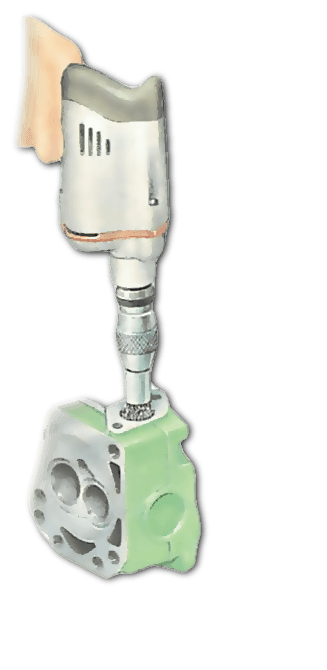
Dry the head with compressed air from a tyre foot pump , and blow through all oilways and bolt holes.
Clean all traces of grinding paste from the valves, remembering to keep them in their removal order.
Smear each valve stem with clean engine oil and refit the valves to their respective positions in the head.
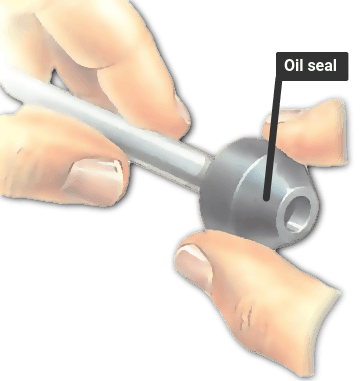
If there are oil seals, fit new ones over the valve stems, taking care to avoid damaging the seal lips. Always fit new valve springs.
Place the new valve spring and spring cap in position over the valve stem, noting that the close-coiled end of the spring is usually fitted next to the head.
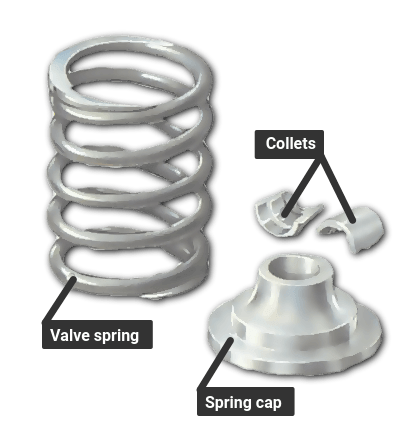
Compress the valve spring with the compressor tool until the two split, tapered collets can be slipped into position between the spring cap and the valve stem.
Slowly release the compressor tool until both collets are locking the spring cap and valve stem together.
Remove the compressor tool and repeat the valve installation procedure on the remaining valves, in the order in which you removed them.
Cleaning the pistons and cylinder block
Clean the piston crowns and cylinder-block face to remove any excess carbon and old head-gasket remains before replacing the cylinder head.
To prevent dirt or carbon particles entering the engine during cleaning, seal oil and water passages in the cylinder-block face with pieces of clean, lint-free cloth as necessary.
The cylinder bores , too, should be plugged with clean cloth to prevent dirt particles falling between the pistons and cylinder walls.
Use a scraper tool, such as the smooth side of a hacksaw blade, to carefully remove all traces of head gasket from the cylinder-block face. Take great care not to scratch or damage the face.
Rotate the crankshaft with a spanner or socket on the crankshaft pulley bolt to bring each piston to the top of its cylinder.
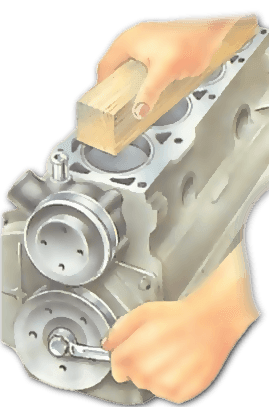
On engines with removable cylinders (wet-liners), hold a block of wood down firmly over the top edge of all the cylinders as the crankshaft is turned.
This prevents the cylinder liners from being lifted as the pistons rise up the bores, and ensures that the coolant seals at the bottom of the cylinder liners are not broken.
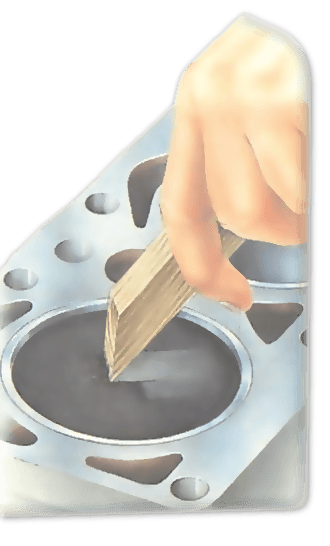
When each piston is at TDC , use a soft scraper such as a wooden block to carefully scrape carbon deposit from its crown, leaving a small ring of carbon round the outer edge adjacent to the cylinder wall.
Polish each piston crown with fine-grade emery cloth.
Clean all carbon and dirt from the cylinder bores and bolt holes, using either compressed air from a tyre foot pump, or a vacuum cleaner.
Make certain there are no carbon particles lodged in the bores.
Clean the block face, cylinder bores and piston crowns with a petrol or paraffin-moistened clean cloth, and then dry them.
Be careful not to risk a fire - do not smoke, for example.
Smear a thin film of clean engine oil on each cylinder-bore wall and then remove the pieces of cloth from the oil and water passages.

The Ultimate Car Mechanics video course
Learn everything about modern cars from our new video series.
Learn more >-
We build a Mazda MX5 Miata from scratch
We start by tearing down and then rebuilding the whole car.
-
Every part explained
There's ridiculous detail on every part. Clearly and easily explained.
-
All modeled in 3D
We've created the most detailed 3D model ever produced so we can show you everything working.
Super detailed explanations in the video course
15 hours of pro-quality, HD content with subtitles
The
video
course
Bonus: Dismantling the engine

Engine Block

Crankshaft

Tools: Using a tap set

Using an engine stand

The Pistons
