Cleaning and fitting spark plugs
The Video Course teaches you everything about modern cars.
Check and clean sparkplugs every 5,000 miles (8,000 km) and replace them after 10,000 miles (16,000 km). Their condition can tell you about the condition of the engine , and help you to correct faults elsewhere.
Always use the type of plug recommended for your car, except as an exceptional and temporary measure.
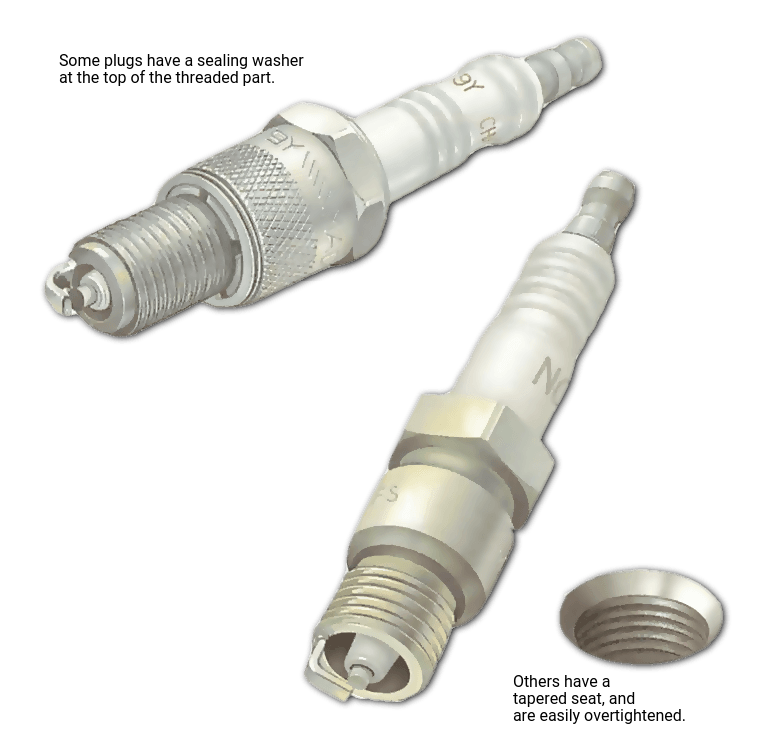
Plugs are classified as 'hot' or 'cold'. Hot plugs have a longer core nose the ceramic insulator inside the threaded part - which retains more heat between firings.
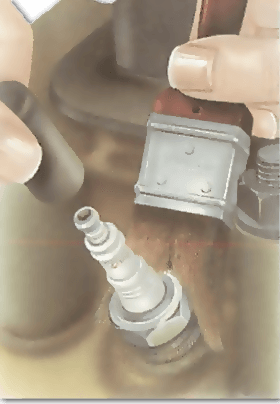
For most cars the sparkplug size is 14 mm, although it may be 10, 12 or 18 mm. Always use a plug spanner of the correct size.
The cheapest type is a box spanner and a tommy bar, but you are less likely to damage a plug if you use a special deep socket with a hard rubber lining .
For cars with plugs that are hard to reach, you can buy a plug spanner with a universal-jointed head: take care not to let it tilt sideways and break the ceramic top of the plug.
This is a danger with any plug spanner; it must fit on straight and as far as it will go. The rubber centre guards against breakage to some extent.
Removing the plugs
Before removing the leads, label them, using pieces of masking tape, with the numbers of the cylinders from which they come. It is easy to mix them up.
Grip each lead by the cap, not by the lead itself; damage here causes misfiring which is hard to trace.
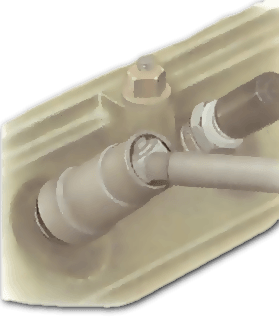
After removing the leads, clean around the plugs, using an old paintbrush, to avoid dropping dirt through the plug hole into the engine . For recessed plugs, blow away dirt with a tyre pump .
Fit the spanner over the plug, making sure it is quite straight. Unscrew the plug and take it out.
Setting the gap
The gap between spark plug electrodes should always be maintained at the distance specified by the manufacturers.
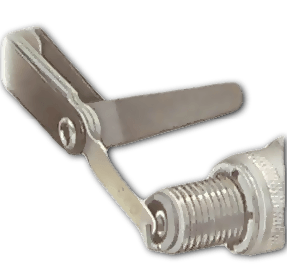
It is safe to lever the gap open carefully with a screwdriver, although a gapping tool - which is inexpensive - is best. But do not use pliers, and do not close the gap by tapping the outer electrode - you are likely to crack the insulator inside the plug.
The recommended spark plug gap should also be given in your car handbook.
An ordinary feeler may not be accurate, because any slight unevenness inside the gap could distort the flexible blade and make you set the gap too wide.
Use a gapping tool. This has hooks to lever the outer electrode either way, a built-in file, and a set of stiff gauges. The appropriate gauge should just go through the gap with a slight click.
Refitting the plugs
Check that the threads of both plugs and holes are clean and that the screw-on terminals (if any) are tight.
Screw the plugs in by hand, taking great care not to cross-thread them. This is easily done, and can damage the cylinder head - particularly an aluminium one.
Correct tightening is vital. Take care not to overtighten, as this will flatten the washer and make it ineffective. Be very careful not to overtighten tapered plugs - found on modern Ford cars - or they may be difficult to remove again.
Tighten each plug a quarter of a turn beyond hand-tight. Refit the leads to the correct plugs.

The Ultimate Car Mechanics video course
Learn everything about modern cars from our new video series.
Learn more >-
We build a Mazda MX5 Miata from scratch
We start by tearing down and then rebuilding the whole car.
-
Every part explained
There's ridiculous detail on every part. Clearly and easily explained.
-
All modeled in 3D
We've created the most detailed 3D model ever produced so we can show you everything working.
Super detailed explanations in the video course
15 hours of pro-quality, HD content with subtitles
The
video
course
Bonus: Dismantling the engine

Engine Block

Crankshaft

Tools: Using a tap set

Using an engine stand

The Pistons
