The working temperature of your engine is normally kept to an optimum level by the cooling system . But there are occasions when your engine is worked harder and reaches temperatures higher than normal. This can happen, for example, when you are towing a trailer or another vehicle, or if your engine has been tuned for higher performance.
As the temperature of your engine increases, the engine oil becomes thinner and thinner. If the engine is run above normal temperature for a long time, there is a danger that the oil may become so thin that it can no longer lubricate the moving parts of the engine properly.
If this happens your engine can become seriously damaged to the point where it has to be stripped and rebuilt or replaced completely.
While a water temperature gauge gives a fairly accurate reading of the engine temperature via the cooling system, it does not directly tell you much about the temperature of the engine oil. For this you need a special oil temperature gauge.
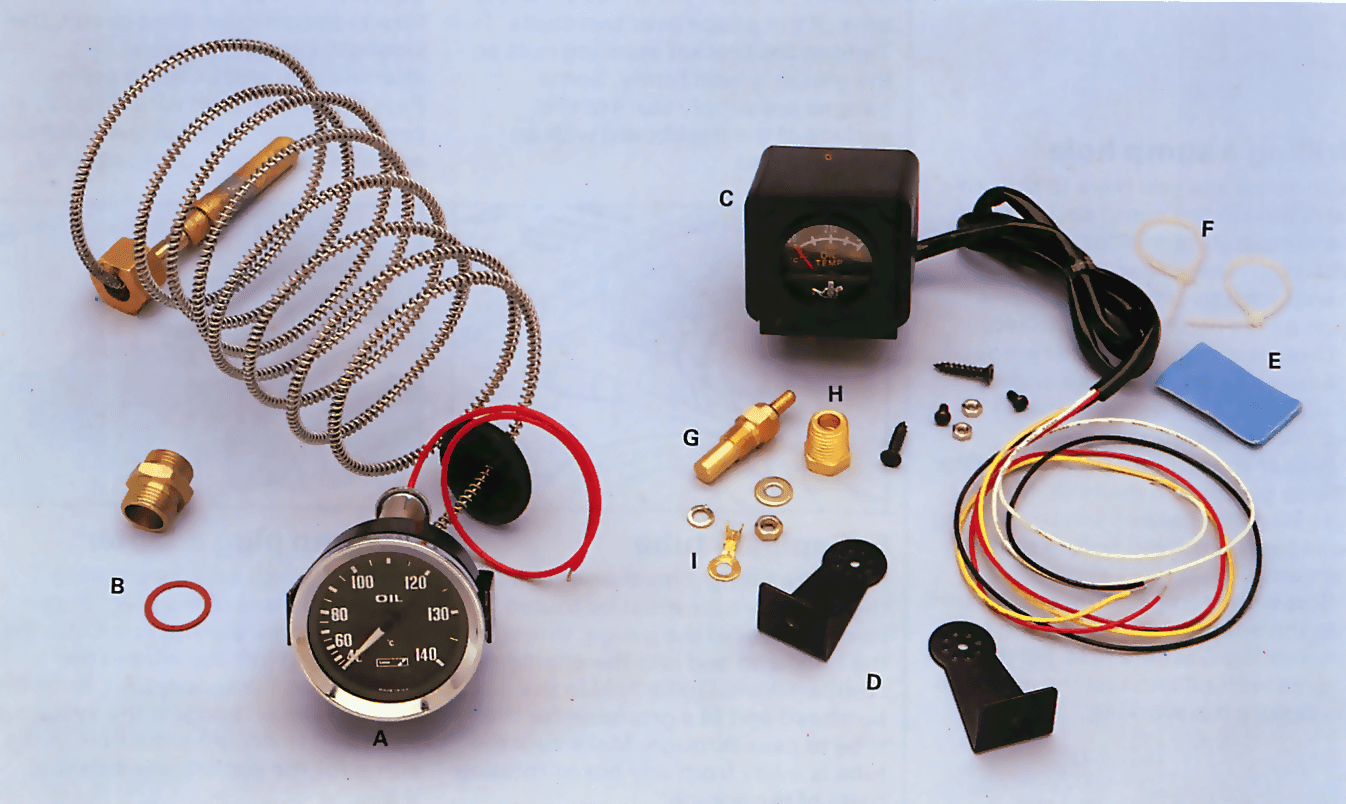
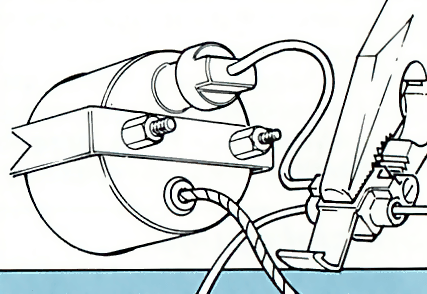
These gauges measure the oil temperature with a sender unit, similar to that used for water gauges, which fits directly into the sump pan to give an accurate reading of the temperature.
The gauges are available from accessory shops and are either mechanically or electrically operated.
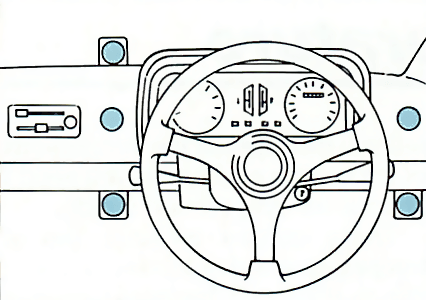
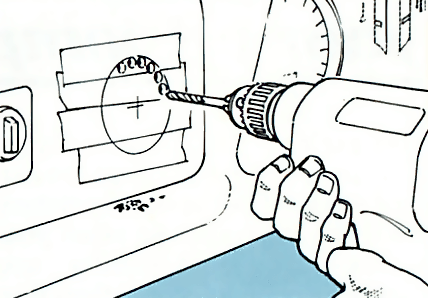
The gauges are mounted either directly into the dashboard or in a bracket suspended under the dash.
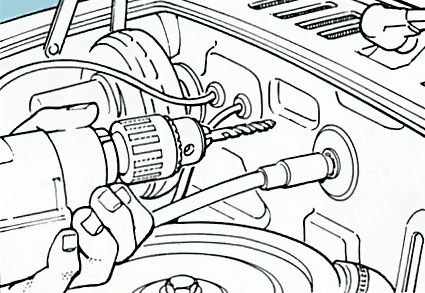
How the sender unit is fitted into the sump pan depends on the type of gauge you have and the model of your car. In some cases the sump pan will have to be removed and a hole drilled and tapped with a thread to accept an adapter.
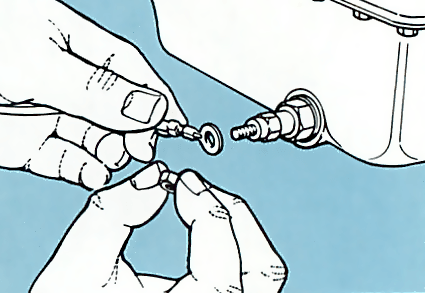
Other types use the drain plug in the sump as the fitting position for the sender unit. Again you may need an adapter to fit the sender.
How you should interpret the readings on an oil temperature gauge depends to some degree on the model of your car. But, as a rough guide for a 2-litre engine when it has been running for some time, the following holds true:
80-95°C - This is a normal oil temperature for an engine under not too much load.
100-110°C This is a normal reading if the engine is working particularly hard, for example when towing. Above 110°C The oil starts to thin out seriously and lose its ability to lubricate the engine and dissipate heat from components. Check the level of the engine oil and inspect the sump pan to make sure it is not covered with heavy deposits of dirt.
Below 70°C It is rare for the oil to run too cold, but this can happen with cars fitted with an oil cooler . If the temperature drops below 70°C suspect a faulty oil cooler thermostat .
Note that all engines, whether or not they are fitted with an oil cooler, are prone to low oil temperature in cold weather, even though the water temperature reads normal.
With some kits you have to drill an extra hole in the sump casing to fit the temperature sender unit. Check with your dealer first, or the gauge manufacturers, to find out where such a hole can safely be drilled.
Drain the engine oil and remove the sump casing from the engine. Mark and drill the hole in the required position.
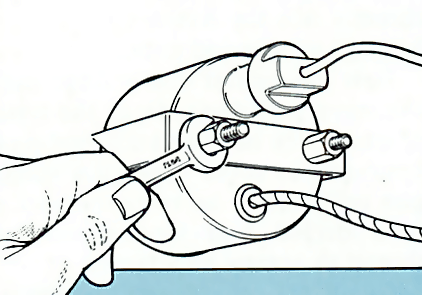
Solder the adapter provided in the kit into position in the hole. Make sure all metal flakes from the drilling have been removed before refitting the sump.
If an engine needs topping up with fresh oil more than usual, or if you see a pool of oil under...
There are two main types of oil seal : static and dynamic. A static oil seal fits between tw...
The oil in your engine needs to be kept at an optimum temperature so it can still carry heat aw...
If you have to replace a coil spring on the front suspension , the replacement spring must be ...