in Transmission
There are two main types of oil seal : static and dynamic. A static oil seal fits between two non-moving parts, a dynamic oil seal between a stationary part and a moving one. Most oil seals are made of synthetic rubber.
An example of a static seal is a simple 'O' ring. These seals can be found in such places as the oil filter used on combined automatic gearbox and engine units, on conventional gearbox front covers and in automatic gearboxes.
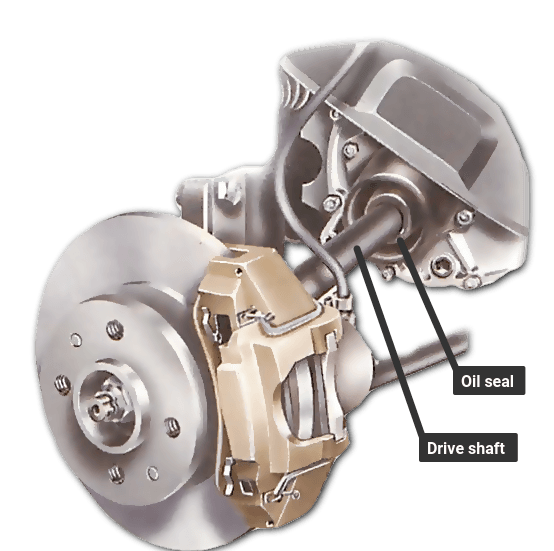
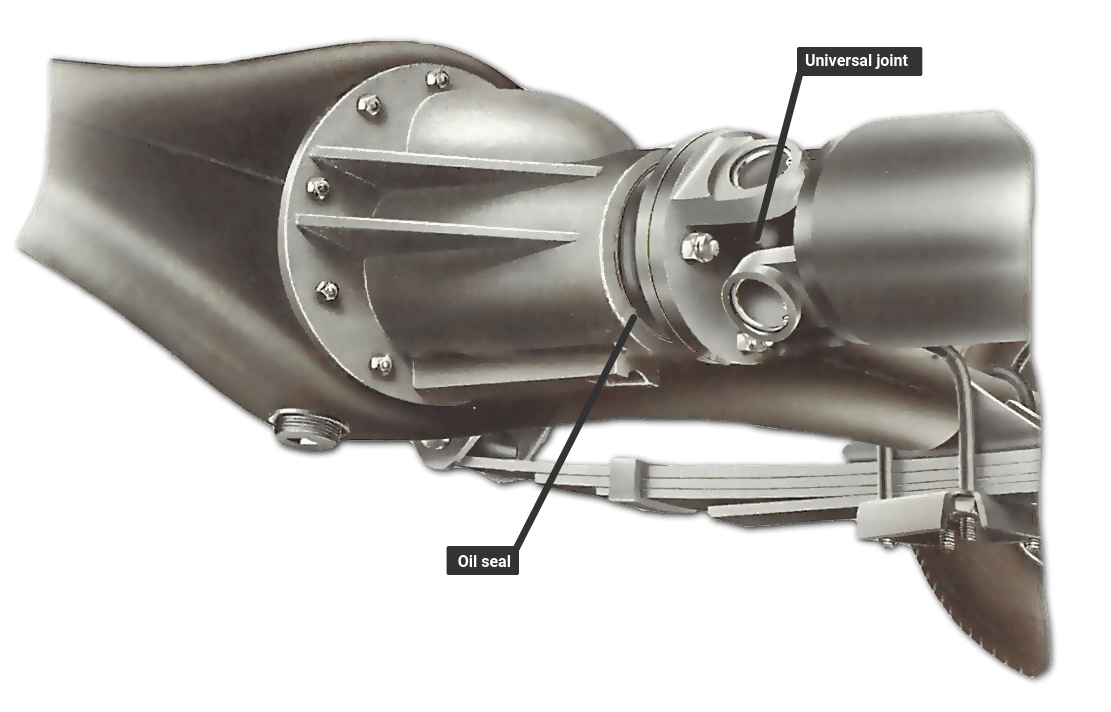
Dynamic seals are more complex in shape, with one or two lips, depending on where they are situated. These are widely used in the transmission system of both front and rear-wheel-drive cars, where oil must be sealed in where a rotating shaft passes through a component. For example, at the outer end of a half shaft and on the differential pinion.
Dynamic seals also contain a thin coiled spring, called a 'garter spring', which holds the sealing lip in contact with the revolving shaft.
Many seals have a metal outer casing for added strength and ease of fitting. Because the seal is in constant contact with a moving part, dynamic seals eventually wear and begin to leak, and both dynamic and static seals deteriorate with age.
Most seals are inexpensive and easy to replace, but many are in places where you must do a lot of dismantling to get at them.
For example, gearbox oil seals (apart from the extension-housing seal on rear-wheel-drive cars) can be replaced only with the gearbox removed - a task best left to a garage.
However, the seals on the rear axle and final drive should all be possible to replace fairly easily, although special tools may be necessary.
After many miles and several new seals, the moving part against which the dynamic seal fits may wear.
Slight wear can sometimes be taken up by fitting a shim between the seal and its housing, to change the point of contact. But if a shaft becomes seriously grooved it must be replaced or repaired at a garage or engineering machine shop.
This is not a common occurrence, but any point at which a shaft rotates in a seal is a possible leak source. Check such points regularly.
When fitting and handling any oil seal, keep it and its sealing point absolutely free from dirt and grit. Make sure you fit the seal the right way round. The lip (or lips) always faces the oil it is sealing.
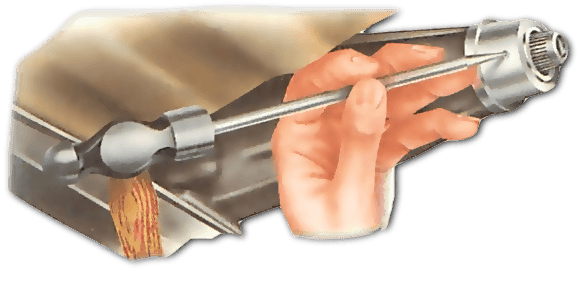
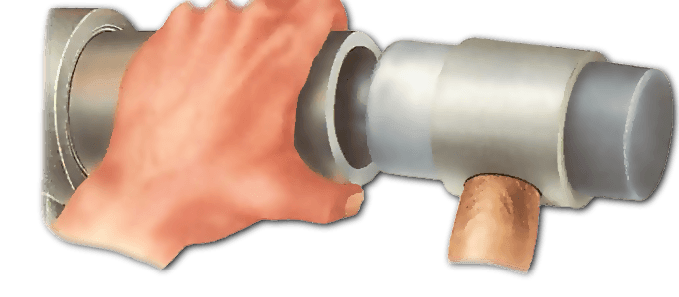
The extension housing seal can usually be replaced without removing the gearbox.
Disconnect the propeller shaft from the extension and put a drip tray under the extension. In most cases you can prise out the with a screwdriver, taking care not to damage the bore .
Some Ford gearbox-extension oil seals are set deeply into the housing; it is best to use a special removal tool to avoid scoring the bore. The tool is a puller which is screwed into the seal, fitting over the gearbox output shaft .
Vauxhall extension oil seals are part of a replaceable collar. Tap it off with a sharp drift or an old screwdriver.
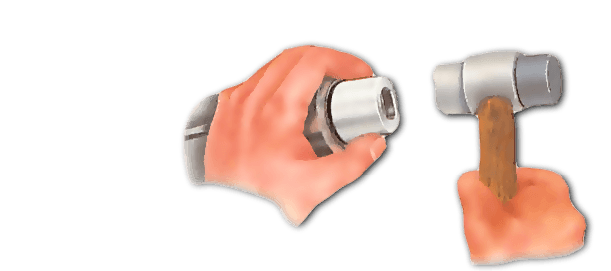
Clean the bore and coat the new seal with multi-purpose grease. Tap the new seal into position, using a socket or a tube large enough to rest only against the outer part of the seal, and a soft-faced hammer.
To avoid damage to the seal, smear its lip and also the front of the prop shaft with grease before inserting the shaft into the extension housing and refitting it.
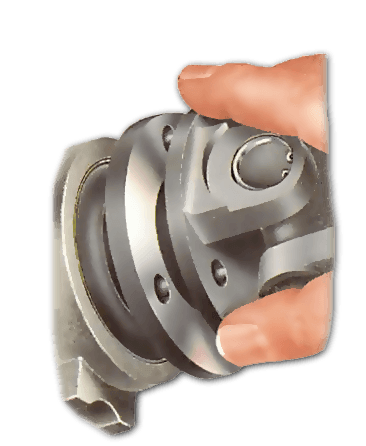
The design of the seals varies greatly from car to car. There may be up to three on both sides of the inner race of the bearing , and a ring outside it. Always replace all the oil seals when you remove a half shaft as they often leak after being disturbed (See Checking the half shafts ).
Prise them off carefully with a screwdriver, taking care not to damage their seatings, and clean the seatings.
Smear the new seals with multipurpose grease and push them in carefully with a piece of tube of a suitable size.
Raise the rear of the car on axle stands, chocking the front wheels; also apply the handbrake .
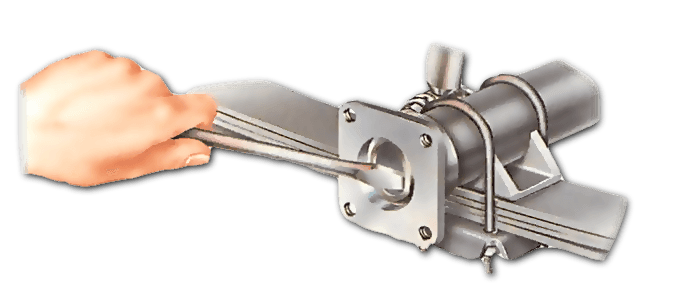
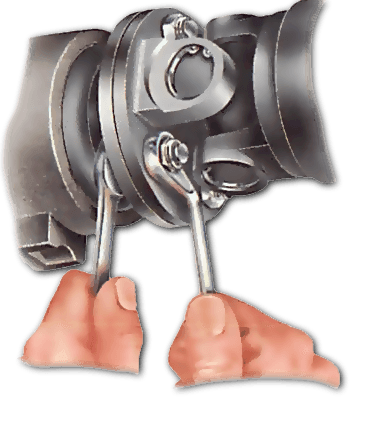
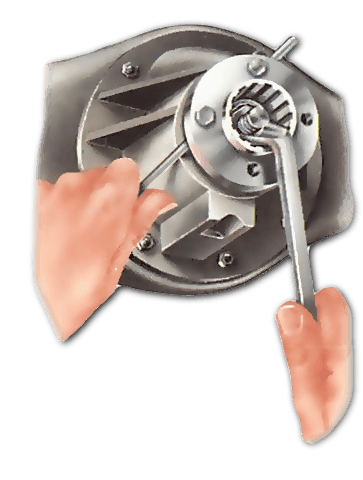
Undo the nuts holding the propeller-shaft flange to the pinion flange.
Mark the position of the pinion flange and its securing nut relative to the pinion-shaft end, using a centre punch. This is important for accurate reassembling later.
Unscrew the nut, counting the turns needed so that you can refit it exactly as it was in order to keep the pinion and crown wheel meshing properly inside the differential.
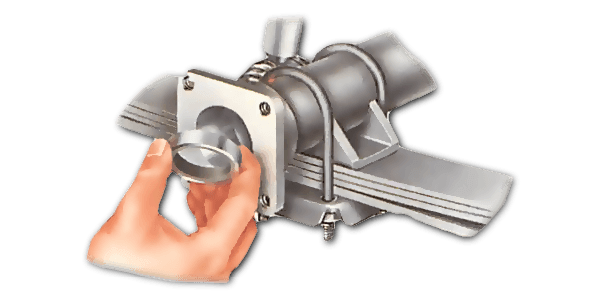
Put a drip tray under the differential nose to catch the oil. There will not be very much, as the level of the oil in the differential will only fall to the level of the nose.
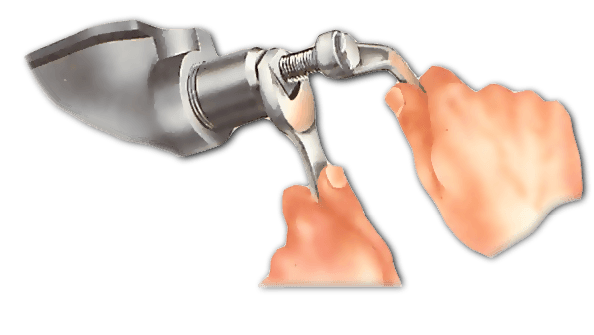
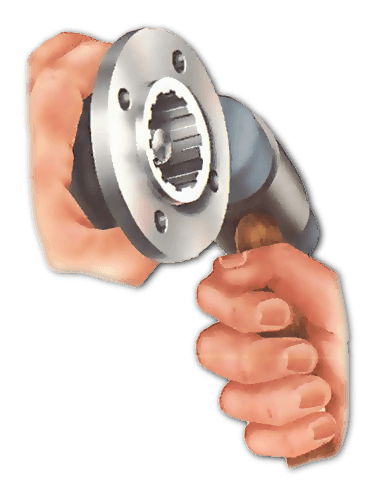
Tap the flange off its splined shaft, using a soft-faced hammer. If it is stubborn, use a pulling tool.
Take care when using a hammer on the flange. Any distortion will result in misalignment of the propeller shaft, leading to early failure of the new seal.
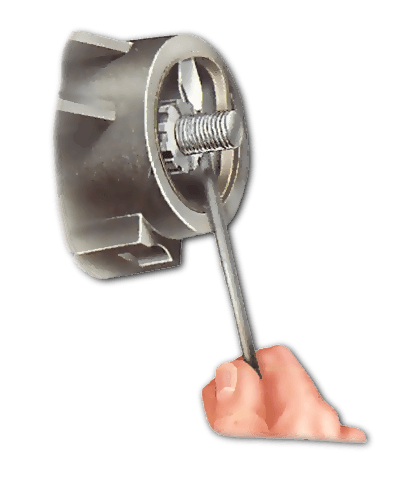
Prise out the old seal with a screwdriver, taking care not to damage the seating.
Use a degreaser or paraffin to clean the area around the differential nose, thoroughly wiping up the mixture of oil and dirt caused by the oil leak. Dry the area with absorbent rags.
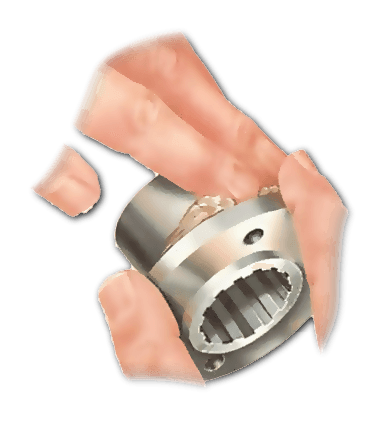
Clean the inner rim of the flange where it touches the seal, and lubricate it with hypoid gear oil .
Tap in the new seal, using a socket of the appropriate size and a soft-faced hammer. Be sure to fit it the right way round, with the lip facing inwards. A special tool of the right diameter is available for some cars, for pushing in the seal, but it is usually not necessary.
Grease the lips of the seal with a multi-purpose grease.
Oil the splines and refit the flange, holding it square to the pinion so as not to damage the seal. Give the nut the same number of turns that it took to remove it, and line up the marks you made earlier. If the nut is self-locking, fit a new nut.
Check with a torque wrench that the setting for the nut corresponds with that given in the workshop manual for the car, to provide the correct load on the pinion. Adjust the setting if necessary. Fit a new split pin on the nut, if required.
If an engine needs topping up with fresh oil more than usual, or if you see a pool of oil under...
The oil in your engine needs to be kept at an optimum temperature so it can still carry heat aw...
If the oil pump is fitted to the outside of the engine , you may be able to reach it from unde...
If you have to replace a coil spring on the front suspension , the replacement spring must be ...