Checking damper units
The Video Course teaches you everything about modern cars.
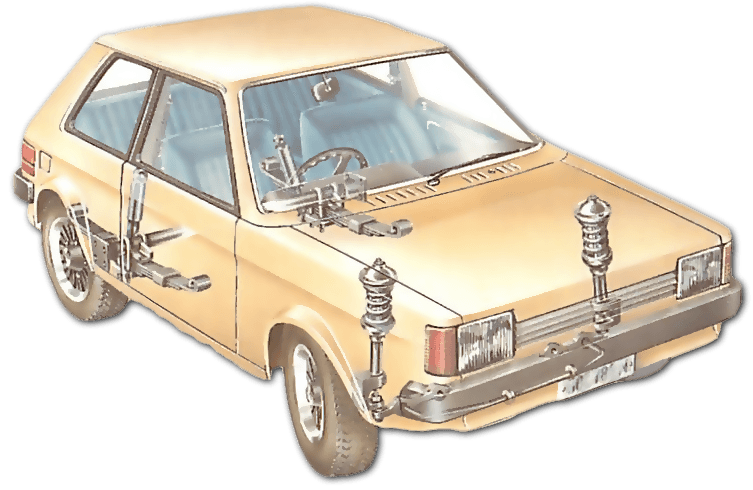
Almost all modern cars have hydraulic telescopic dampers in their suspension systems .
Where the front suspension system is a MacPherson strut , the damper is built into the strut or leg that supports the wheel-hub assembly (See How car suspension works ).
To inspect the condition of telescopic dampers, loosen the wheel nuts, jack up the car and support the chassis on axle stands so that the wheels hang free and the dampers are extended. Remove the wheels.
How front dampers are attached
The front dampers may be attached to their mounting points at each end by a pivot bolt through a bushed eye. Alternatively, each end may have a threaded pin passing through the mounting bracket. Or there may be an eye and bolt at one end and a threaded pin at the other.
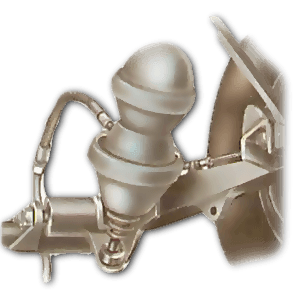
The upper mounting of a MacPherson strut is a bearing on a rubber-bonded block, fixed to a plate bolted to the body. The lower end has a ball swivel joint.
With coil-spring parallel-wishbone front suspension, the damper is usually inside the coil spring.
The spring is located rigidly in the lower wishbone, and passes through the upper wishbone to a mounting on a chassis outrigger.
Checking for damper leaks
The dampers are filled with a special oil, which provides the damping effect. The piston and rod moving up and down inside the strut forces the oil through narrow passages, which slows down the oil transfer.
This restricts the up-and-down movement of the car suspension.
The weak point of a damper is the gland seal round the part of its body where the piston rod moves up and down. It is not unusual for this gland to fail, allowing oil to escape.
Oil leaks leave a dark stain in the road grime that collects on the damper and on its mounting points.
If there are any signs of a leak, renew the damper (See Fitting new dampers ).
On a car with MacPherson struts, look around the lower parts of the dampers for dark oil stains. A new damper insert can be fitted (See Renewing MacPherson-strut inserts ).
Always replace dampers in axle sets (pairs) to ensure uniform suspension damping on both sides of the car.
Checking for damage
Inspect each damper casing for signs of damage caused by flying stones or deep rust. Slight dents may not be too serious, but investigate a deep one further, preferably by taking the unit off the car for close examination and testing in a vice (see Bounce test).
Look also at the piston rod. It may be hidden by a rubber dust cover, which can be pulled back.
Check the rod for signs of scoring, pitting or rust. If you find any, replace the unit, or it will damage the piston oil seal .
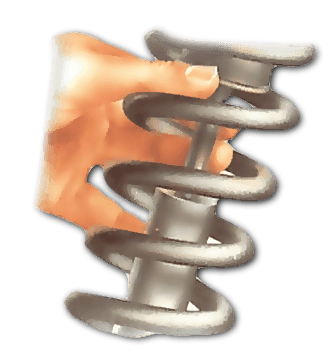
Wipe the damper clean and check the rubber bush at the base of the unit. Look for signs of damage, perishing, cracks or distortion.
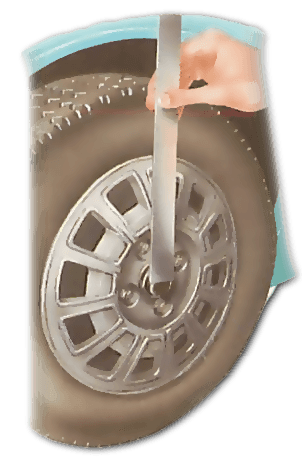
Grip the lower body of the unit and try to move it backwards and forwards, and twist it about its mounting bolt. If the rubber bush is in good condition, there should be no movement.
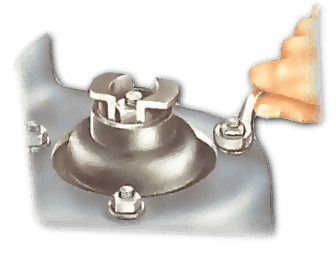
Check the upper-mounting bush in the same way. If the upper mounting is a pin, check the condition of the rubber discs.
Look also at any upper mounting on the inner front or rear wings. You may need a torch or inspection lamp.
Weakening of the turret top in which the damper is fitted is common. Reinforcing plates can be welded, but this is a job for a professional.
If you find any worn or cracked rubbers, replace them.
Replacing rubbers
Remove the unit from the car. An eye-type bush may be in two halves (one fitted at each end) with a steel sleeve through the middle.
After pulling out the old bush, lubricate the eye with soap solution and fit one half of the bush with the steel sleeve inserted.
Push in the other half as far as possible, then force the bush into place by squeezing from both ends in a vice.
Some eye bushes are in one piece. With the old bush still in place, take a socket with a diameter large enough for the whole bush and place it in a vice on one side of the eye.
Place the new bush on the other side and squeeze with the vice to push the old bush into the socket as the new one is forced into the eye.
With pin-type fittings, place the rubber discs over the stem of the unit in the same sequence as the old ones. Note where spacers and washers fit.
Checking lever dampers
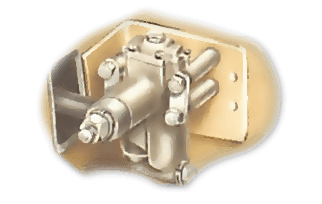
A few cars have front-mounted lever dampers that also serve as the top link of the suspension.
To test the damper action, first disconnect it from the suspension (See Replacing lever-arm dampers ). Move the damper arm slowly up and down to feel if there is firm resistance in both directions.
Replace if defective (See Replacing lever-arm dampers ).
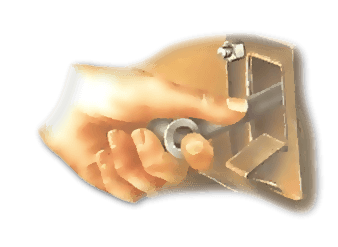
How rear dampers are attached
Rear dampers are attached at the bottom to brackets on the axle casing, or to where the spring is seated. The fixing is usually a bolt or stud through the rubber-bushed eye.
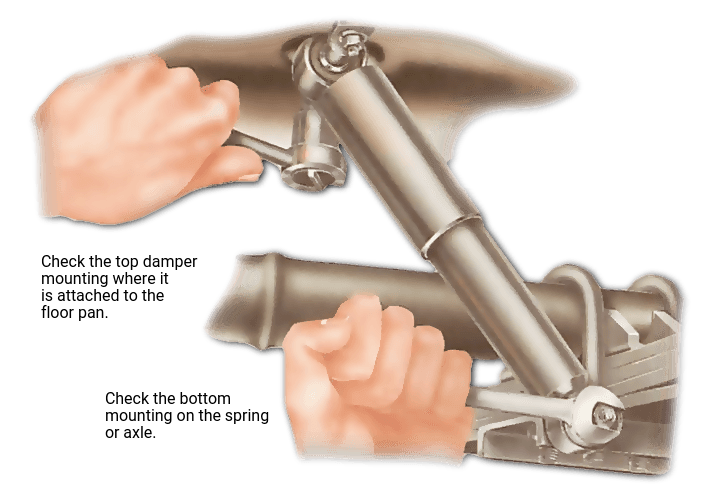
At the top, the dampers are attached to a bracket or mounting point in the floor pan or the inner rear wing.
Top mounting points are sometimes hidden in turrets within the inner bodywork, and you may have to consult a service manual for the location and type.
If the car has pin-type upper mountings, the rubber discs where the pin passes through may be on either side of the metal bodywork. Check both sides of the mounting plate.
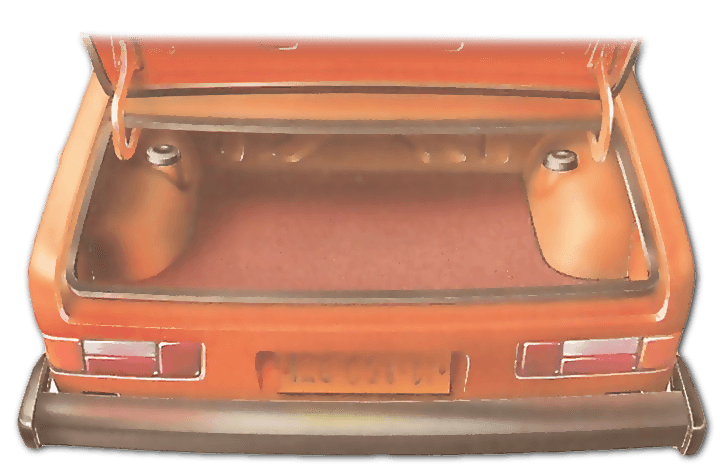
To check the top side of an upper mounting, you may have to remove trim panels in the boot or, in a hatchback, the car interior trim.
Inspecting rear mountings
Rear dampers with pin fittings at the top are usually fixed through the inner wings, either through reinforced areas or through the top of a turret in the bodywork.
Turret-mounted dampers are often found on cars with coil-spring rear suspension, when the turret also locates the spring.
To check the tops of the mounting, open the boot or hatchback lid and look at the rounded outer side of the wheel arch. The mounting point is usually easy to see.

Check the threaded end of the pin for damage (which will make removal difficult), for the tightness of its one or two securing nuts and - most important - for the condition of the rubber disc under a nut.
To inspect the underside of the mounting, loosen the wheel nuts, jack up the rear of the car, support the chassis on axle stands, and remove the wheels.
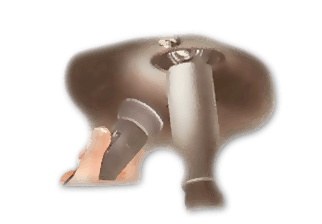
Use a torch or inspection lamp to inspect the condition of the rubber disc and the condition of the metal at the top of the turret.
At the same time, use the lamp to check the lower part of the damper and the lower mounting.
How to check a displacer unit
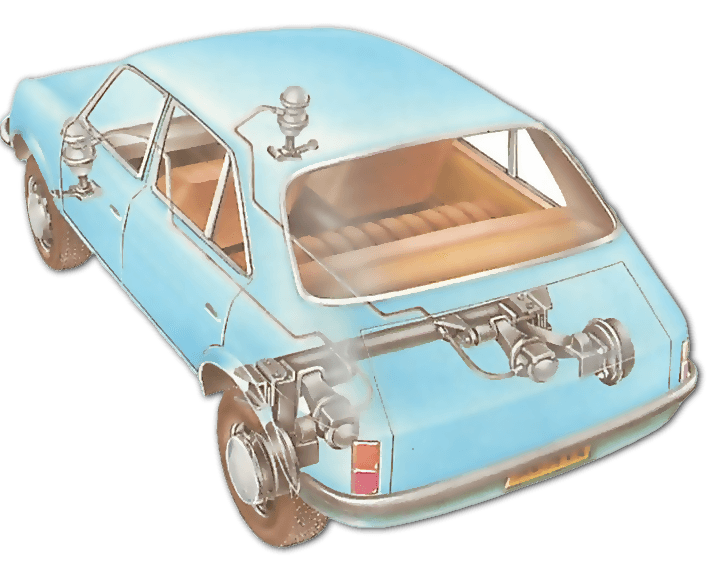
Cars fitted with hydraulic suspension systems make use of fluid under pressure to provide the springing effect.
At each wheel, there is a displacer unit - a piston with a sealed cylinder that takes the place of the spring.
Frequently the units on each side of the car are connected front-to-back by high-pressure piping, to provide the desired suspension characteristics.
In other installations, the inter-connections are across the car - nearside rear to offside rear and nearside front to offside front.
Often, the displacer units also act as dampers, otherwise they are assisted by hydraulic dampers, which should be checked in the same way as dampers on any other car.
Because the suspension relies on fluid under high pressure, it is essential to find any leaks in the system and have them rectified immediately.
Otherwise, either one or both sides of the car will sink to the rubber bump stops, with a loss of suspension movement.
If this happens, it is usually possible to drive the car very slowly - maximum 30mph - but it should be taken to a garage for repair as soon as possible.
Sometimes re-pressurising the system will restore its proper function, but this work must be done by a garage equipped to undertake it.
The ride height of the car gives a good indication of the condition of the suspension. The correct height is given in the car handbook.
Inspect the displacer units and associated pipework during routine servicing, or at the intervals recommended in the car handbook.
On some cars, the front displacers are in the engine compartment. On others, they can be seen only from underneath the car. The rear displacers can usually be seen and reached from underneath.
Jack up both ends of the car on one side and support them on axle stands, with the handbrake firmly applied and the other wheels chocked.
The work is easier if you remove the wheels to get a clear view.
Follow the lines of the hydraulic pipes. Look for leaks at the pipe unions and for signs of damage caused by flying stone or pipes rubbing against any components.

The Ultimate Car Mechanics video course
Learn everything about modern cars from our new video series.
Learn more >-
We build a Mazda MX5 Miata from scratch
We start by tearing down and then rebuilding the whole car.
-
Every part explained
There's ridiculous detail on every part. Clearly and easily explained.
-
All modeled in 3D
We've created the most detailed 3D model ever produced so we can show you everything working.
Super detailed explanations in the video course
15 hours of pro-quality, HD content with subtitles
The
video
course
Bonus: Dismantling the engine

Engine Block

Crankshaft

Tools: Using a tap set

Using an engine stand

The Pistons
