Lubricating and reassembling wheel bearings
The Video Course teaches you everything about modern cars.
Removing the outer races
Clean the hub and races well with paraffin or white spirit. Then drive the races away from each other. The inner and outer races may be of different sizes. If so, begin with the smaller one.
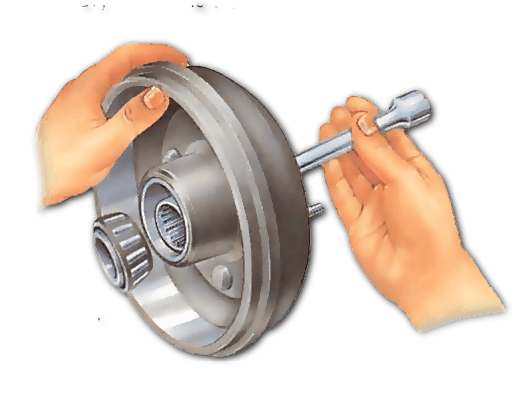
Use a socket as a 'drift' (pusher). Choose one which fits through the larger race to rest against the smaller race.
Lengthen the socket with an extension piece and tap this gently with a heavy hammer to expel the race. Use a bigger socket to force the other race out in the opposite direction.
If the races are the same size, remove the first one with a flat-faced punch and heavy hammer, tapping alternate sides and working evenly around the race so as not to tilt and jam it. Be careful not to scratch the inside of the hub.
When the first race has been removed, free the second race, using a socket as a drift.
Checking and cleaning the bearings
Clean all parts well with paraffin or white spirit. Avoid getting grease on the brakes when cleaning the stub axle .
If you are doing only routine lubrication, the outer races remain on the stub. Inspect them: very slight indentations are allowable, but if there is noticeable pitting or scoring you need new bearings .
For the inner races and the rollers or balls make no allowances at all. Any blemish is unacceptable and means renewal of the bearing.
Lubricating the bearings
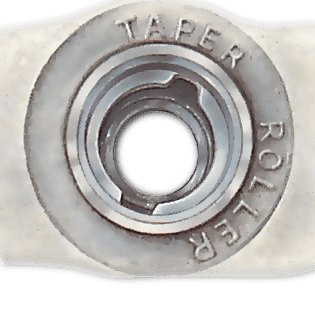
To replace bearings, tap the outer races into the hub using the old races as drifts. Be sure to fit a tapered roller race the right way round.
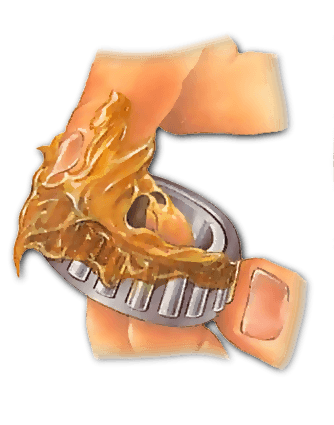
Pack the bearings with an approved type of bearing grease - consult the car handbook or a dealer if in doubt. Find out also how much grease to apply. On some hubs the central area is heavily loaded with grease, but other types need only a light coating. Always fill the bearings themselves with as much grease as they can hold, forced in between the races.
With roller bearings , coat the outer race thickly with grease. Spin the rollers in their cage on the inner race while rubbing grease into every crevice.

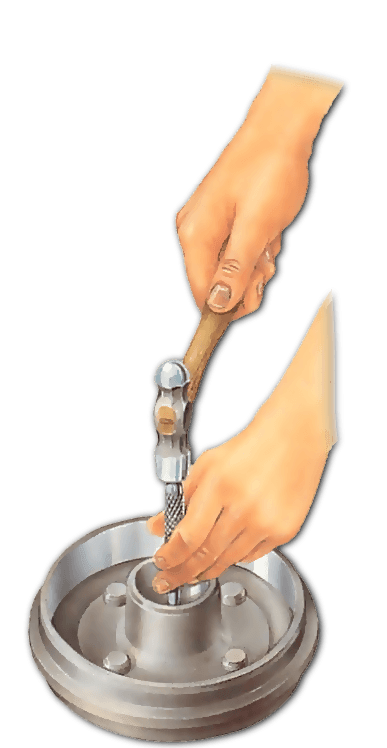
Put the inboard inner race into its outer race; or tap it on the stub axle with a tubular drift if this is more convenient. Do not forget to fit any spacer between the bearings.
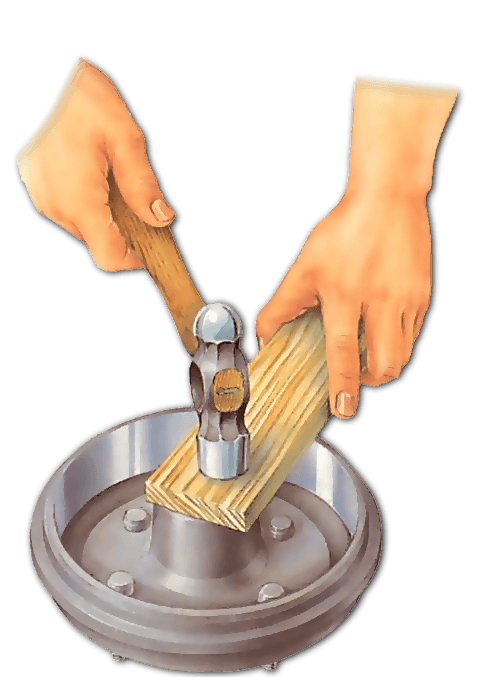
With either type of bearing, now insert the new grease seal . Be sure to fit it the right way round. If it fits flush with the inner edge of the hub, tap it gently home with a wooden block. If it is recessed, use a socket to press it in.
Reassembling the bearings and hub
Lightly grease the stub axle, including the threaded end and the shoulder at the base. Keep grease off brake parts.
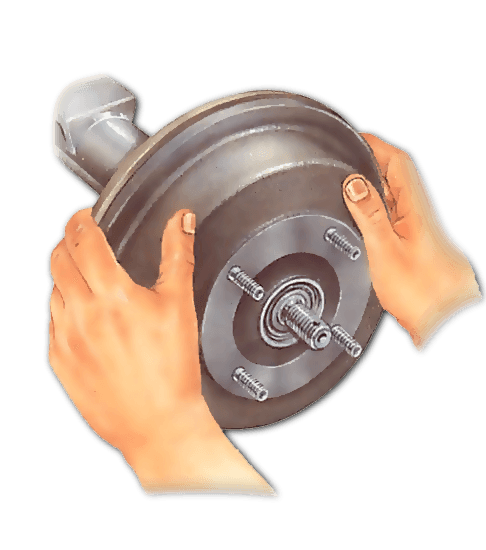
Carefully push the hub on to the axle, taking care not to knock out the inner race of an outer ball bearing with the axle end.
If the hub sticks, tap it with a soft-faced hammer. Insert the inner race of an outer roller bearing.
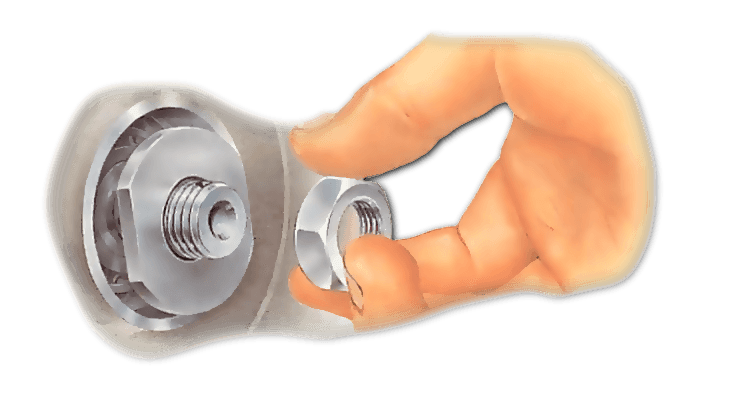
Fit the thrust washer with its chamfered side towards the bearing. Screw on the hub nut, then adjust the hub. Position a castellated nut so that it lines up with the split-pin hole - by easing the nut, back, not forward - or fit the nut cover if there is one.
Insert a new split-pin, head uppermost, and open the legs. Trim the legs so that they will not prevent the dust cover being fitted. Reassemble the brakes.


The Ultimate Car Mechanics video course
Learn everything about modern cars from our new video series.
Learn more >-
We build a Mazda MX5 Miata from scratch
We start by tearing down and then rebuilding the whole car.
-
Every part explained
There's ridiculous detail on every part. Clearly and easily explained.
-
All modeled in 3D
We've created the most detailed 3D model ever produced so we can show you everything working.
Super detailed explanations in the video course
15 hours of pro-quality, HD content with subtitles
The
video
course
Bonus: Dismantling the engine

Engine Block

Crankshaft

Tools: Using a tap set

Using an engine stand

The Pistons
