Fixing a windscreen wiper motor
The Video Course teaches you everything about modern cars.
Removing a windscreen wiper motor
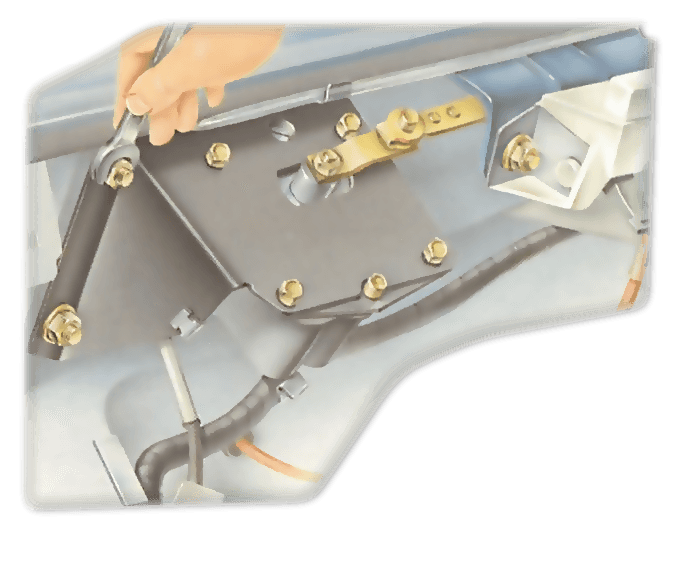
Disconnect the battery . Remove the electrical connections from the motor , preferably labelling them so that you can refit them to the right terminals .
With a rack -and-wheelbox system, disconnect the rack from the motor gearbox and unbolt the motor.
With a pushrod system, it is usual to take out the motor and linkage in one piece. Often they are mounted together on a plate that can be unbolted and removed.
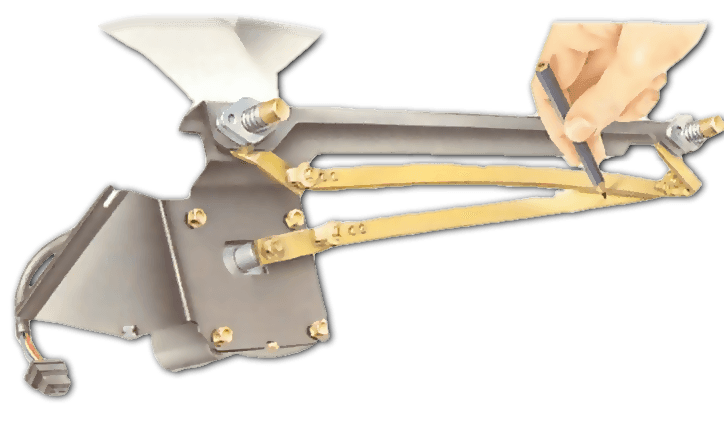
On some cars you unbolt the pushrod at the motor spindle , remove the bolts that hold the motor and lift it out on its own.
Before removing the motor and linkage, free the wiper spindles by removing the arms and unscrewing the spindle nuts. Note the position of any spacers and washers.
Mark the linkage to show how its parts are angled when the blades are in the park position.
If the motor failed when the wipers were not parked, mark the positions of the blades on the windscreen as well as the angles on the linkage, as a guide when refitting.
With the mechanism removed, disconnect the linkage from the motor.
Fixing the motor
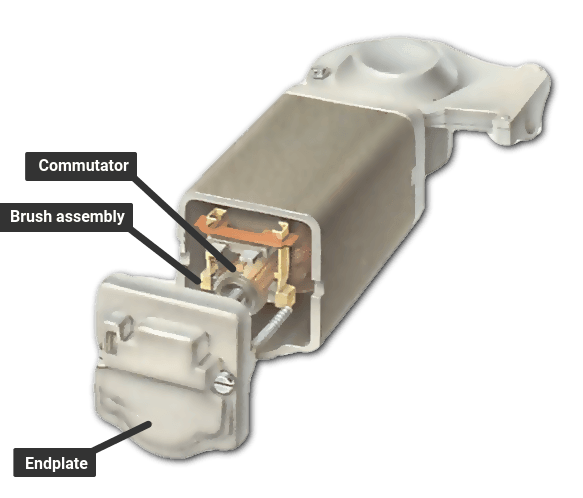
Two types of Lucas wiper motor are in general use on English cars. Other motors are very similar, but you may not be able to get new brushes or other parts for them. If you cannot get parts, buy and fit a new motor.
The earlier (wound-field) Lucas motor is square. Take out the long bolts securing the endplate.
Pull the fibre lock plate free from the brushes, open the jaws of the spring-loaded brush holder and slide it off the commutator .
Look at the brushes - if they are worn down to about ; in. (3 mm), fit new ones, making sure these slide freely. Use a fine file to remove any roughness.
Take out the armature and main gear wheel, and clean them with methylated spirit on a lint-free cloth.
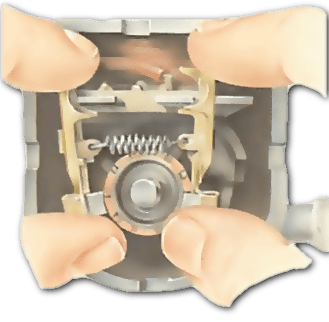
If the commutator is slightly burned or corroded, clean it with fine emery cloth; if however, it is badly pitted or scored, fit a new or exchange motor.
If the gear teeth are worn, fit a new gear spindle.
Reassemble the motor, packing the gearbox with plenty of high melting-point grease.
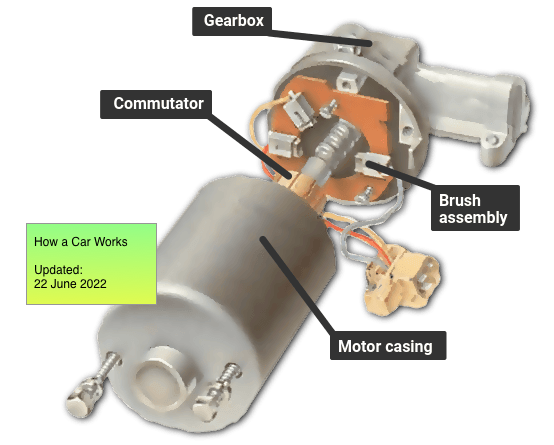
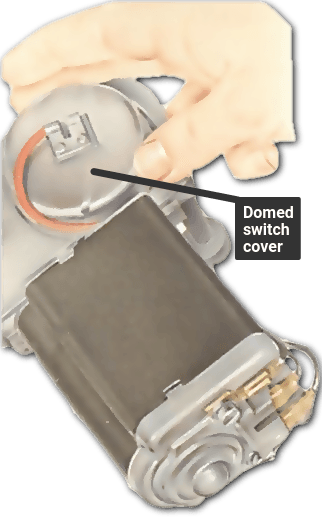
The casing of the later ( permanent-magnet ) Lucas motor is round. Before you unbolt the casing mark its position on the gearbox. If you replace it the wrong way round, the motor will tum backwards. There may be more than two brushes if the motor has more than one speed. Inspect the brushes, and if they are worn to in. (3 mm), fit new brushes and holders. Remove and clean the armature and main gear wheel with methylated spirit on a lint-free cloth. The gear has a dished washer under it; refit it the right way round. Clean the commutator with fine emery cloth.
If you have to fit a new gear, buy a replacement with the same sweep angle, which is marked on the wheel -110 degrees, for example.
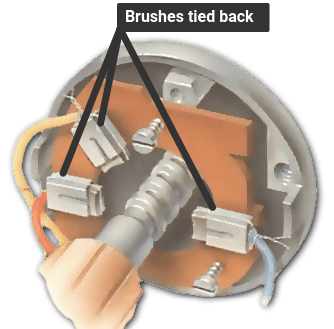
When you reassemble the motor, the brushes have to be pressed back into their holders while you fit the commutator.
Tie them back with 4 in. (100 mm) lengths of 5 amp fuse wire. Twist the ends and let them stick out.
Push in the commutator until it just enters the space between the brushes, then slip off the wires and slide the commutator home.
On some makes of motor, brushes are soldered into place. Solder one brush at a time.
Cut off the old lead, carefully noting its route, and match it with the new one. Melt a little solder on a new lead and the contact point, then solder on the lead.
Do not let solder run along the lead and stiffen it.
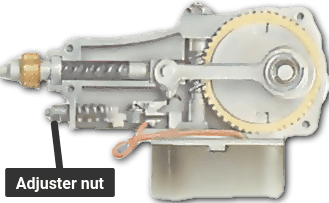
Some motors have exterior screws for adjusting armature end float (that is, lengthwise free play), which should be only fractional. Other motors have springs to take up end float.
Refitting the motor
When reassembling a pushrod linkage, use the guide marks you made to position rods at the correct angles.
Once the motor is back in place, test the wipers with the blades lifted off the screen. Then wet the screen with the washer and test with the blades in the wiping position.
The Ultimate Car Mechanics video course
Learn everything about modern cars from our new video series.
Learn more >-
We build a Mazda MX5 Miata from scratch
We start by tearing down and then rebuilding the whole car.
-
Every part explained
There's ridiculous detail on every part. Clearly and easily explained.
-
All modeled in 3D
We've created the most detailed 3D model ever produced so we can show you everything working.


