How to lubricate the steering system
The Video Course teaches you everything about modern cars.
Most modern cars have sealed for life joints in at least part of the steering system. These do not need maintenance, and are simply replaced when worn or damaged.
But even new cars may have grease nipples and/or oil-filler holes in various parts of the system.
Their position depends on the steering system - rack and pinion or steering box - and the front suspension type - wishbone or MacPherson strut .
The car handbook will tell you where to lubricate and how often usually every 6,000 miles or 10,000 km - and the type and amount of lubricant to use. (For power-steering systems see Checking power-assisted steering .)
Raise the front of the car with the wheels hanging free. Support it on axle stands set under frame members. Apply the handbrake firmly and chock the rear wheels. Put rear-wheel-drive cars in gear (`park' for automatics ).
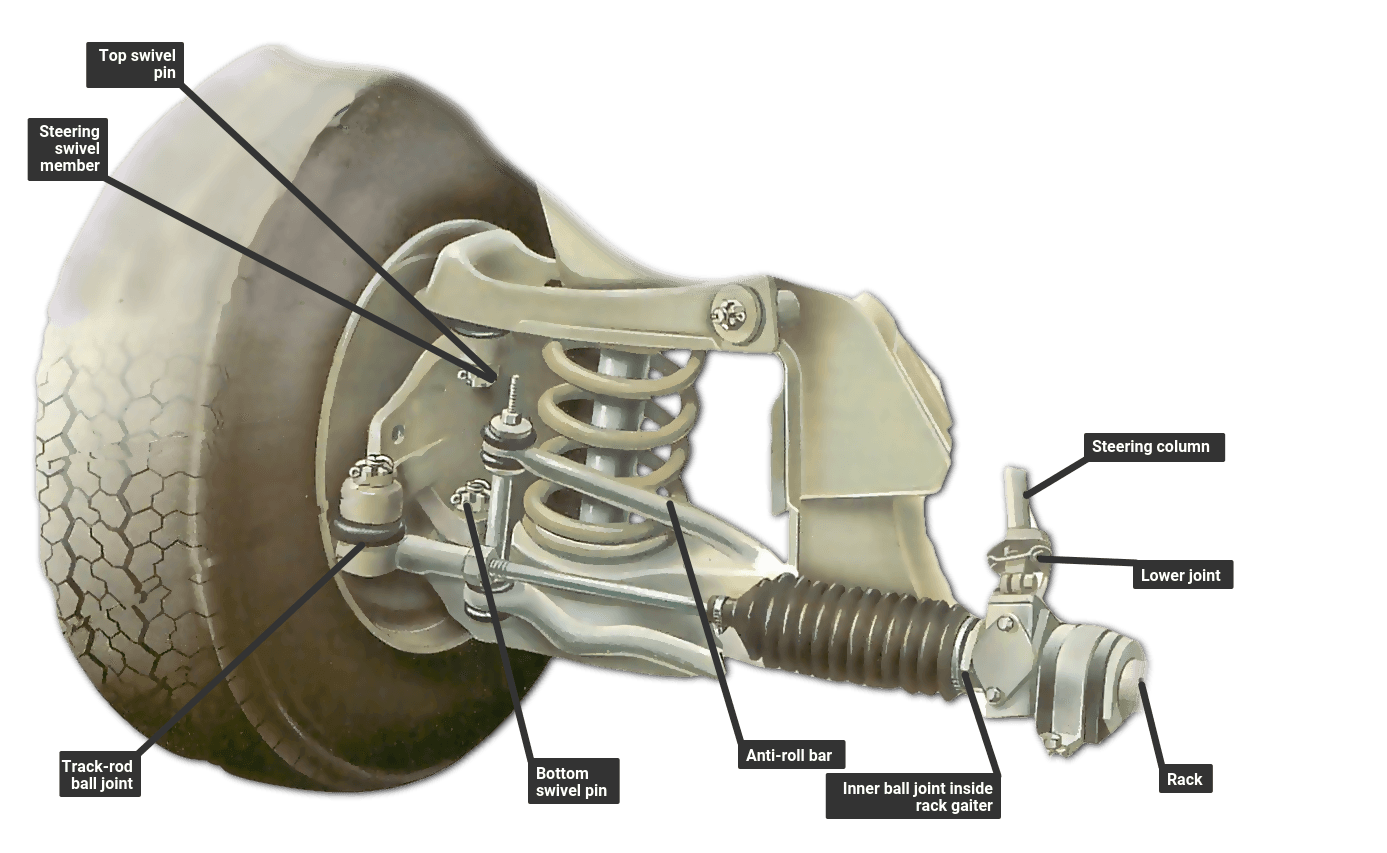
Lubricating a rack and pinion

The rack is filled with oil or grease, but does not usually need regular maintenance. It needs re-lubrication if you remove or replace a rack gaiter, or if there has been a leak past a loose or damaged gaiter clip (See Replacing steering-rack gaiters ).
If you do need to re-lubricate, consult the car handbook to see whether oil or grease is used, which kind, and how much.
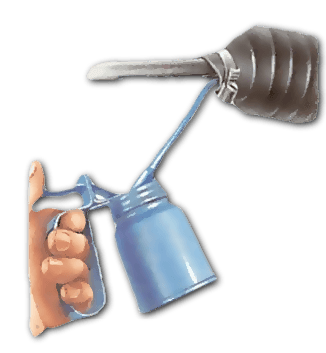
If it is oil, drain the rack and use a syringe to refill it. Check how much the syringe holds, to ensure the right oil level.
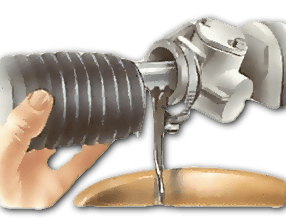
Raise the car on an axle stand on one side only, so that the rack is tilted. Clean carefully around the gaiter and set a drip tray under the lower end of the rack.
Release the clip at the inner end of the lower gaiter. Pull the gaiter free of the rack housing and let all the oil drain out.
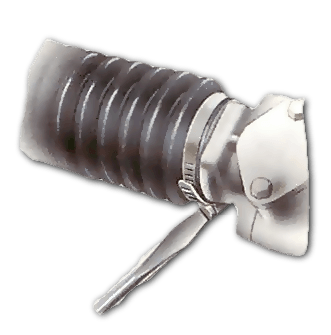
Smear a little grease or gear oil inside the gaiter to make it easier to push on. Refit the gaiter and tighten the clip. Replace a wire clip with a screw clip. Unclip and free the inner end of the other, upper gaiter.
Use a syringe to inject the correct amount of gear oil of the right grade. If you do not have a syringe, use an old cycle pump or an oil can. Refit the gaiter and clip.
If it is inconvenient to tilt the car, you can empty the rack on the level by undoing one gaiter at the inner end and slowly moving the steering wheel from lock to lock several times - not quickly, for that might burst the other gaiter.
Refasten the gaiter, then unclip its outer, small end. Note how far it reaches along the track rod: its exact placing is important.
Push the syringe in between the gaiter and track rod to inject the oil. Refasten the clip.
Grease cannot be removed; but when replacing a gaiter you should wipe grease off the inner track-rod ball joint to inspect the joint.
Smear the joint and all visible parts of the rack mechanism generously with grease before putting back the gaiter.
Use the grade of grease that is recommended in the handbook for the car.
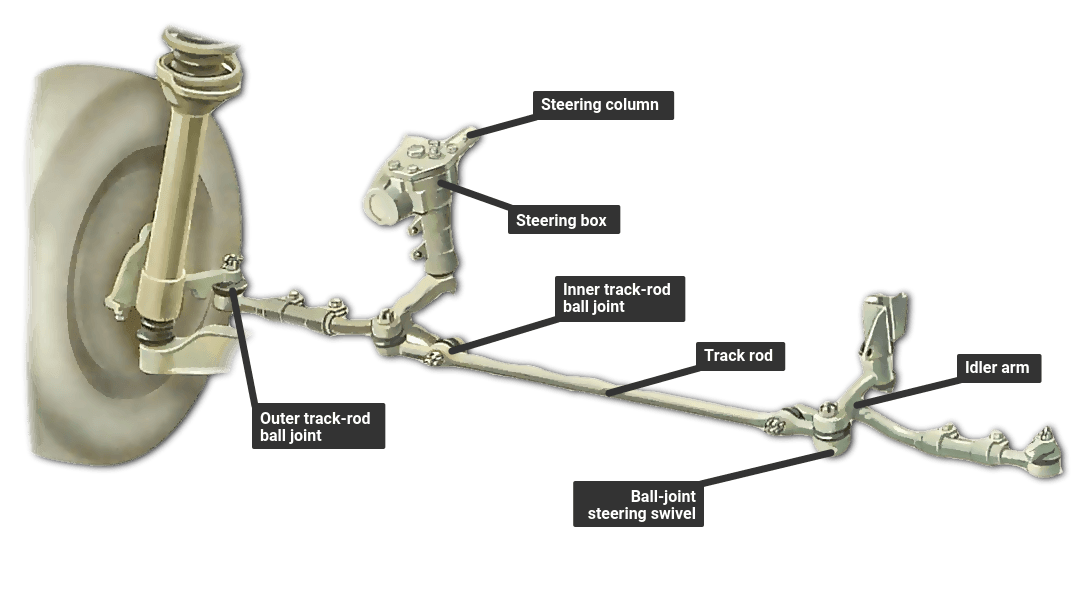
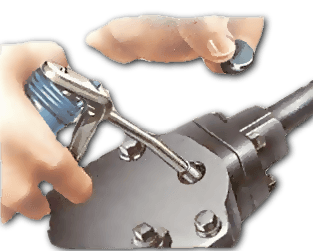
Greasing track-rod ball joints
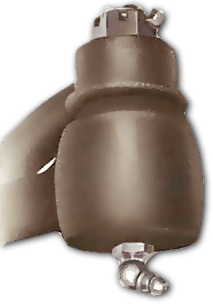
Track-rod ball joints are usually sealed for life. If they do have grease nipples, the nipples are usually on the flat top of the ball-joint housing.
Grease them when carrying out major services, or at the intervals recommended in the car handbook, which will also tell you the correct grade of grease to use.
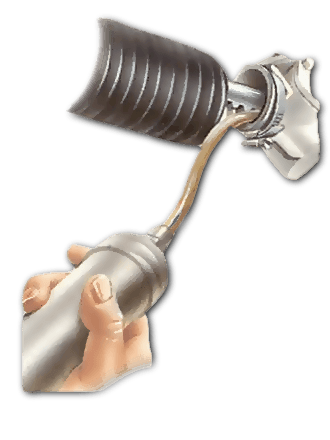
Wipe each nipple clean and inject it with a grease gun until fresh grease exudes from the joint. Wipe the nipple clean.
Be sure to grease all the nipples steering-box systems may have four, or even six.
Topping up a steering box
The steering box is filled with oil, and does not usually need regular topping up. However, you should check the level whenever you are doing routine maintenance on the steering, in case there is a leak from an oil seal (See Checking the steering box ).
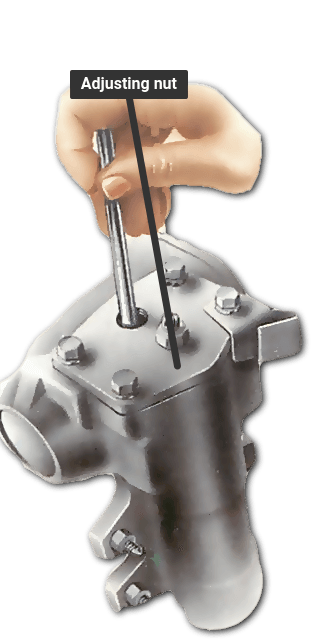
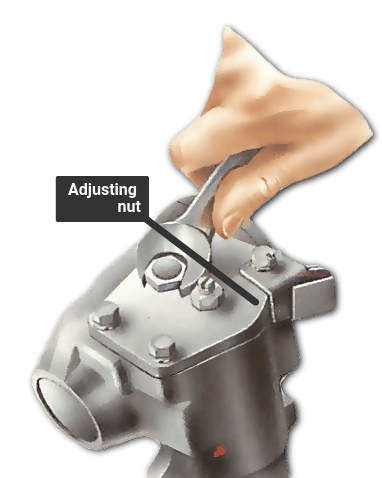
A combined level and filler plug is usually set in the top of the box.
Do not confuse it with the adjusting screw or bolt, or the cover retaining bolts which are also on top of the box.
Find out from the car handbook or a service manual where the oil level should be in relation to the filler hole.
If the filler hole is in the side of the box, the correct level is usually right up to the bottom of the hole when the car is standing on a level surface.
Clean carefully around the filler plug, then unscrew it. Inspect the oil level. If necessary, use a short rod as a dipstick .
Refill to the correct level with gear oil of the grade recommended in the car handbook.
A side filler hole may need to be filled from a plastic squeeze bottle with a piece of plastic tube attached.
Squeeze in the oil until it begins to overflow. Wait until the overflow stops, wipe away the excess and replace the filler plug.

The Ultimate Car Mechanics video course
Learn everything about modern cars from our new video series.
Learn more >-
We build a Mazda MX5 Miata from scratch
We start by tearing down and then rebuilding the whole car.
-
Every part explained
There's ridiculous detail on every part. Clearly and easily explained.
-
All modeled in 3D
We've created the most detailed 3D model ever produced so we can show you everything working.
Super detailed explanations in the video course
15 hours of pro-quality, HD content with subtitles
The
video
course
Bonus: Dismantling the engine

Engine Block

Crankshaft

Tools: Using a tap set

Using an engine stand

The Pistons
