Replacing a handbrake cable
The Video Course teaches you everything about modern cars.
The handbrake on most cars is a mechanical linkage of rods and cables, operated by a lever on the car's floor or dash. Over a period of time, the linkage wears - the cables become slack, or the pivot points and linkage pins become badly grooved, allowing slack to build up. You can compensate for wear until the handbrake adjuster won't take up any more slack, then you need to fit new parts.
Alternatively, the cable may simply fray, seize , or even break, leaving you without a handbrake, which is illegal.
Cable layouts
Most cars use one of several lay- outs, depending on whether they are front- or rear-wheel drive, and whether the handbrake operates on the front or rear wheels. This, in turn, determines how you replace the cable. These Mechanics sheets look at one of the most common and simple systems in use - it is found on many cars, including Fords and Vauxhalls.
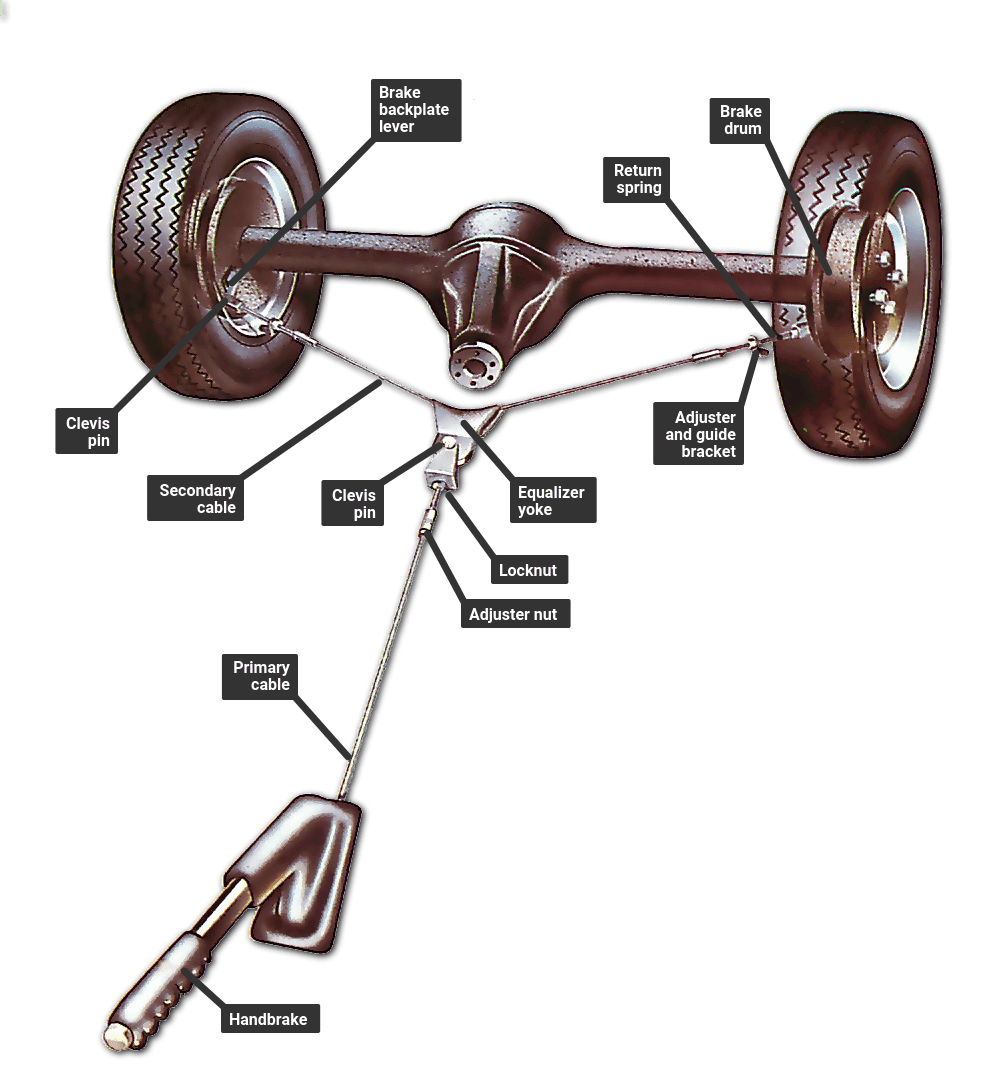
This system has the handbrake pulling on a short primary rod or cable that is attached to a U-shaped guide known as an equalizer yoke. Another cable (the secondary cable) loops around this yoke and runs to each rear wheel. At each brake backplate the secondary cable is attached to a lever that operates the shoes inside the drum. When the handbrake is pulled on, the primary rod or cable pulls on the yoke and that tensions the secondary cable.
In addition, the secondary cable may also be one of two types. One design has the cable exposed along its full length, running in metal guides welded to the underside of the car. The other design uses an enclosed Bowden cable where the handbrake cable runs for part of its length within an outer sheath.
Checking the cable
To find out where the wear lies, support the rear of the car on axle stands, chock the front wheels and release the handbrake. Get under the car and watch the linkage while a helper works the handbrake lever on and off. Watch for any lost motion in the joints indicating that the clevis pin is badly worn.
If there is no slack in any of the joints, yet the handbrake is on maximum adjustment, then the cable may have stretched. You can sometimes fit an extra cable adjuster to take out some of the slack and give the cable a new lease of life (see sideline overleaf) but, if not, then you must buy and fit a new cable.
Primary cable
The primary cable (where fitted) runs back from the handbrake lever to the equalizer yoke where the secondary cable or rod joins. First have a look at the primary cable to see how it fits. It may be attached to the handbrake lever either underneath or inside the car.
If the cable fits inside the car, begin by removing the carpets and the gaiter that surround the handbrake lever. The gaiter may come off with the carpet, or it may be held to the floor by screws.
Where the connection is under the car, there may be a rubber gaiter to keep out dirt - peel this back.
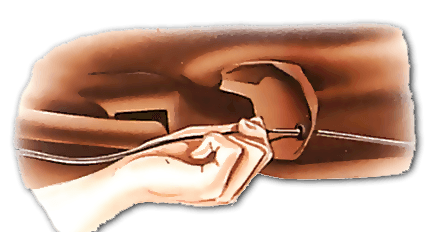
Disconnecting a handbrake cable
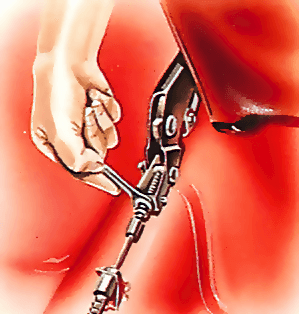
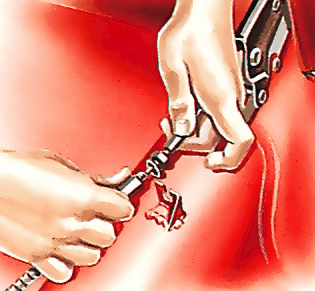
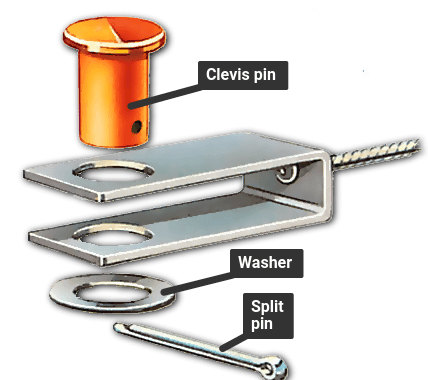
You will be faced with one of two types of connection. The most common is simply a clevis pin joining a small yoke on the cable to the end of the lever. The clevis pin is secured by a split pin. Straighten and pull out the split pin with pliers, note any washers fitted, then push out the clevis pin with a screwdriver. If the pin is corroded, spray it with penetrating oil , leave it to soak and try again. When the cable is free, pull it clear of the handbrake lever.
The other type of joint you may get is where the primary cable adjuster is on the handbrake end.
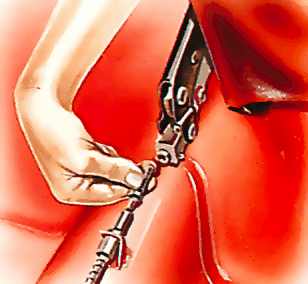
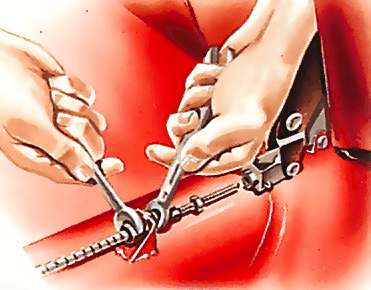
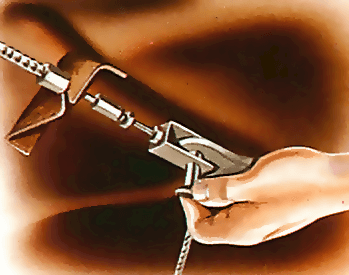
You will be faced with a nut securing the threaded end of the primary cable to the handbrake lever. First undo the locknut (if fitted), then remove the adjuster nut, noting which way round it fits and also the position of any washers. Pull the cable back free of the hole in the handbrake lever.
Now go to the other end of the primary cable where it attaches to the equalizer yoke or lever. You will be faced with whichever connection your cable didn't have at the other end - disconnect it as described above.
With both ends of the primary cable exposed, you should now be able to pull the cable away from the car. Watch out for any brackets or rubber support loops that the cable runs through, and carefully disconnect it from them. Where the primary cable is of the Bowden type (an inner cable running in an outer sheath), the outer sheath may be attached to a bracket by a nut undo it to free the cable.
The new cable can be fitted in the reverse order to removal, taking care to route it via all its brackets. Don't forget to adjust the cable once fitted.
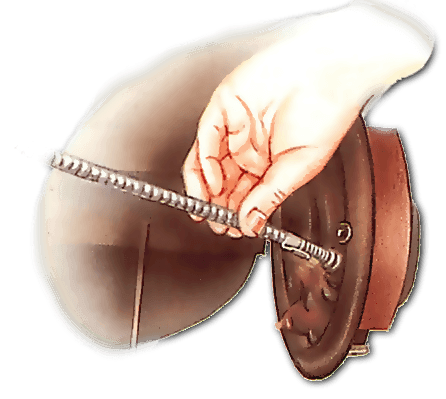
Changing an exposed secondary cable
Replacing an exposed secondary handbrake cable is not too difficult - you can see the entire cable run under the car. It is a good idea if possible to make a sketch of exactly which brackets the cable fits to before removing it - there may be extra brackets fitted under the car for different models.
Start by disconnecting the secondary cable from the rear brake levers. You will find that the small yoke on each end of the cable is secured by a split pin and clevis pin. As you disconnect them, note the position of any washers.
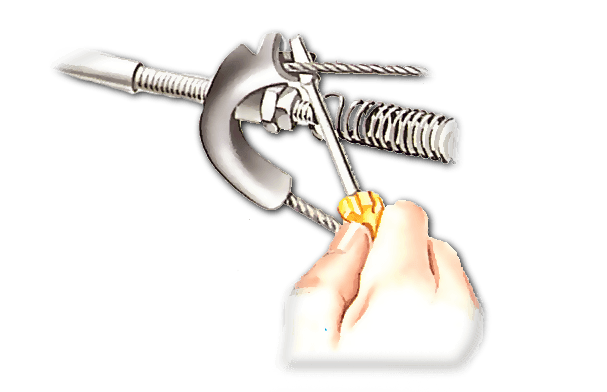
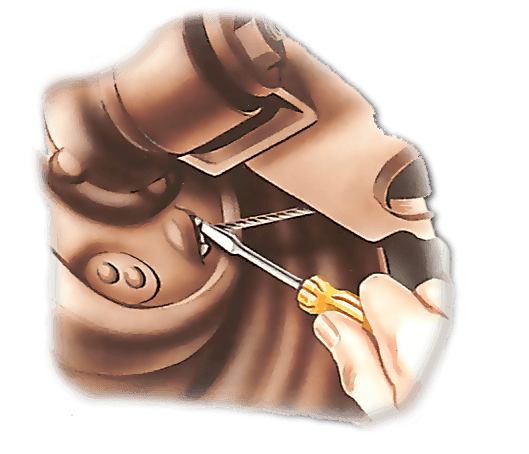
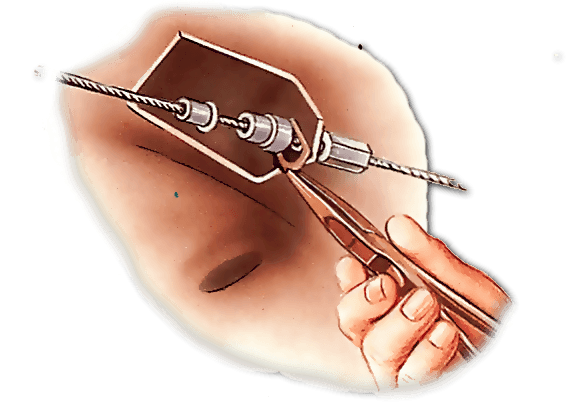
Now work your way along the underside of the car, unhooking the cable from the guide brackets. Once the entire cable is disconnected, you have to detach it from the equalizer yoke. Some designs allow the cable simply to drop straight out, but on some the edges of the yoke are squashed over to keep the cable in place. If so, use a screwdriver to gently widen the ends of the yoke and pull out the cable.
On a very few designs, the yoke fits right round the cable. If yours is like this, the new cable comes complete with a new yoke. To remove the old cable, use pliers to pull out the clevis pin securing the yoke to the handbrake lever or primary cable, then pull off the yoke complete with the secondary cable.
When you fit the new cable, it's well worth renewing any clevis pins that are grooved, as they will create a lot of slack in the linkage. Also fit new split pins. Where the cable passes through the yoke and the guide brackets, make sure it is well greased. When the cable is refitted, adjust it.
Replacing a Bowden cable
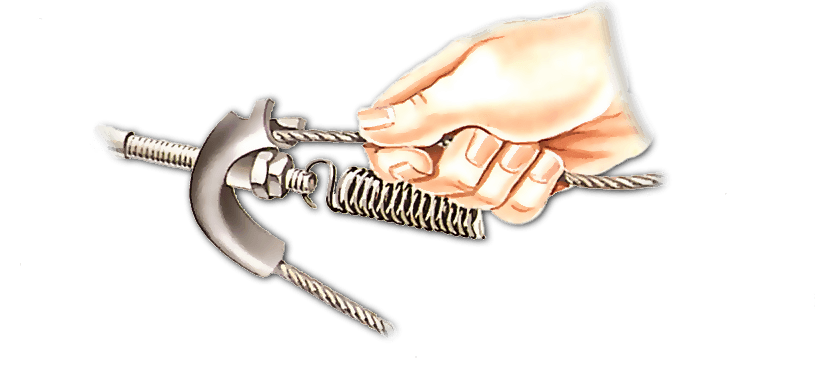
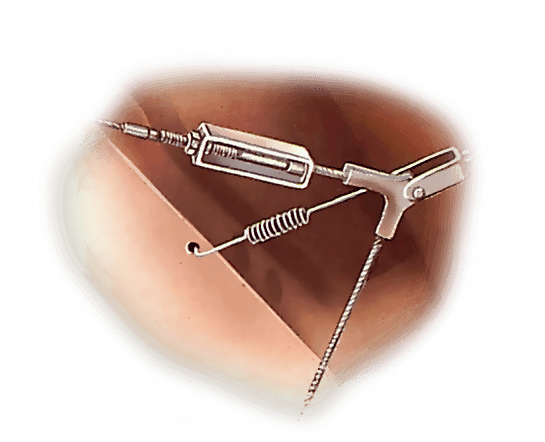
Secondary Bowden cables follow much the same route as the ex- posed types but are often fitted differently. The most common design has a short section of exposed cable running back from each side of the equalizer yoke which disappears inside the outer sheath of the Bowden cable. The cable then runs back to the brake shoes.
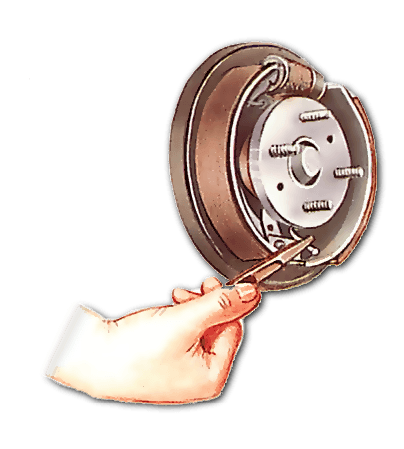
First remove the brake drums . Look at where the cable fits to the brake shoe, then unhook it with pliers. Do the same on the other side.
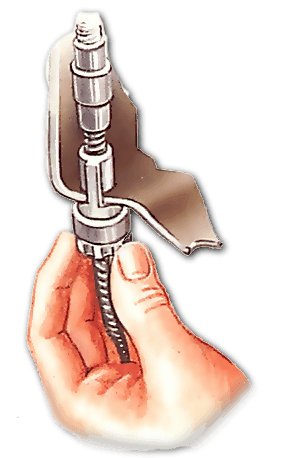
Next follow the cable forward until you find where it attaches to a bracket on the underside of the car body. The outer sheath of the cable will probably be a push-fit into the bracket, so guide the outer sheath out then slip the inner cable through the slot in the bracket.
Where the adjuster for the cable is fitted at the bracket, the outer sheath will usually be fixed in place by a securing nut. Undo the nut then release the cable from the bracket.
Again follow the cable forward to where the inner cable emerges near to the equalizer yoke. Disconnect the outer sheath at its brackets, then disconnect the inner cable from the yoke (or the yoke itself) in the same way as for the exposed cable (see above).

The Ultimate Car Mechanics video course
Learn everything about modern cars from our new video series.
Learn more >-
We build a Mazda MX5 Miata from scratch
We start by tearing down and then rebuilding the whole car.
-
Every part explained
There's ridiculous detail on every part. Clearly and easily explained.
-
All modeled in 3D
We've created the most detailed 3D model ever produced so we can show you everything working.
Super detailed explanations in the video course
15 hours of pro-quality, HD content with subtitles
The
video
course
Bonus: Dismantling the engine

Engine Block

Crankshaft

Tools: Using a tap set

Using an engine stand

The Pistons
