Engine mount replacement
The Video Course teaches you everything about modern cars.
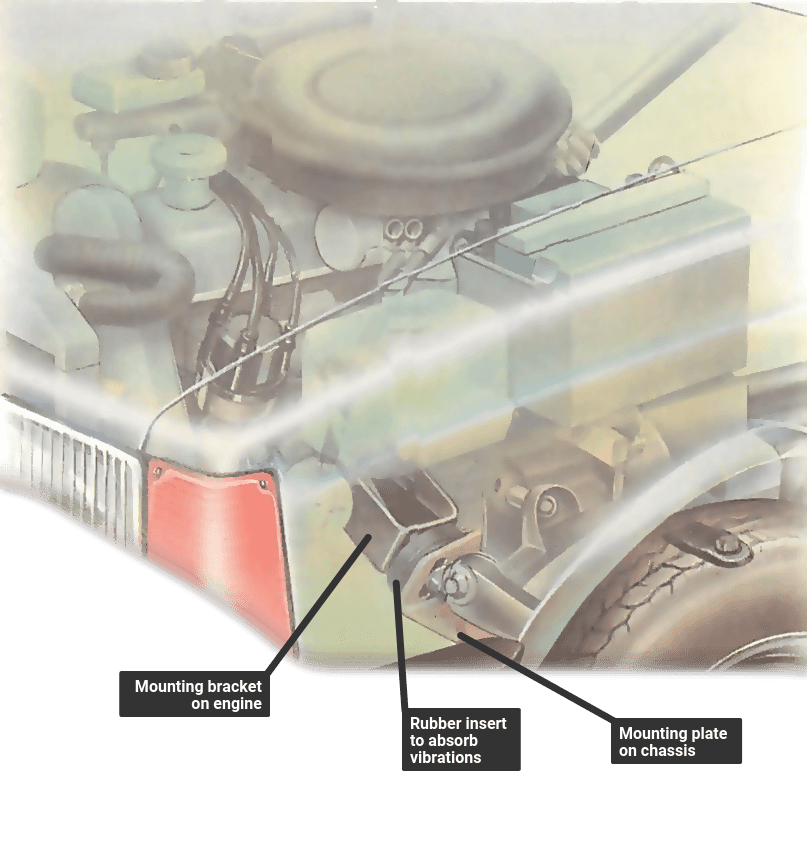
The rubber anti-vibration mountings of an engine may crack or come away from the metal plates to which they are bonded.
Check with the engine running. Pull the throttle linkage of the carburettor so that the engine speeds up for a moment.
As it does so, watch the mountings; as the engine suddenly rocks on the mountings, any cracks or unbonded areas should open up.
Repeat with the engine switched off by rocking the engine by hand on its mountings.
An engine that is mounted longitudinally usually has two front mountings, which are easy to see. It also has rear mountings at the gearbox.
A transverse engine may have three or four mountings, some of which have to be checked (and if necessary replaced) from under the car.
Raise the front wheels on ramps with the handbrake applied and the rear wheels chocked. Ask a helper to actuate the throttle.
If any mounting is faulty, replace both front ones for a longitudinally mounted engine, or all the mountings of a transverse one.
Replacing the mountings
If the engine has a steady bar or damper (See Checking engine dampers ) holding it to the body, unbolt one end of the bar or damper and swing it clear.
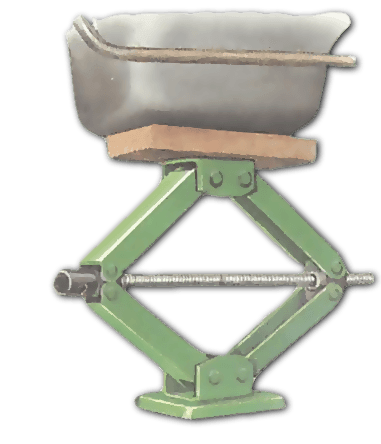
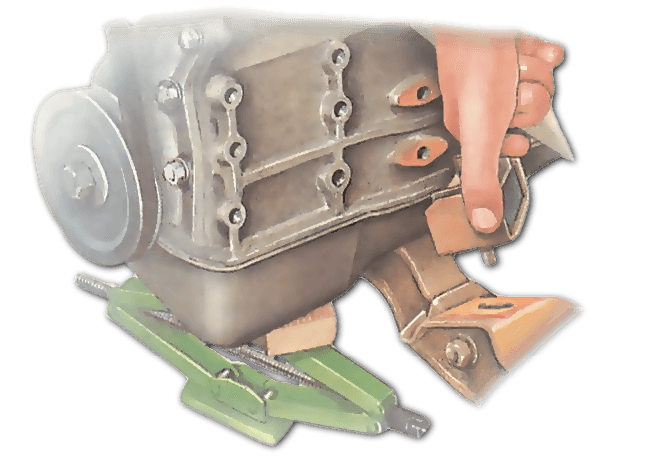
Support the engine with an adequate jack under the sump , as nearly as possible exactly between the mountings.
Protect the sump with a wood block at least 6 in. (150 mm) square and 1 in. (25 mm) thick.
Screw up the jack until the engine just rises. Look at the radiator hoses , exhaust, cables, pipes and linkages to make sure further movement will not strain them. Disconnect anything that seems at risk.
Raise the engine until the mountings are not bearing any load. The car body rises some distance too.
You may need to stand on a stool or wooden box to reach the mountings.
If you need to get under the car, make sure both engine and wheels are safely supported. On any car, disconnect only one mounting at a time so that the engine is never supported by the jack alone.
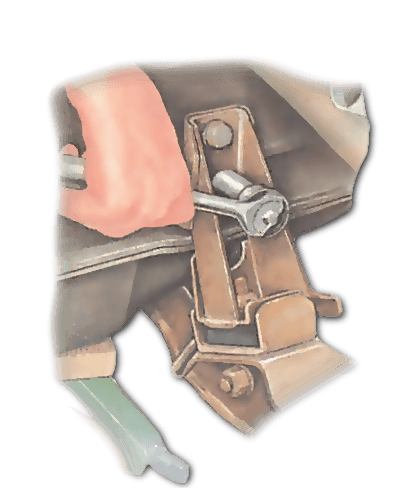
Undo the nuts and bolts holding the mounting to the engine and body, noting exactly how they and any washers are fitted.
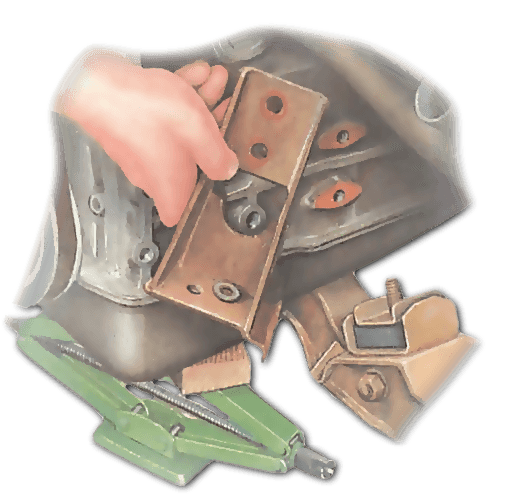
Also note which way round the rubber part is fitted, then remove it and put in the new one.
Refit the nuts and bolts, but do not tighten them fully.
Replace other mountings as necessary in the same way.
Slowly lower the jack and remove it. Reconnect the steady bar and any disconnected engine fittings.
Start the engine and let it idle for a few minutes so that it can settle down into its normal place on the mountings. Tighten the nuts and bolts.
Finally, check the tightness of all the clips holding pipes and hoses to the engine, in case any have pulled loose.

The Ultimate Car Mechanics video course
Learn everything about modern cars from our new video series.
Learn more >-
We build a Mazda MX5 Miata from scratch
We start by tearing down and then rebuilding the whole car.
-
Every part explained
There's ridiculous detail on every part. Clearly and easily explained.
-
All modeled in 3D
We've created the most detailed 3D model ever produced so we can show you everything working.
Super detailed explanations in the video course
15 hours of pro-quality, HD content with subtitles
The
video
course
Bonus: Dismantling the engine

Engine Block

Crankshaft

Tools: Using a tap set

Using an engine stand

The Pistons
