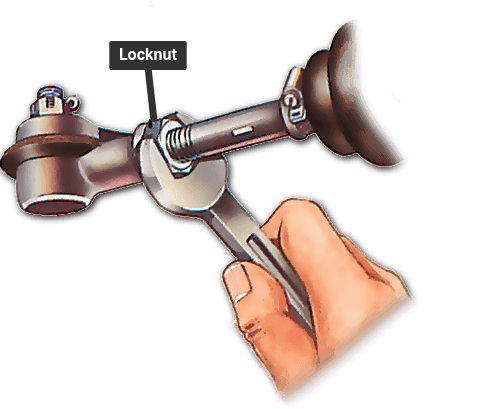
Setting the tracking
The Video Course teaches you everything about modern cars.
The front wheels on most cars are not set exactly parallel. Instead they point slightly in or slightly out at the front - known as toe-in or toe-out. The set of the wheels is called tracking .
Tracking check
If the tracking is incorrect the front tyres will wear out very rapidly along the inner or outer edges. In severe cases the car's handling may be upset by such an extent that it is impossible to keep the car on line.
Ideally the tracking should be checked and reset about every 10,000 miles (16,000km), or sooner if you notice that the tyres are wearing unevenly. You can either have a garage or tyre specialist do the job, or alternatively you can buy one of the DIY tracking gauges that are on the market, such as the Mobry tracking tool.
Checking the toe-in
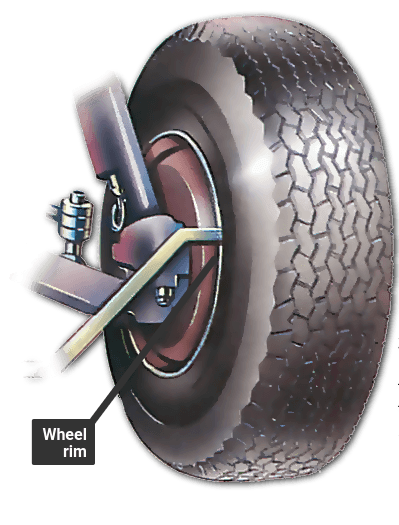
With the car on level ground , offer the tracking tool up to the wheels and adjust it so that the arms sit against the front lip of each wheel rim. Make sure the tool touches the rim as close to the centreline as possible.
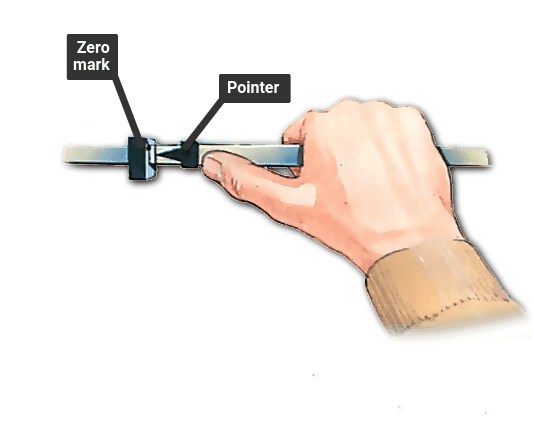
Holding the tool in place, slide the pointer until it aligns with the zero mark on the scale .
Lift the tool carefully away, and use it to measure the distance between the rear edges of the wheel rims. You will have to slide the arm and pointer out slightly until it touches the rim.
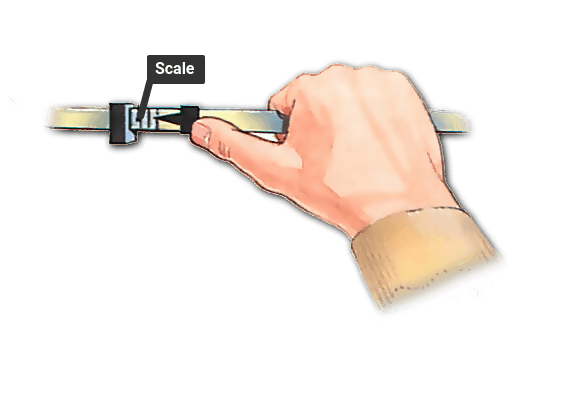
Then check the reading on the scale and compare it with the specified figure.
How it works
The way in which the Mobry tracking tool works is very simple. It consists of three pieces - a straight centre section and two cowhorn sections. The two cowhorns fit into the centre section, and are free to slide in and out. You can then use the gauge to measure the distance between the front of the two wheel rims and between the rear. By subtracting one from the other you are left with the amount by which the wheels toe in or out.
First find out what the setting should be for your car. The figure is usually given in the booklet that comes with the gauge, but if it isn't check with a workshop manual or your dealer. Make sure you get the right figure for your car - it may be affected by factors such as power-assisted steering.
Also find out whether the car has to be loaded. On some cars the tracking must be checked with no load in the car, while other cars have to have weights in them again you can get the information from a manual or your dealer.
Prepare the car
Before you can check the tracking you need to check the steering and front suspension to make sure that they are not worn. Wear in either of these systems will give you a false reading.
Jack up the front of the car and support it on axle stands. Then check the steering and suspension ball joints for wear by rocking the wheels in the 12 and 6 o'clock and 3 and 9 o'clock positions.
Follow this by checking the wheel bearings for wear and adjusting them where possible. Finally check that the tyre pressures are all correct. If all these components are in good condition you can proceed to set the tracking.
Check the setting
Bounce the suspension a few times so that it is fully settled. Run the car back about 30ft (10m) in a straight line, then run it forwards, again in a straight line, to where you are going to measure.
Assemble the tracking tool by pushing the two cowhorn arms firmly into each end of the centre section. You have to press in the spring-loaded plastic buttons to get each arm in. The arm with the pointer on should be fitted to the end of the central tube with the markings.
If your car has a very wide track, or you are checking the tracking on a van, the short arm without the pointer may not be long enough to do the measurements. A second longer arm is provided for this.
Although you can do the job on your own, it is much easier if you ask a friend to help. Make sure there are no balance weights or buckled rim sections at the centre point of the wheel rim at either the front or rear.
If the wheels have to be set toe-in, position the tool at the front of the wheel rims so that the arms are as near the centre-line of the wheels as possible. Holding it there, press in the plastic button to free the arm without the pointer and slide the arm out until it touches the wheel rim. Then do the same with the pointer arm. There is a slot in the end of each arm that locates on the wheel rim.
Now keeping the tool steady, carefully slide the pointer so that its tip is against the zero setting on the scale. Making sure you don't knock or disturb the arms, move the tool and line it up with the centreline at the rear of the wheel rims. Press the arm without the pointer against one rim, then hold the tool there and press in the plastic button to free the pointer arm and gently slide it out so that the slot fits over the rim.

The Ultimate Car Mechanics video course
Learn everything about modern cars from our new video series.
Learn more >-
We build a Mazda MX5 Miata from scratch
We start by tearing down and then rebuilding the whole car.
-
Every part explained
There's ridiculous detail on every part. Clearly and easily explained.
-
All modeled in 3D
We've created the most detailed 3D model ever produced so we can show you everything working.
Super detailed explanations in the video course
15 hours of pro-quality, HD content with subtitles
The
video
course
Bonus: Dismantling the engine

Engine Block

Crankshaft

Tools: Using a tap set

Using an engine stand

The Pistons
