Replacing the Bendix gear
The Video Course teaches you everything about modern cars.
The name Bendix gear strictly applies to the spiral drive mechanism of an inertia-type starter . However, the term is sometimes used for the pre-engaged starter mechanism.
Drive-mechanism faults can occur in two ways. The starter can spin without engaging with the flywheel , or jam in engagement.
In an inertia starter, dirt in the spiral Bendix thread is the usual reason for it not engaging.
Remove the starter (See Checking and replacing the starter motor ) and clean the gear thoroughly with petrol and a paintbrush. Let it dry completely: petrol fumes can explode. Test the gear by sliding the pinion along the shaft. It should slide easily and return under the spring pressure .
Do not oil the gear: that would attract more dirt. Refit the starter and your problem may be solved.
If a pre-engaged starter does not engage, or if either type instead of spinning emits a dull > clunk , showing that it is jammed, there may be more serious trouble and you may have to strip the starter (See Stripping the starter motor ).
Sometimes a starter turns the engine and then jams in engagement, producing a loud howl as the engine starts. Switch off at once and remove the starter for examination.
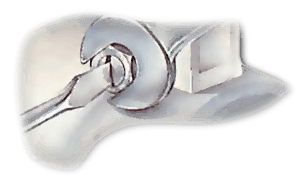
The exposed Bendix gear of an inertia starter is easy to check without dismantling the motor . But a pre-engaged starter has to be stripped completely.
With either type of starter, if you find no fault, it may be the flywheel that is damaged. There may be marks on the flywheel and corresponding ones on the pinion teeth.
You can often check the flywheel teeth by removing the starter motor and viewing them through the aperture while a helper turns the engine.
Replacing the Bendix on a pre-engaged starter motor
Strip the motor and examine the drive mechanism for any damaged parts. If necessary, remove the drive pinion and clutch assembly.
These are replaced as a single unit, so do not dismantle further.
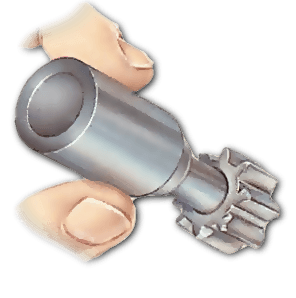
Remove the actuating lever if possible (it may not be removable). Grip the armature firmly, but not too hard, in a vice to remove the thrust collar. Use wood in the jaws of the vice to avoid damaging the armature.
The collar is located by a jump ring - a spring circlet - which engages in a groove on the shaft a pre-engaged starter and another groove inside the collar.
Some collars are removed by using a length of pipe as a drift. Place it against the collar and give it a sharp tap to jolt it down the shaft and off the jump ring.
Remove the ring with a screwdriver and slide the collar off the shaft.
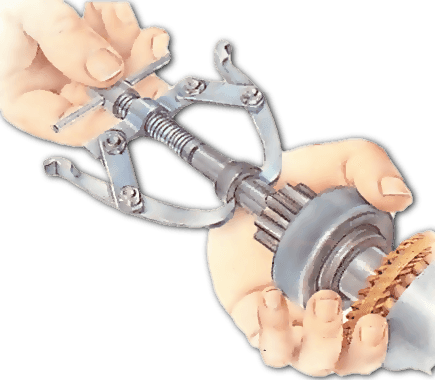
Other collars are pulled off the jump ring with a pulling tool.
Look at each side of the collar to tell which type it is: push or pull it away from the side on which the jump ring is just visible.
The entire pinion-and- clutch assembly can now be lifted off. There may also be a clutch stop bracket fitted over the shaft. Remember to replace this when reassembling.
Reassemble by sliding on the pinion-and-clutch assembly, the thrust collar and the jump ring. Use a small puller to draw the thrust collar back up over the jump ring. If it is one of the alternative types of collar, use a drift to tap it back on. Test that it is on far enough by measuring the armature end float movement lengthways. The maximum allowable end float is 3 mm.
Changing the Bendix on an inertia starter
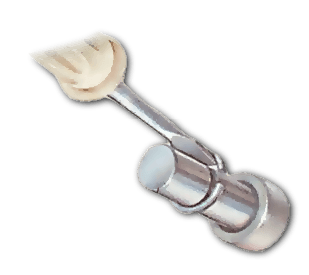
The Bendix gear is usually held on by a circlip recessed into the end of the buffer spring. To free it, compress the spring with a compressor tool available from most accessory shops.
Do not use a vice instead: it can be dangerous if the spring slips.
However, you can adapt an ordinary valve-spring compressor by adding a short piece of tube with a gap cut out of the side, and topped by a steel plate .

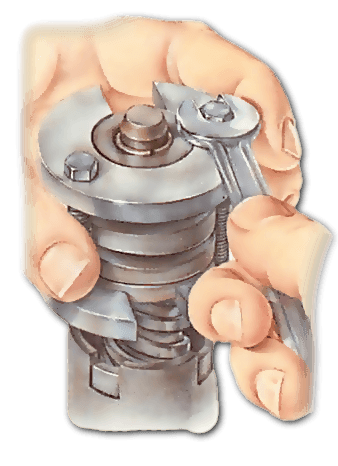
Screw the tube down on the spring to compress it, then hook out the circlip through the gap with a small screwdriver. With the clip and inertia starter removed, slowly unscrew the compressor and pull the parts of the drive off the shaft.
One or more parts may need replacing. You may be able to replace any part separately, or you may have to buy an entire drive assembly, depending on make. Consult an auto-electrician.
If you are fitting a new spiral Bendix spindle , feel along the splines and threads for burrs. Remove these carefully with a small, fine carborundum stone. Do not oil the parts when reassembling. Use the compressor to replace the circlip.
Testing pinion mesh clearance
Reassemble the motor fully, but leave the electrical connection between the solenoid and motor open.
Use test leads to connect the negative (-) battery terminal (if negative earth) to the starter body and the positive (+) one to the small connector on the solenoid which links it to the ignition switch .
The solenoid should click into its engaged position.
Insert a feeler gauge between the pinion and its bearing on the far side of the motor. The gap should be 0.010 in. (0.25 mm) unless another figure is quoted by the maker.

The Ultimate Car Mechanics video course
Learn everything about modern cars from our new video series.
Learn more >-
We build a Mazda MX5 Miata from scratch
We start by tearing down and then rebuilding the whole car.
-
Every part explained
There's ridiculous detail on every part. Clearly and easily explained.
-
All modeled in 3D
We've created the most detailed 3D model ever produced so we can show you everything working.
Super detailed explanations in the video course
15 hours of pro-quality, HD content with subtitles
The
video
course
Bonus: Dismantling the engine

Engine Block

Crankshaft

Tools: Using a tap set

Using an engine stand

The Pistons
