Replacing gaskets and oil seals
The Video Course teaches you everything about modern cars.
Gaskets and oil seals should be replaced if worn or leaking, or whenever removed during servicing. Replacement is simple, but some engine dismantling may be necessary to reach them. Buy gasket sets from a dealer for the make of car, and state clearly for what parts they are needed.
Replacing a rocker or cam-cover gasket
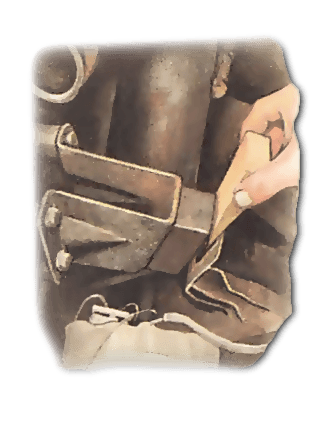
Before removing the cover, note the positions of any pipes and wires round it or fixed to it, which have to be removed before it can be freed.
You may need to take off the air cleaner (See Air filter change ), which may also have pipe connections.
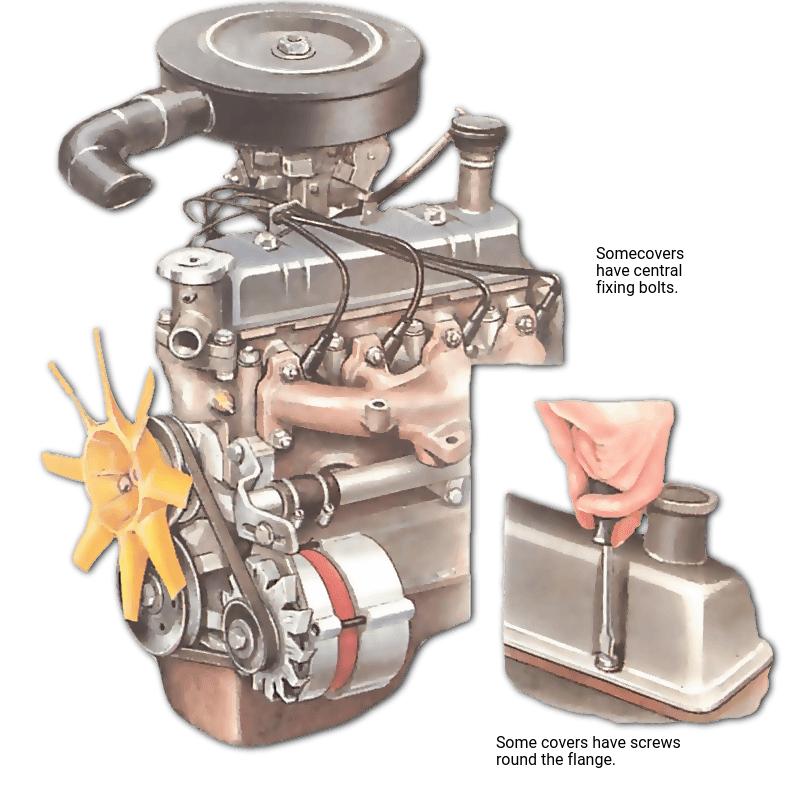
The cover is fixed by nuts or bolts on top, or by screws round the edge. Loosen them all and remove them with their washers. If there are several oil-sealing washers under each fixing, note their order.
Carefully lift off the cover. If it sticks, gently tap it sideways with a soft-faced rawhide or nylon hammer, or with the heel of your hand.
If necessary, lever it gently with a broad screwdriver blade, but take care not to bend the flange or damage the head.
Take off the gasket from the cover flange or cylinder head , noting how it is attached. Some gaskets have tongues that fit cutouts in the flange; others are stuck to the flange with sealant ; some just fit into the flange groove .
Cover the valve gear with a clean cloth to prevent dirt getting into the working parts of the engine.
Use a piece of wood to scrape off all traces of the old gasket from the head and cover. If total removal proves difficult, use a broad screwdriver blade, but take care not to scratch the seating.
Lift off the cloth, making sure no debris falls into the valve gear.
Fit the new gasket to the cover or head — whichever the old gasket was fixed to.
If it was stuck to the cover, smear gasket sealant along the cover flange and upper gasket and leave it to dry for a few minutes.
Fit the gasket to the cover, making sure any screw holes line up. If the gasket has tongues, fit them into their cutouts.
Some gaskets are in two or three pieces dove-tailed together. Make sure the pieces join up properly.
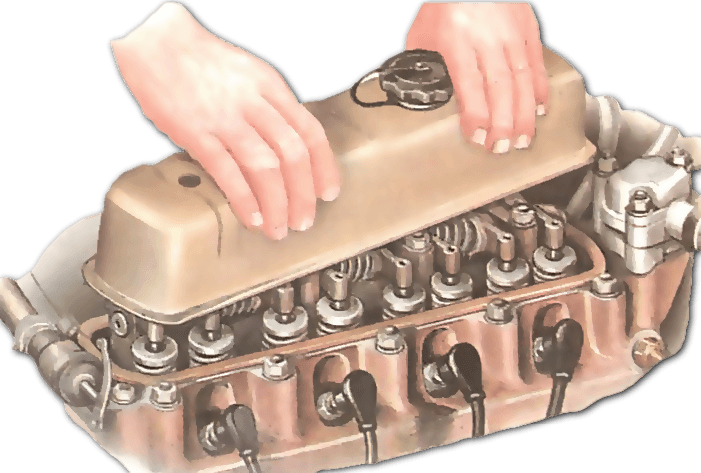
Refit the rocker or cam cover, aligning its fixing holes with those on the head. Check that the gasket edge aligns with the cover flange all round, and is not distorted. If necessary, adjust it gently with tweezers or long-nosed pliers. Tighten bolts evenly to just compress the gasket.
Refit all pipes and wires, and the air cleaner. Start the engine and check for oil leaks.
Replacing the fuel-pump gasket
This applies only to a mechanical fuel pump on the side of the engine.
First disconnect the battery earth terminal , to avoid the risk of a short circuit while the fuel pipes are disconnected.
Have two plugs, such as old pencils, ready to fit the pipes. Unscrew the pipe connections and plug them at once.
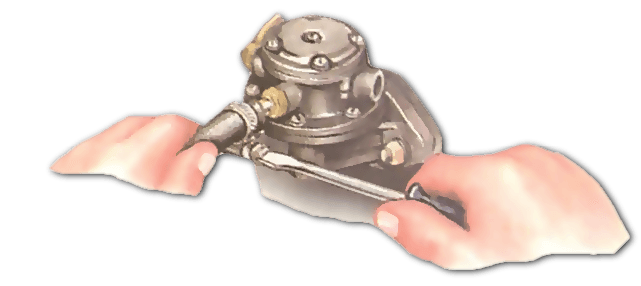
Remove the pump fixing nuts or bolts. Pull the pump and gasket or gaskets off the engine.
There may be a thick spacer gasket between two thin paper ones. Check the spacer for cracks. If it needs replacing, be sure the new one is the right thickness, because this governs the fuel-pump lever stroke .
Remove all traces of the old gasket from the pump and engine, using a paint scraper if necessary.
Smear gasket sealant on the mating faces of the pump and the engine. Refit the pump and gasket or gaskets and tighten the fixings.
Make sure the fuel-pipe connections are clean. Unplug them and reconnect to the pump.
Reconnect the battery . Start the engine and check carefully for oil or fuel leaks.
Preparing to replace the sump gasket
On most cars you need not remove the engine to get at the sump . But often you have to raise it slightly and wedge it on its mountings so that the sump moves clear of the front- suspension cross member.
Look at the end of the sump. If you cannot see clearly whether you need to remove the engine, consult a car service manual or dealer.
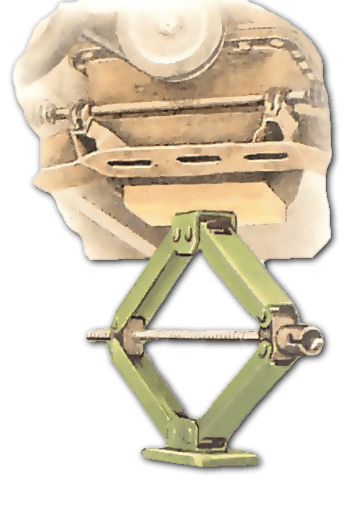
Raise the front of the car on ramps, apply the handbrake and chock the rear wheels. Clean round the sump and the crankcase , clutch and gearbox. Drain the engine oil (See How to drain engine oil and remove filter ). Use an adequate jack to lift the engine.
Put a wood block at least 6 in. (150 mm) square and 1 in. (25 mm) thick as a spacer between the jack and the sump to prevent damage.
Raise the jack to take the weight of the engine off its mountings. Make sure you do not strain the radiator hoses or other connections. If in doubt, drain the radiator and disconnect the hoses (See How to remove a car radiator ).
Note how the mounting nuts or bolts are fitted, then undo them. Have ready some wooden wedges to use as supports, and a strong helper to hold the engine steady.
Slowly raise the engine about 11 in. (38 mm) and insert wedges between the mounting rubbers and pads .
If this is not possible, you may be able to fit the lower retaining bolt into the upper mounting support, to hold the engine level. Or the gearbox may have to be jacked up and supported.
Once the engine is securely held, lower and remove the jack.
Replacing the sump gasket
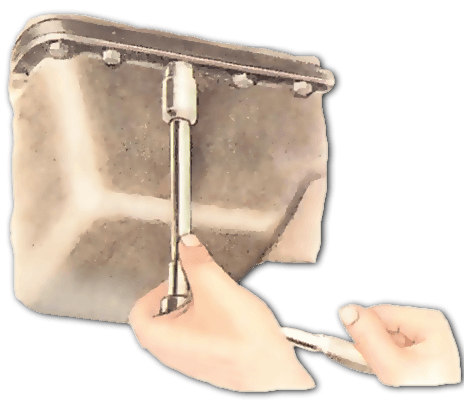
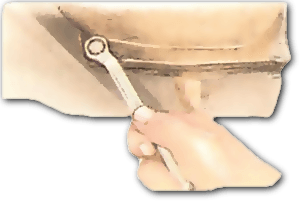
Loosen all the sump nuts or bolts with a socket, long extension bar and ratchet handle.
On some engines you have to remove the clutch-housing cover to reach the rear nuts.
Remove most of the fixings, then support the sump with one hand while you take out the last few.
Carefully lower the sump from the crankcase.
You may need to turn the crankshaft so that it protrudes less. Turn the front pulley bolt with a spanner or socket.
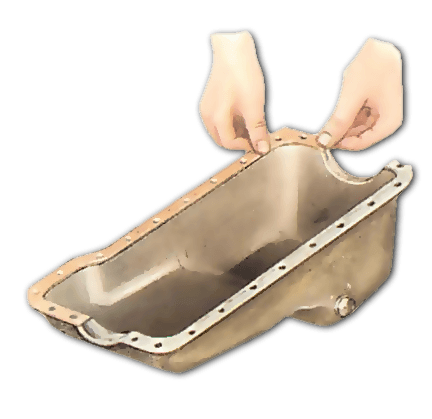
Scrape off all the traces of dirt and old gasket from the engine and sump flanges with a paint scraper.
Clean sediment out of the sump with petrol and a stiff brush . Dry with a lint-free cloth.
Sump gaskets are usually in several pieces, often with separate curved seals that fit under the front and rear main-bearing housings of the crankshaft.
Lay out the pieces of the new gasket on clean newspaper, and note how the joints fit.
Coat the sump flange with gasket-sealant and fit the flat parts of the gasket to it, ensuring that they are exactly positioned and joined.
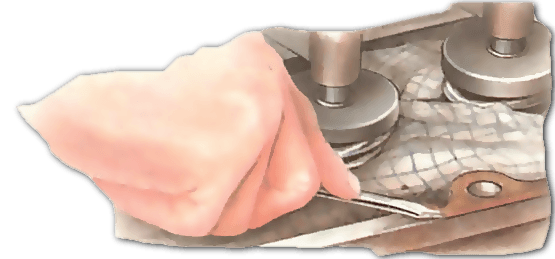
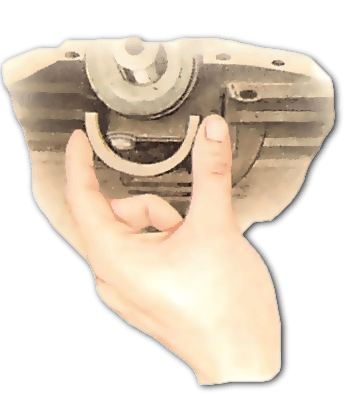
If there are curved seals, fit these to the engine. Smear sealant on the seal groove, stick the seal in place, and apply a blob of sealant to each end of the seal where it joins the gasket.
Refit the sump, taking great care not to disturb the gasket. Hold it up by hand and fit two front bolts and two rear ones to keep it in place while you refit the rest.
Tighten all fixings in sequence to the correct torque (consult a service manual or dealer if you are uncertain of the torque).
Put the jack and wooden spacer under the sump and raise the engine just enough to free the supports.
With a helper holding the engine steady, remove the wedge supports, lower the engine and reconnect the mountings loosely.
Replace the sump drain plug tightly and refill the engine with the right amount and grade of oil.
Start the engine and check for oil leaks round the sump flange. Stop the engine and tighten the mountings.
Replacing a cylinder-head gasket
Remove the cylinder head (See How to remove a cylinder head ), carefully peeling off the old gasket from the head or block. Make sure no dirt or carbon falls into the engine.
The mating surfaces of the head or block must be perfectly clean, flat and smooth.

Stuff clean rags into the cylinder bores and all water and oil passages and bolt holes to catch scrapings and dirt.
Use a flat paint scraper, or the smooth side of an old hacksaw blade, to remove very carefully all traces of carbon and old gasket from both faces.
Take extra care with a light alloy block or head. It is vital to avoid scratching the machined surface.
Lift out the rags without dropping dirt into the engine, bores or passages.
Check the faces of the head and block for flatness. Alloy heads in particular can distort and then leak.
The block is unlikely to distort except after severe overheating, but check anyway using a steel ruler or similar high-quality straight-edge.
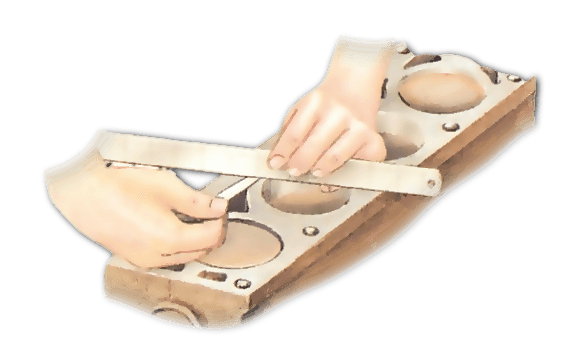
Place the ruler or straight-edge on edge diagonally across the head and block and look for gaps showing light anywhere between the ruler and block.
Repeat with the ruler laid diagonally between the other two comers.
If you find a gap, measure it by sliding a feeler gauge under the ruler.
If the gap is larger than 0.002 in. (0.05 mm) at any point, have the head or block checked and machined flat by a specialist.
Wipe the head and block absolutely clean with a cloth moistened with petrol.
Make sure that the new gasket is clean, and confirm which way round it fits. The upper side is usually marked 'top', 'haut' or 'oben'.
Set the gasket on the block and make sure that all holes are perfectly aligned before refitting the head (See How to remove a cylinder head ).
Replacing a crankcase side-cover gasket

On some engines, you need to remove one or both manifolds (See Exhaust manifold gasket replacement ) to reach the crankcase side cover.
The side cover may be held by one or more central bolts, or by screws round the flange. Undo the bolts or screws and remove them.
Free the cover by levering gently round the edge with a screwdriver; take care not to bend the flange.
Use an old screwdriver or scraper to carefully remove all traces of the old gasket from the cover and engine flanges.
Smear a little gasket sealant round the cover flange and fit the new gasket to it. Make sure it is flat and straight.
Apply gasket sealant to the engine flange and refit the cover. Tighten the fixings but do not overtighten them.
If the manifolds have been removed, refit them with new gaskets (See Exhaust manifold gasket replacement ).
Start the engine and check for oil leaks.
Replacing a crankshaft front oil seal
On most cars you need to remove several parts to get at the seal.
Slacken the alternator or dynamo adjuster and pivot bolts, push the unit inwards and ease off the drive belt. Remove the belt completely.
Remove the radiator (See How to remove a car radiator ) if necessary, to make room for removing the crankshaft pulley.
If the car has a manual gearbox , select first or reverse gear and put the handbrake full on. Otherwise, disconnect the battery and remove the starter motor .
Insert a tyre lever or large screwdriver into the starter aperture so that it jams in the teeth of the ring gear on the flywheel .
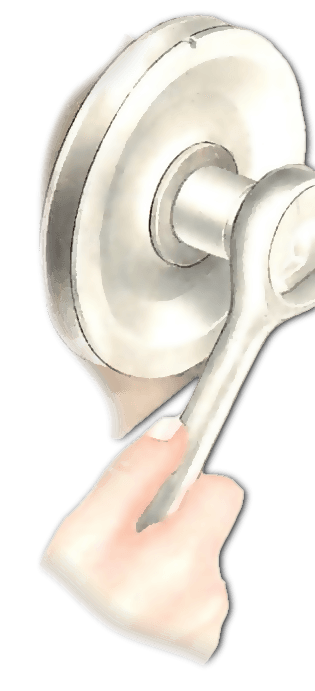
Unscrew the pulley bolt anticlockwise with a socket and bar. Start it turning with a sharp blow on the bar.
On engines that rotate anti clockwise (viewed from the front) the pulley bolt unscrews clockwise.
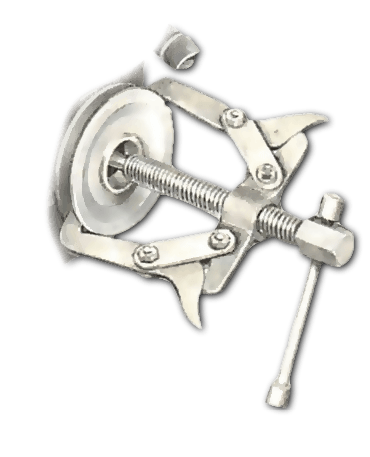
The pulley may slide off easily; if not, use a universal puller, which you may be able to hire.
The pulley is kept from turning on the crankshaft by a key fitting into grooves on the crankshaft and pulley.
Remove the key and keep it safe until ready to refit the pulley.
Thoroughly clean the area around the oil seal and check how it is fitted. If you cannot see the outer end of the seal, remove the timing-belt cover or chain cover (not the belt or chain) and possibly the water pump (See Replacing a water pump ) to reveal it. On an engine with a belt-driven overhead camshaft , remove the belt and its drive sprocket .
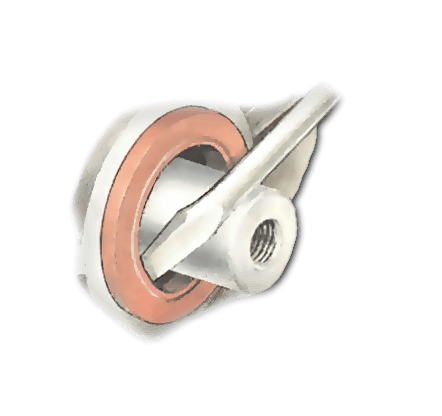
Lever the seal out with a screwdriver, working carefully to avoid scoring the seal housing.
Clean all dirt and oil from the housing, and set the new seal in place with its open (spring) side towards the engine.
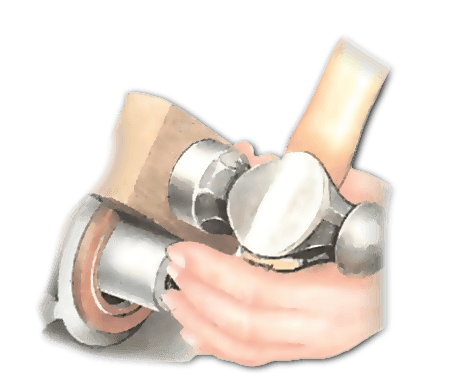
Put a wooden block or a piece of large tube against the seal and gently tap it squarely into the housing until it is fully home. Refit the timing cover, if removed.
Thoroughly clean the sleeve at the back of the pulley, and look for any roughness on it where it touches the seal. If necessary, smooth it with fine wet-and-dry abrasive paper.
Smear clean engine oil on the pulley sleeve and seal, then refit the pulley with the key and keyway aligned. Tighten the bolt to the correct torque (consult a service manual or a dealer if in doubt).
Refit all the components in the reverse order of dismantling.
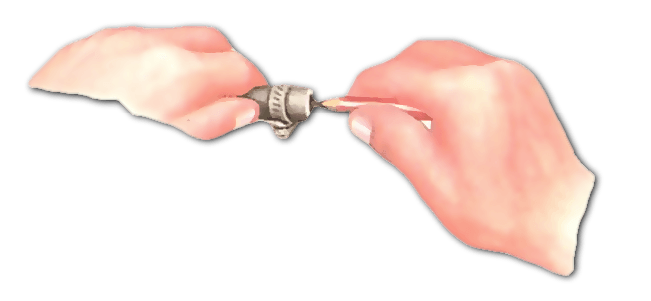
Replacing a distributor oil seal or gasket
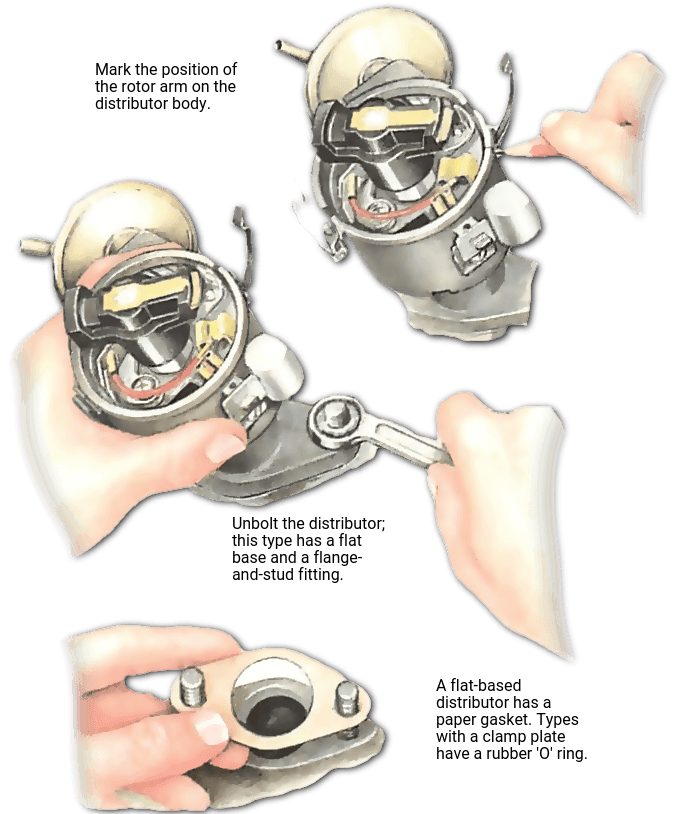
Remove the distributor cap . Before removing the distributor (See Removing and refitting the distributor ), mark the position of the rotor arm so that you can refit it just as it was.
To do this, turn the engine with a socket on the crankshaft pulley bolt until the rotor arm is pointing to the plug contact of the timing cylinder (usually No. 1, check in the car service manual), and the timing marks on or behind the pulley show exactly top dead centre ( TDC ).
Mark the position of the rotor arm by lightly scratching a line on the distributor body. Disconnect the LT lead from the distributor body.
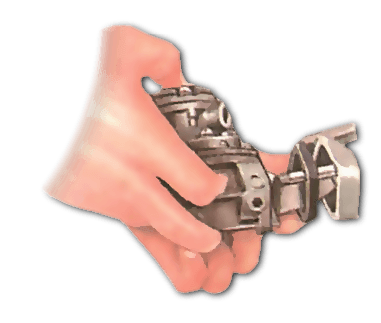
Loosen the securing-clamp bolt at the base of the distributor, then carefully withdraw the distributor.
If the drive gear has slanting teeth, they may cause the rotor arm to turn. If it does, mark its new position to aid refitting
Some distributors can be removed without separating the gears, and so the arm does not turn.
There may be a rubber '0' ring oil seal round the base of the distributor, or a paper gasket under the plate of the securing clamp. Remove either seal, clean away all dirt and oil, and fit the new one.
Refit the distributor, ensuring that the rotor arm is exactly in line with the first mark. If not, withdraw the distributor and try again.

The Ultimate Car Mechanics video course
Learn everything about modern cars from our new video series.
Learn more >-
We build a Mazda MX5 Miata from scratch
We start by tearing down and then rebuilding the whole car.
-
Every part explained
There's ridiculous detail on every part. Clearly and easily explained.
-
All modeled in 3D
We've created the most detailed 3D model ever produced so we can show you everything working.
Super detailed explanations in the video course
15 hours of pro-quality, HD content with subtitles
The
video
course
Bonus: Dismantling the engine

Engine Block

Crankshaft

Tools: Using a tap set

Using an engine stand

The Pistons
